Halloween preparations and a DIY Ninjago Costume
Over the years we’ve vacillated with celebrating Halloween or not, some years we skipped all Halloween and ‘Fall Festival’ activities, while others we were selective about which events we attended. With extremely sensitive kids it was just too difficult to enjoy the fun of Halloween while still protecting them from scary things. Halloween was more stress than fun.
Last year, we tried trick or treating for the first time by visiting 5 houses in our neighborhood. The kids were ecstatic about their 12 pieces of candy each and want to try again this year. I hope we can skirt the scary houses and older kids without any drama.
In their excitement, they’ve been discussing costumes since September. This will be the first year we’ve done much more than Gramma’s Halloween party, having attendance to 4 Halloween events planned. I want the kids to be happy with their costumes, but I also won’t spend money on cheaply made costumes that will fall apart before we’ve finished all our Halloween fun.
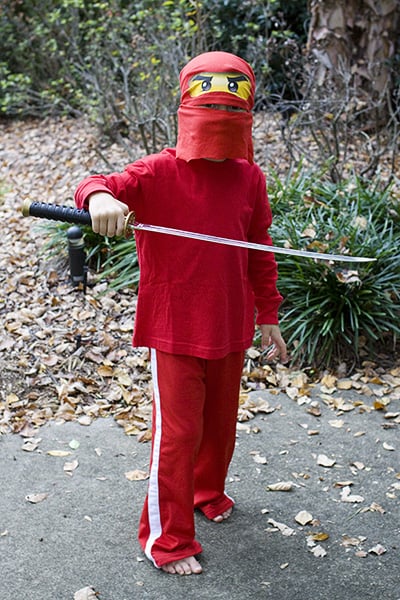
Michael is Kai, the lego Ninjago character for Halloween this year. I hoped to buy him a red karate uniform, but found the inexpensive version sold out everywhere in his size. We settled on a red t-shirt and track pants. After finding a Ninjago eyes iron on at Etsy, I bought a cheap adult sized red t-shirt from the craft store. I cut one side into a big triangle for his headpiece, ironing the face to the front. Then, I cut the other side into a smaller triangle to cover the lower half of his face. I planned to tuck that triangle into his collar to completely cover his skin, but he couldn’t stand the feel of it and had me cut off the bottom. The costume would be more complete with a black belt and sash (which I planned to make with black webbing) however, Michael is happy with the costume as is and I will refrain from digging through all the still packed sewing boxes in the garage.


