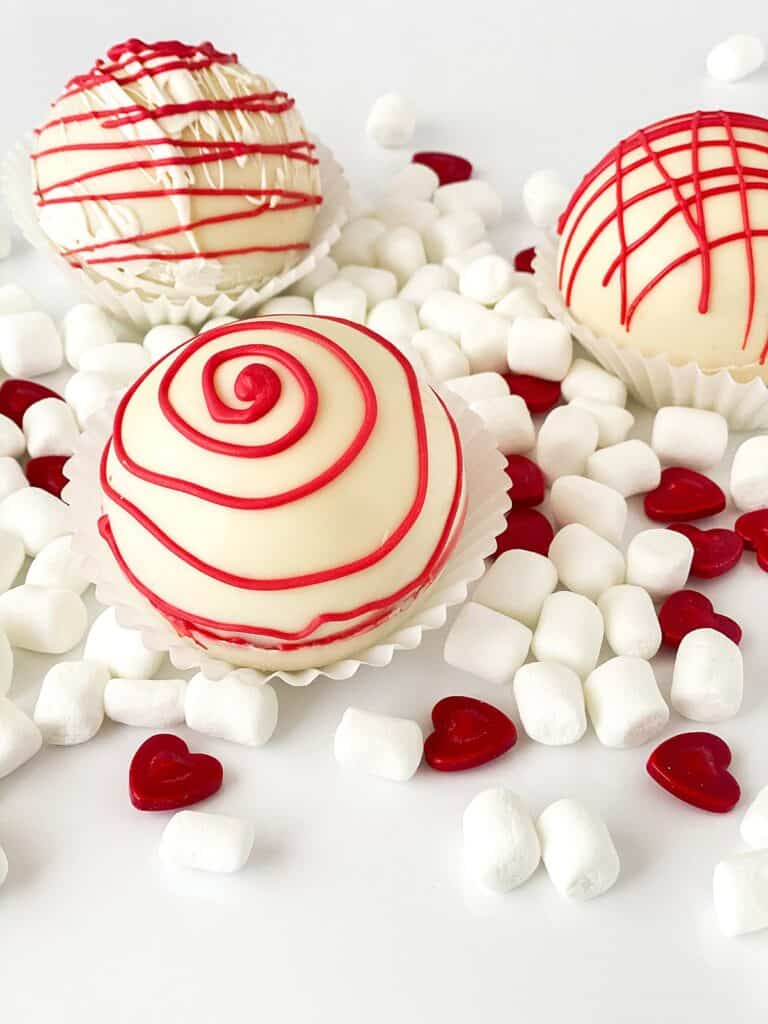
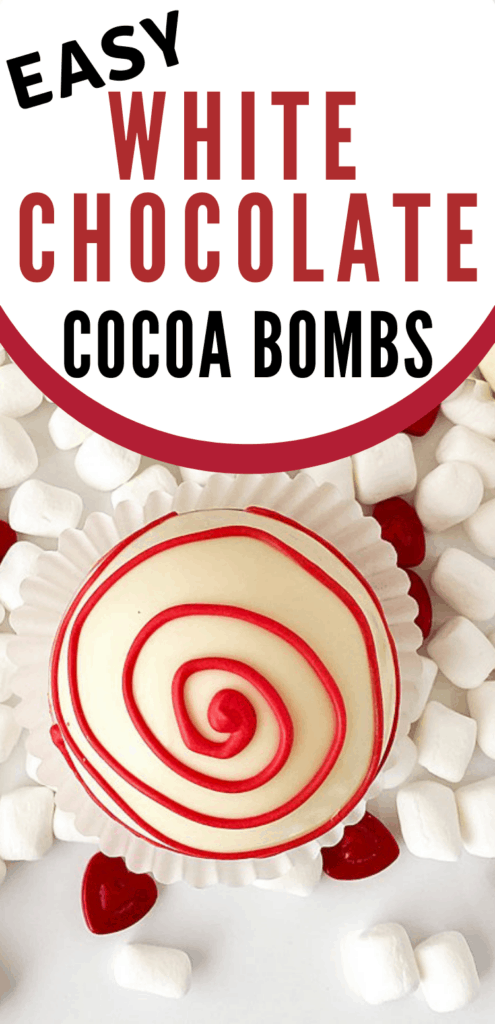
White Chocolate Cocoa Bombs
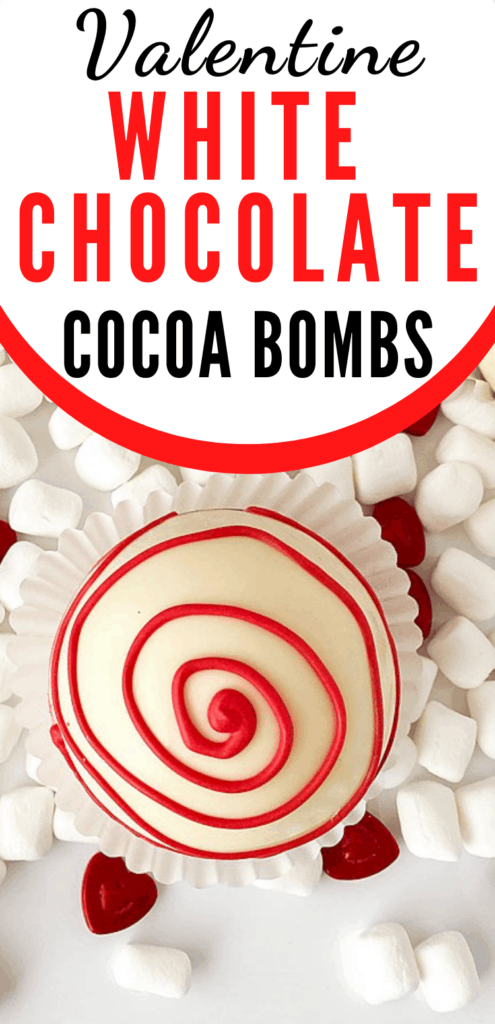
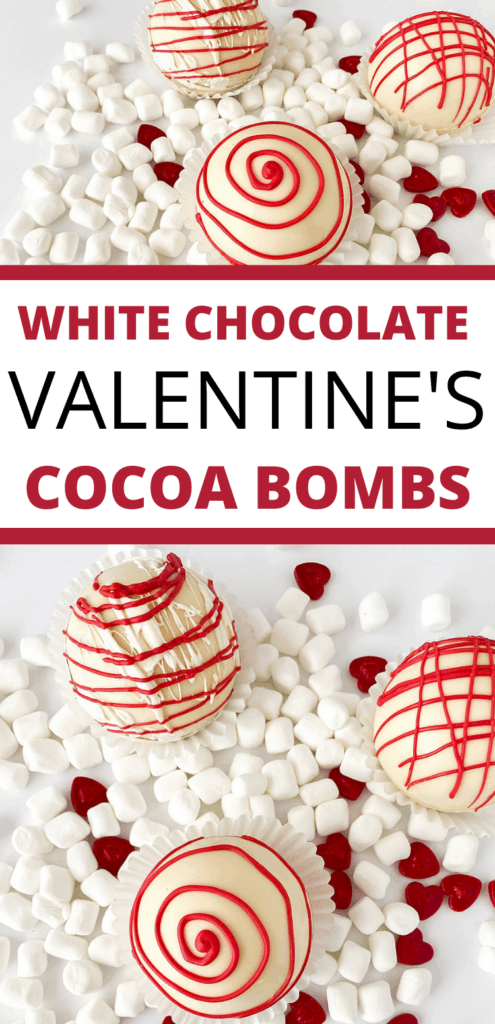
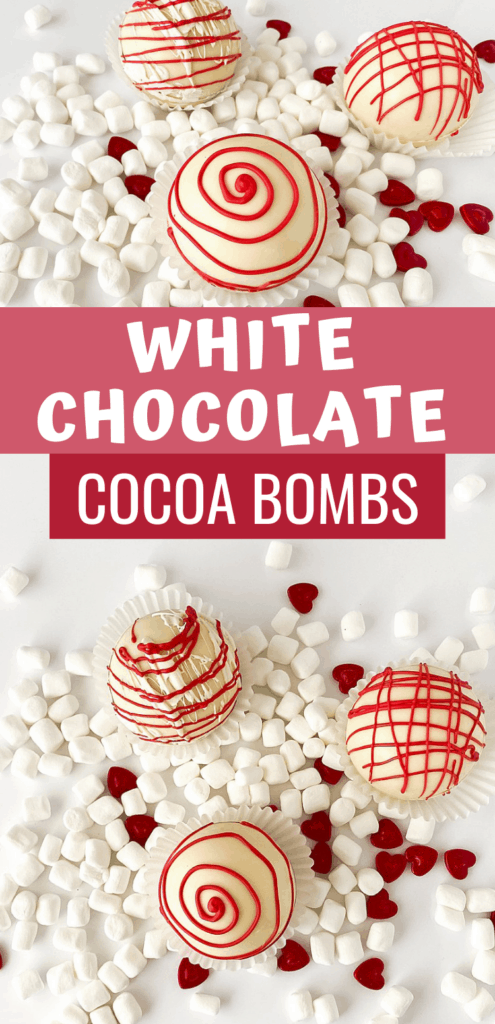
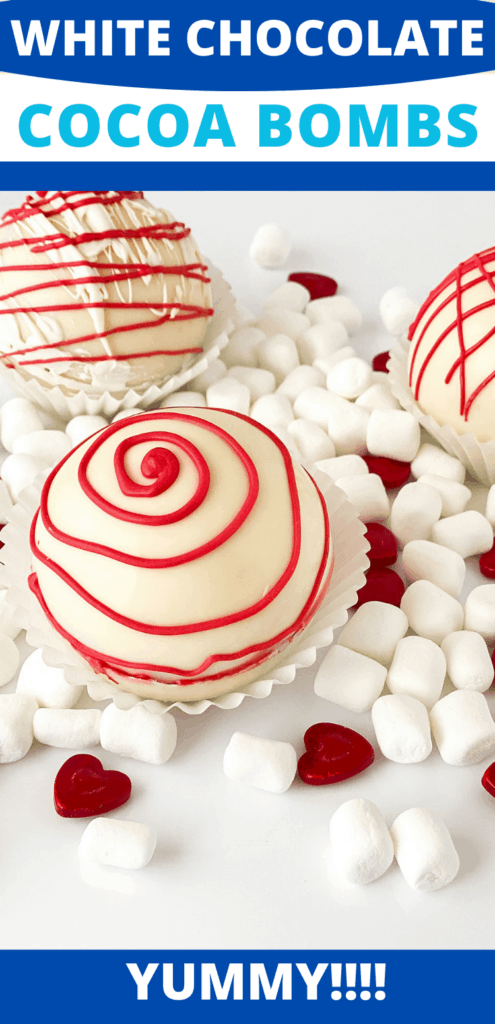
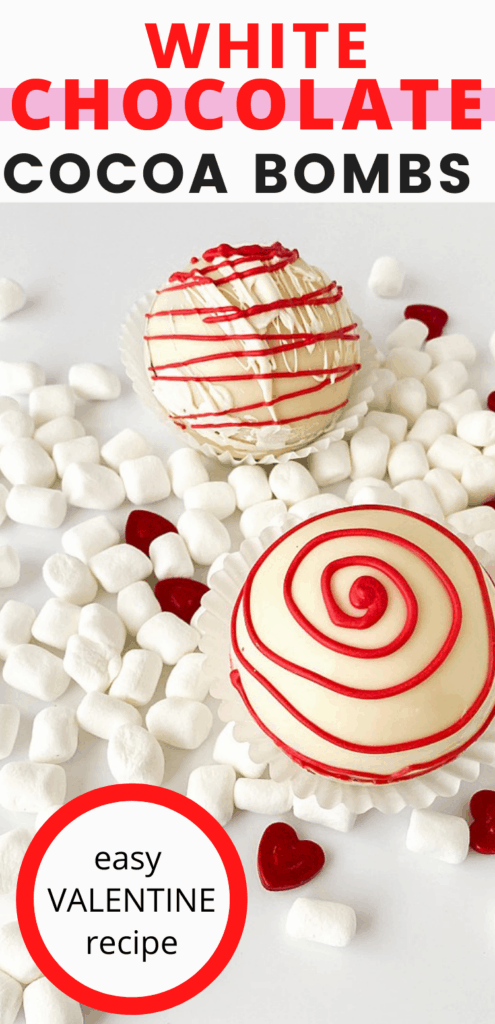
It might be freezing outside, but you could be snuggling up with an incredible cup of white hot chocolate after making a set of these adorable and delicious White Chocolate Hot Cocoa Bombs.
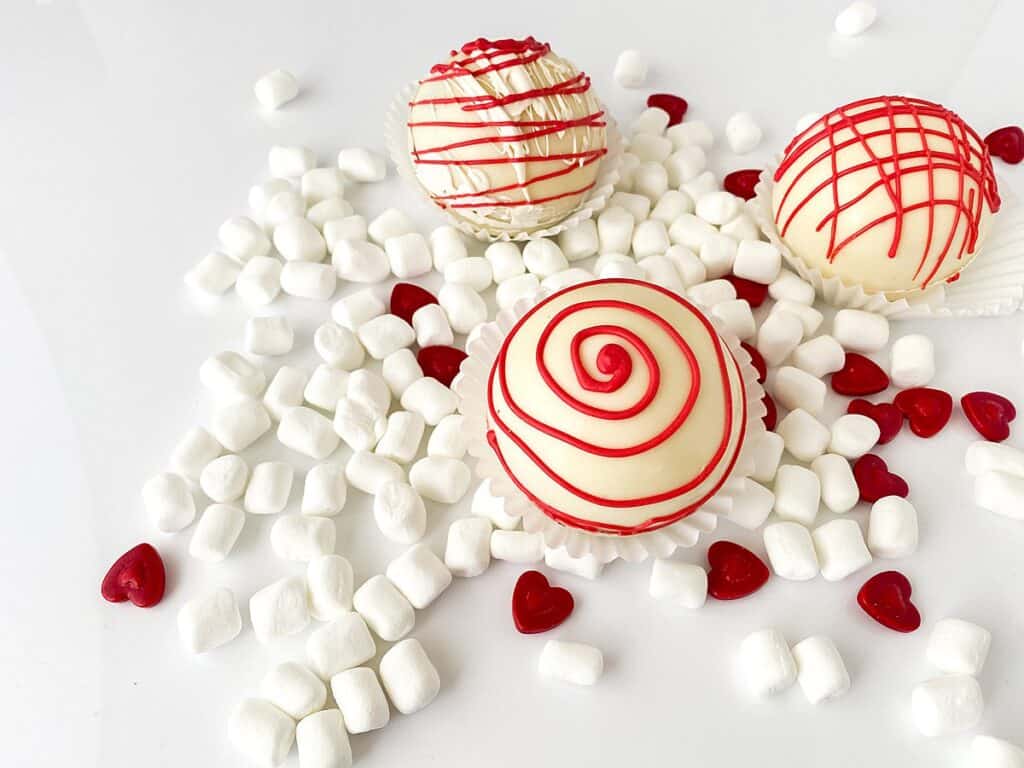
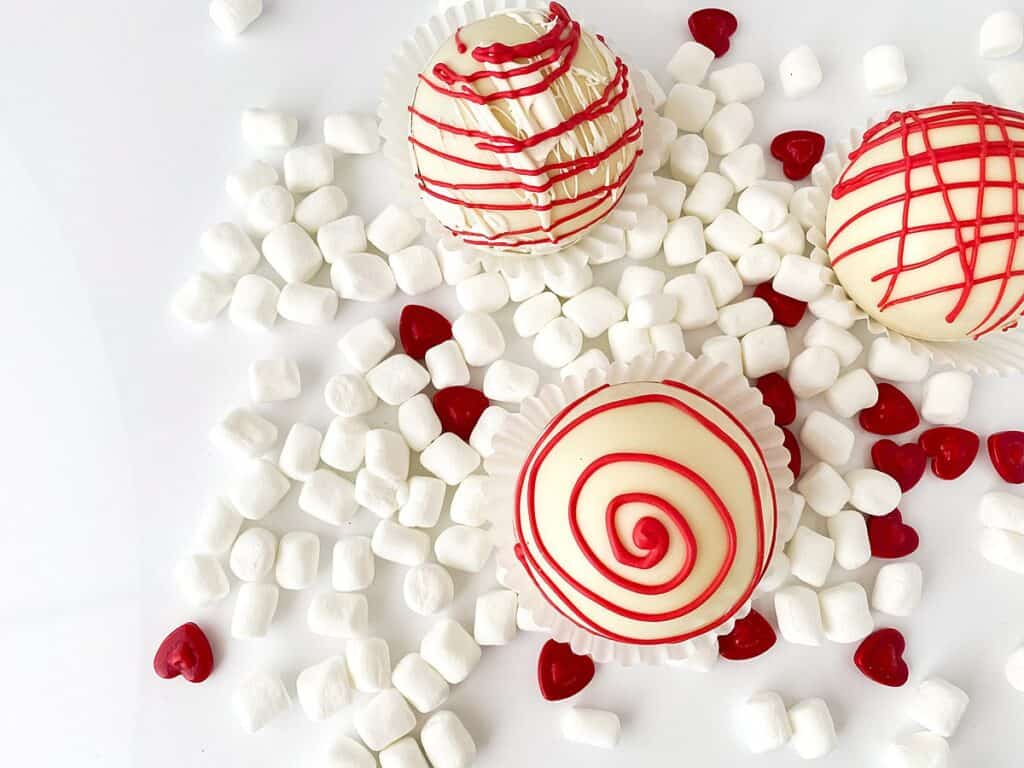
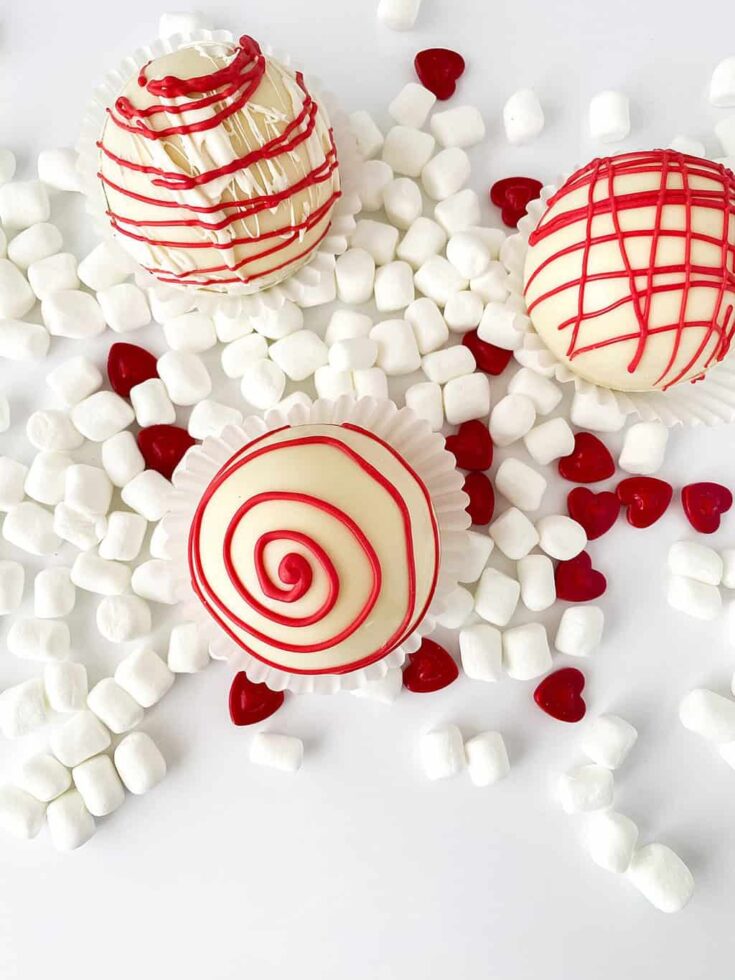
These White Chocolate Cocoa Bombs are perfect for your Valentine’s Day celebration with the addition of red candy melt accents. Or make them any time of the year, leaving the red topping off (or changing the color to suit your preference)
What is a Hot Cocoa Bomb?
This cute little ball is actually a cup of hot chocolate waiting to be made! They are simply hollow balls of chocolate, hot chocolate mix, marshmallows and other fun edible surprises. Once plopped into a cup of hot milk (or water) they melt into a steaming cup of hot cocoa.
We are a participant in the Amazon Services LLC Associates Program, an affiliate advertising program designed to provide a means for us to earn fees by linking to Amazon.com and affiliated sites.
The best part? You can make these fun hot chocolate bombs yourself, and they really aren’t difficult to make either!
How to make White Chocolate Hot Cocoa Bombs for Valentine’s Day:
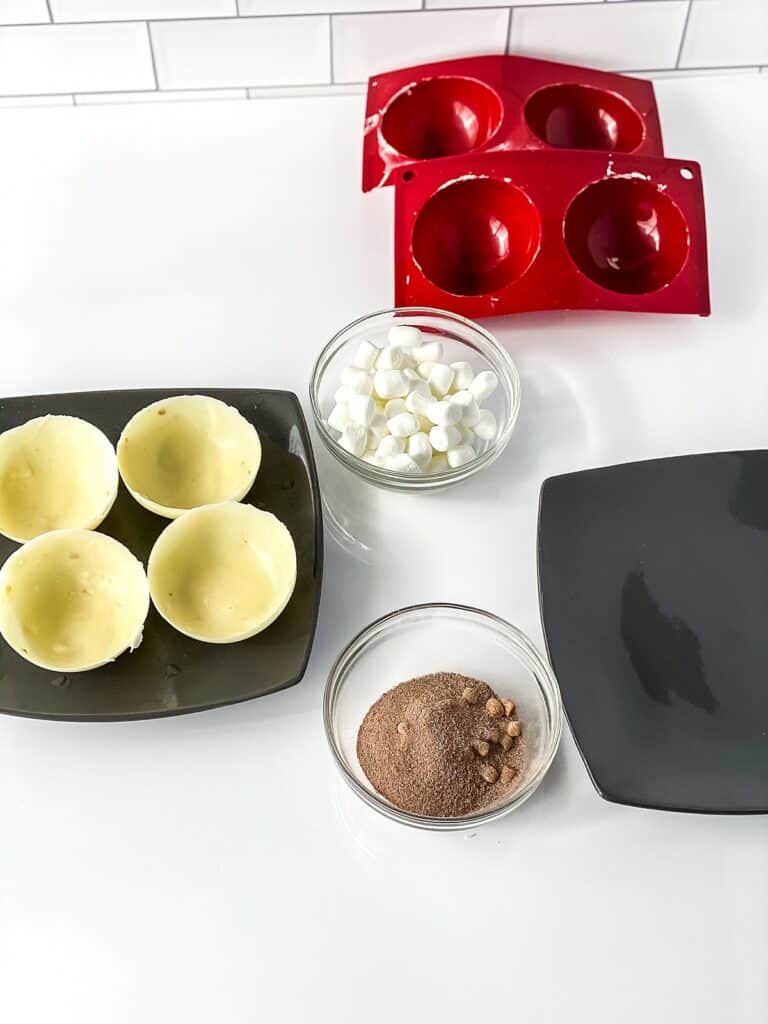
First gather your supplies and ingredients.
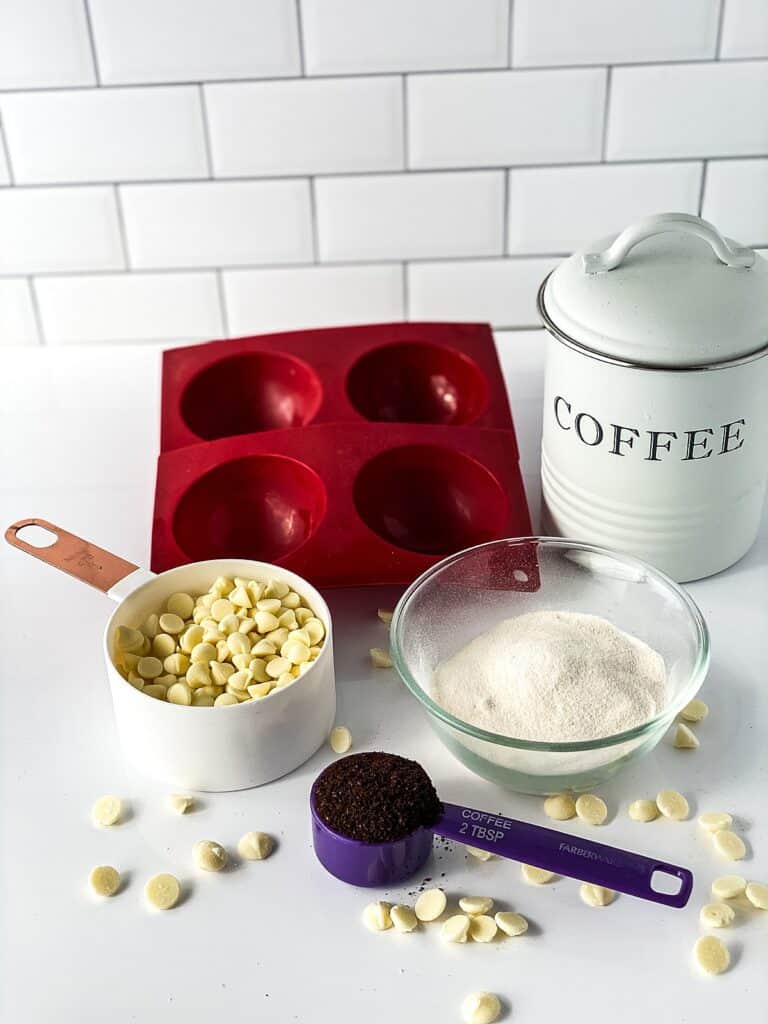
You’ll need a microwave safe bowl, a spoon, a hot plate (or a frying pan), a sphere silicone mold, zip lock bags (or piping bags), and a pair of scissors.
Next, gather your ingredients. You’ll need chocolate chips, hot cocoa mix, and marshmallows. You can choose to use colored candy melts for accent decoration (we used red for these Valentine themed hot cocoa bombs). You can also add add crushed candies or sprinkles inside your hot cocoa bomb.
To get ready to create your white chocolate hot cocoa bombs, you’ll first place a plate in the freezer.
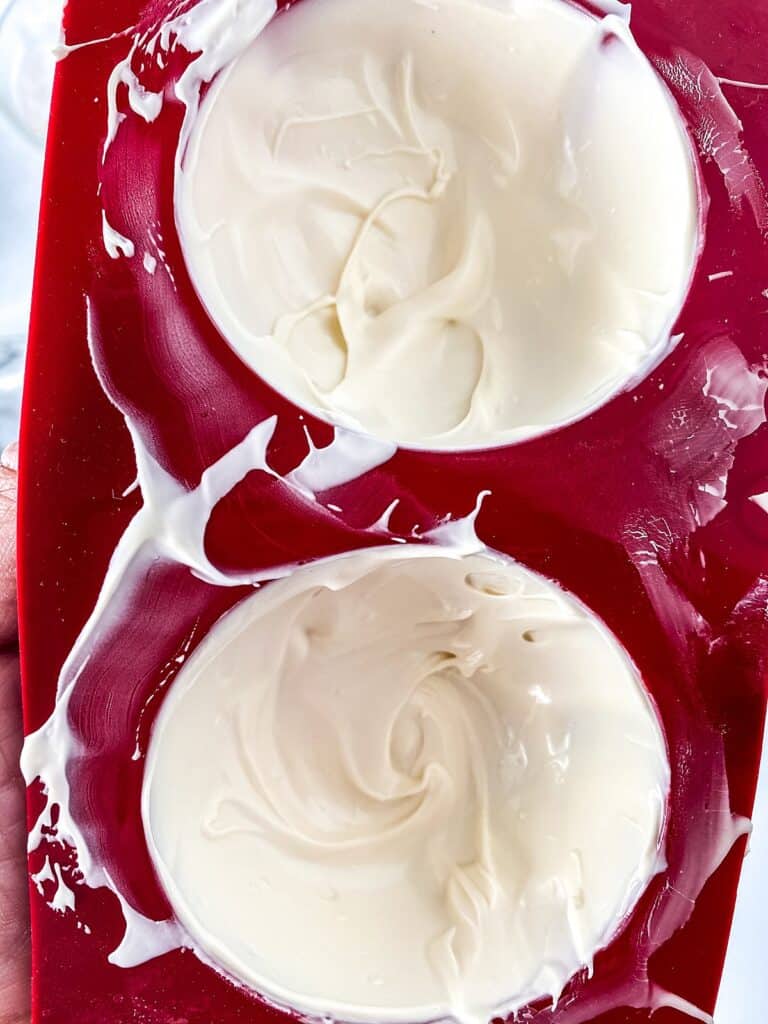
Next melt your chocolate chips. Once melted you’ll coat the sphere mold completely with the melted chocolate using the back of a spoon.
*pro tip: If you do not bring the chocolate all the way up the cavity your two halves will not
connect. Make sure to take extra care to bring the melted chocolate all the way up all the sides. You should not be able to see the color of the inside of the molds, if you can your bomb wont be as sturdy.
Freeze the chocolate covered sphere molds for 10 to 15 minutes until they are completely hardened.
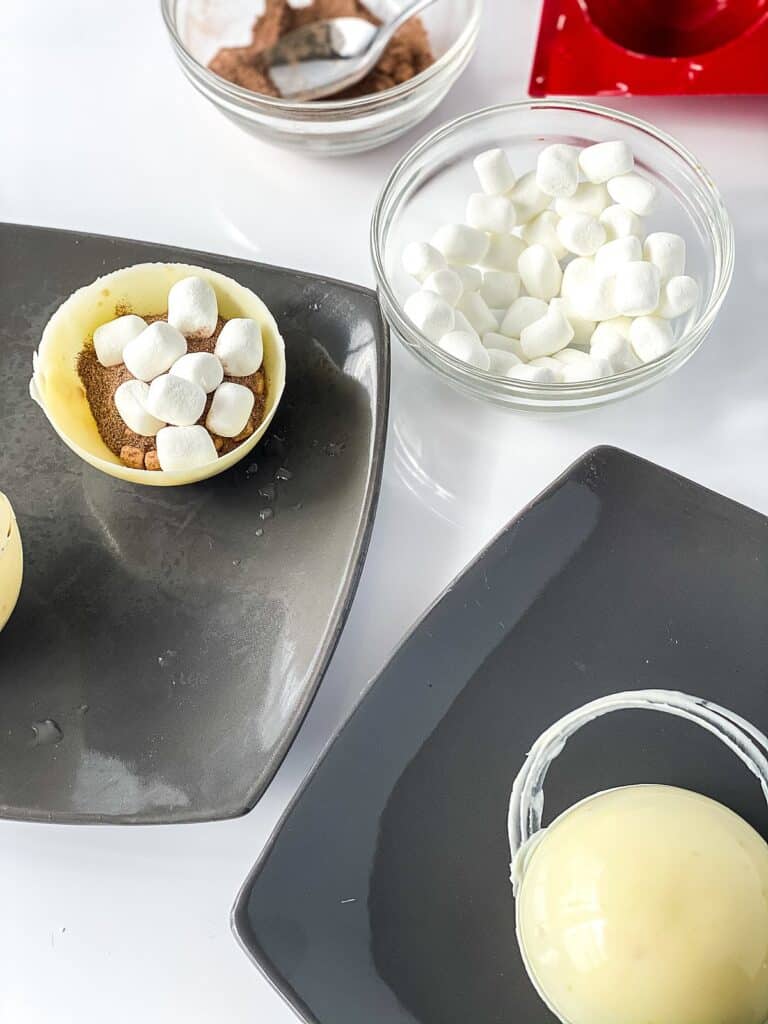
While waiting for the chocolate to harden set out the ingredients for the inside of the hot cocoa bombs. You’ll need the cocoa mix and mini marshmallows, plus any other fun surprise contents you’d like to include in the middle of the hot cocoa bombs.
**Remember whatever you put inside the cocoa bomb will end up in your hot chocolate. All candy and sprinkles do not melt. While it is nice for presentation, be selective on what you put inside of your hot cocoa bombs. Some sprinkles may be a choking hazard to small children.
Now, remove the plate and the sphere mold from the freezer. Carefully remove each half of the chocolate bomb from the mold.
Set the halves of the bomb on the frozen plate to keep them from melting while you work.
To one half of the white chocolate bomb add 2 spoonful’s of cocoa mix, and a small handful of mini marshmallows. You can also add some fun candy and sprinkles during this step.
Connect the two sides of the white chocolate sphere. There are two ways to choose from when connecting the two halves of the chocolate bomb together.
Ways to connect your cocoa bomb:
- Hot Plate Method: Place a plate in the microwave for 2 minutes and remove. The platewill hold the heat without the risk of burning yourself.
- Pipe melted chocolate: Use leftover melted chocolate. Add to a piping bag or smallziploc bag. Cut a small hole at the end of the piping bag (or one corner of the ziploc bag). Squeeze chocolate around the rim of the bottom sphere and simply place the other sphere on top. Using your finger, smooth the chocolate out. (leave as is or add sprinkles or crushed candies)
If you use the piped chocolate method just remember if the chocolate is too hot it will burn a hole into your bomb, so watch your temperature.
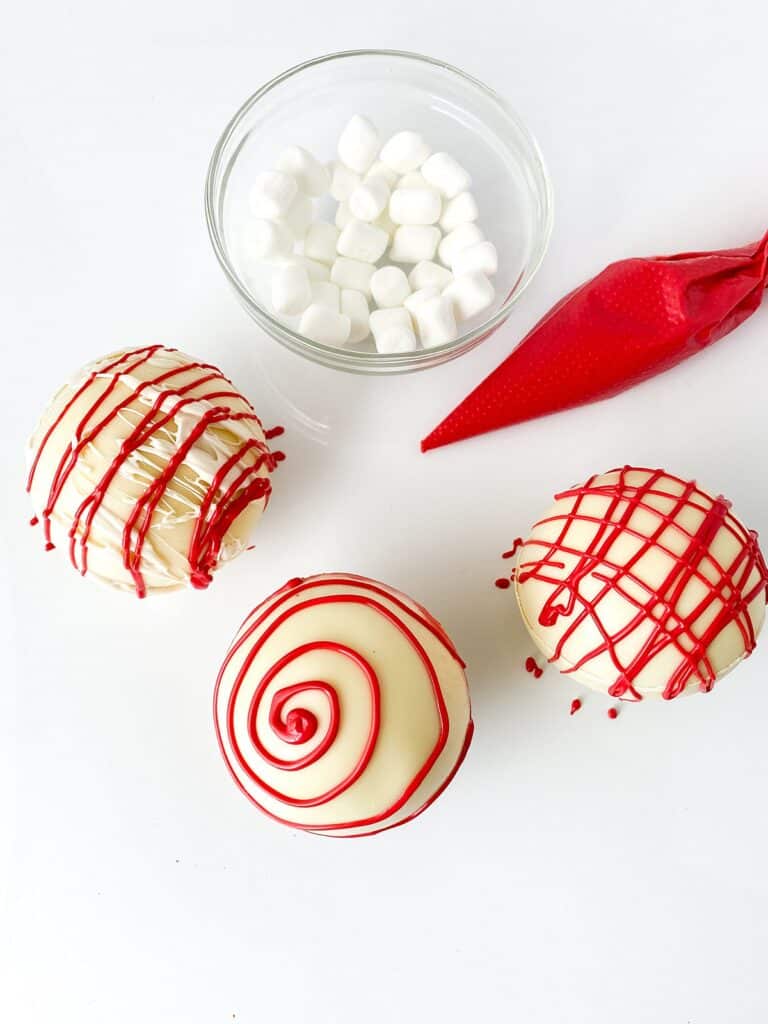
Now your white chocolate hot cocoa bombs are finished! You can choose to pipe melted candy melts on the outside of the bombs for decoration now.
When you are ready for a delicious cup of white chocolate cocoa simply place the bomb on it’s side in a mug and pour almost boiling water (or milk) directly over the seam of the hot cocoa bomb.
White Chocolate Hot Cocoa Bomb
Delicious white cocoa hot chocolate bombs are perfect for cold winter days!
Ingredients
- 1 cup good quality chocolate chips (nestle is fine, ghirardelli is better) Cocoa Mix of your choice
- Sprinkles or Crushed Candies (optional)
- Marshmallows (large cut in half or mini)
Instructions
- First, Place a plate in the freezer
- Melt chocolate in a microwaveable bowl on high for 60 seconds.
- Stick a spoon in the chocolate to see if it's beginning to melt. If it is you will need to decrease the power percentage on your microwave down to 60 percent and continue.
- Continue to warm up chocolate in 30 second intervals stirring between each time.
This may take 2-4 times. - When you stir the chocolate and see it's mostly melted, heat for 15 seconds and stir until all lumps are gone and the chocolate is smooth.
- Use a spoon to drop a dollop into the first cavity of the silicon mold.
- Use the back of the spoon to coat the mold completely.
Wipe away any excess chocolate. - Freeze for 10-15 mins.
- Prepare your set up for the contents inside of the cocoa bombs.
- Remove plate and mold from the freezer.
- Carefully remove each half from the mold and set them on the now cold plate (this keeps them from melting)
- Spoon in 2 spoonful’s of cocoa mix (not an entire packet).
- Add mini marshmallows
- Connect the two ends of the heart together by either melting chocolate to serve as a glue (piping bag method) or place the top half onto a heated plate to lightly melt the edges and stick them together.
Notes
*Freezing a plate will help make sure your cocoa bombs don't melt once you unmold them. Do not overheat the chocolate as it can and will burn.
*When coating the sides pay careful attention to the rim as the chocolate will need to be able to be “glued” together. If you don't fully coat the mold, the two pieces won’t fit. If you do not bring the chocolate all the way up the cavity your two halves will not
connect. Make sure to take extra care to bring the melted chocolate all the way up all the sides. You should not be able to see the color of the inside of the molds, if you can your bomb wont be as sturdy.
*Ways to connect your cocoa bomb:
1. Hot Plate Method: Place a plate in the microwave for 2 minutes and remove. The plate
will hold the heat without the risk of burning yourself.
2. Pipe melted chocolate: Use leftover melted chocolate. Add to a piping bag or small
ziploc bag. Cut a small hole at the end of the piping bag (or one corner of the ziploc bag). Squeeze chocolate around the rim of the bottom sphere and simply place the other sphere on top. Using your finger, smooth the chocolate out. (leave as is or add sprinkles or crushed candies)
If you use the piped chocolate method just remember if the chocolate is too hot it will burn a hole into your bomb, so watch your temperature.
*If cocoa bombs are being made in advance they can be frozen and stored.
**Secrets of success:
Place the bomb on it’s side in the mug and pour piping hot (almost boiling) milk or water directly onto the seam.
Body heats melts chocolate quickly, use gloves or touch the bombs as little as possible once they are formed in the molds.
****Important Note:
Remember whatever you put inside the cocoa bomb will end up in your hot chocolate. All candy and sprinkles do not melt. While it is nice for presentation, be selective on what you put inside of your hot cocoa bombs. Some sprinkles may be a choking hazard to small children.