Clay Pot Shark Craft
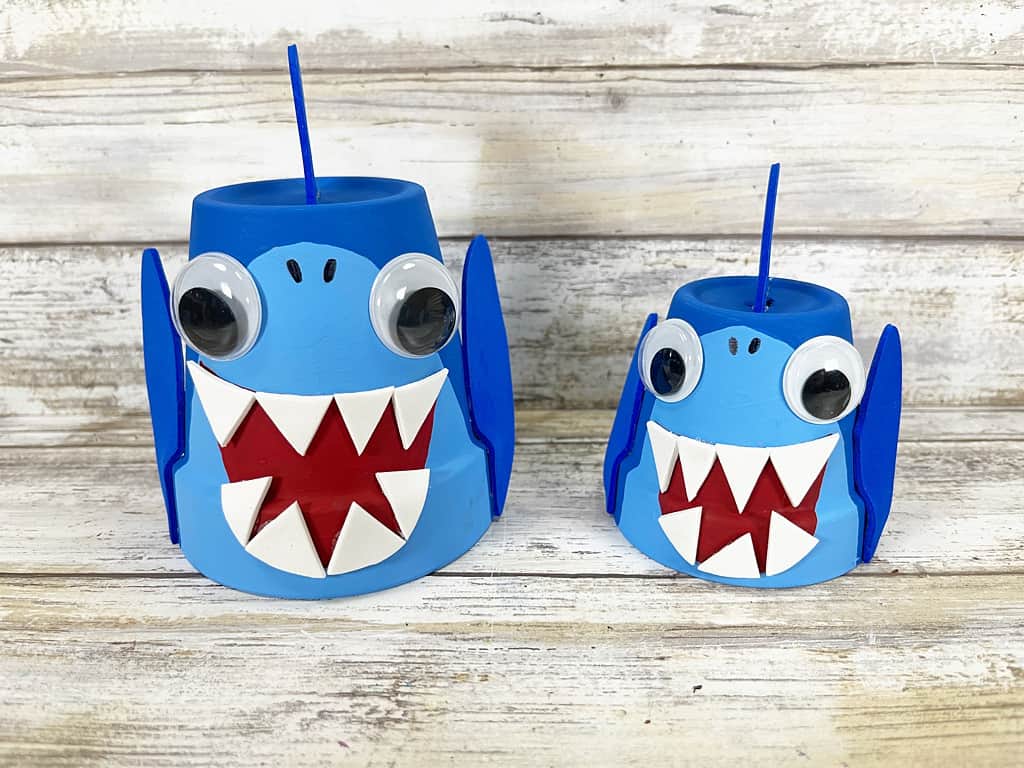
Looking for a super fun shark week craft? These little sharks made from clay pots are fun for kids and adults alike to create.
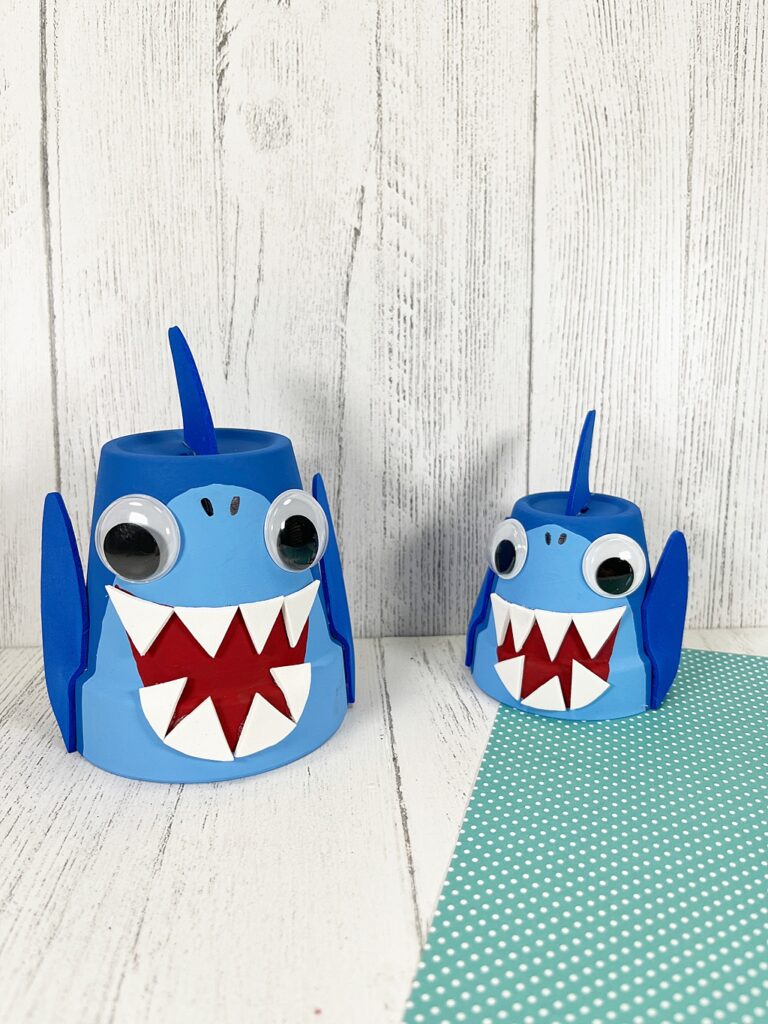
Choose different sized pots and create a whole shark family!
Get pots from the Dollar Store, your favorite big box store, or even Amazon to make the cutest family of sharks!
Make a shark family to keep and one to give as a gift to your shark week obsessed friends.

How to make a clay pot shark craft
Materials:

- Clay Pots – we used 3.5” and 2.5” pots
- White & Blue Craft Foam
- Wiggle Eyes
- Glue Gun and Glue Sticks (or your favorite craft glue)
- Light Blue, Medium Blue, and Red Craft Paint – we used acrylic paint
- Paintbrush
- Scissors
- Pencil
- Black Permanent Marker
- Clay Pot Shark Template
Instructions:
Remove any paper tags from the clay pots.
Download, print and cut out the Clay Pot Shark Patterns.
Trace the inside of the shark head on the small and large clay pots with a pencil. Basecoat with light blue craft paint.
Let dry and apply a second coat, if necessary.

Top coat the remaining surface of the clay pots with medium blue craft paint. Let dry and apply a second coat, if necessary.

Trace the shark mouths onto the large and small clay pots with a pencil.

Paint the shark mouths with red craft paint.
Let dry, and apply a second coat, if necessary.

Trace the large and small set of shark’s teeth on white craft foam, and cut out with scissors.
Attach the teeth into each mouth with your choice of craft glue.
You can use liquid craft glue for this project, but you will have to wait for it to dry longer.

Attach two wiggle eyes to each shark with a glue.
Draw on nostrils with a black marker.

Trace the large and small set of shark fins onto blue craft foam, and cut out with scissors.

Glue one fin to the right and one fin to the left-hand side of each shark.
Attach the dorsal fins to the top of each shark with a glue.

Create these jawsome Sharks in just about 30 minutes!
