DIY Fairy Garden in a Teacup

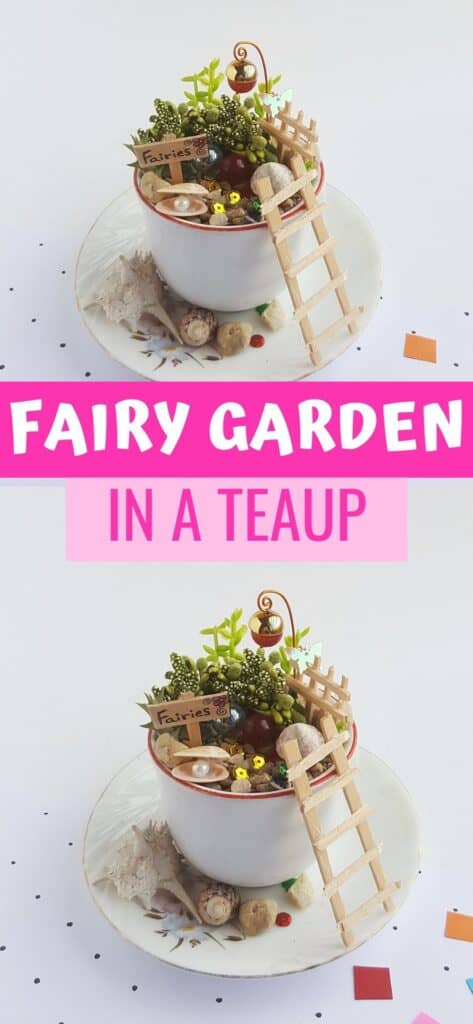


My children have always wanted to make a fairy garden in our yard, but gardening isn’t my strength, so I’ve never made it happen. This Fairy Garden in a Teacup is the perfect solution to those fairy garden dreams.

Not only is it the most adorable thing, but it’s fun for your kids (or you!) to create. It is the perfect spring and summer decoration for your home.
We are a participant in the Amazon Services LLC Associates Program, an affiliate advertising program designed to provide a means for us to earn fees by linking to Amazon.com and affiliated sites.
Gather your supplies and create this cute DIY miniature garden project with your kids today!
DIY Fairy Garden in a Teacup
What you need:
Tools:
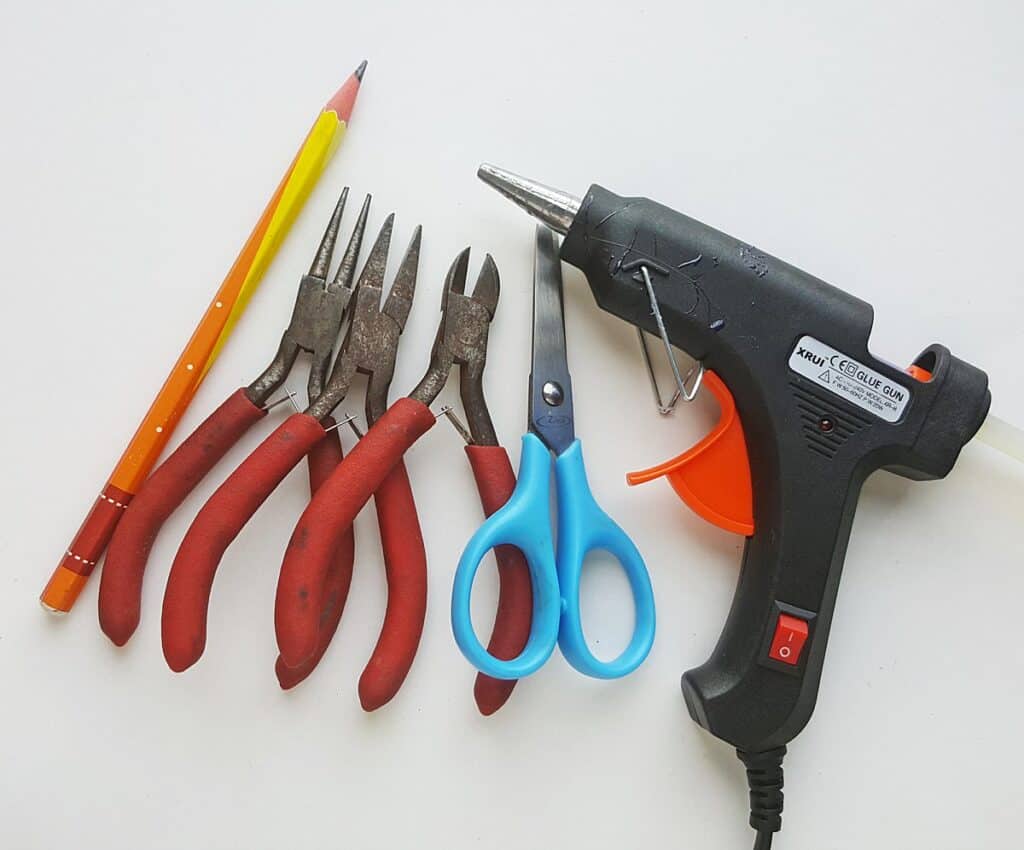
- Pencil
- Scissors
- Craft pliers
- Hot glue gun
Supplies:
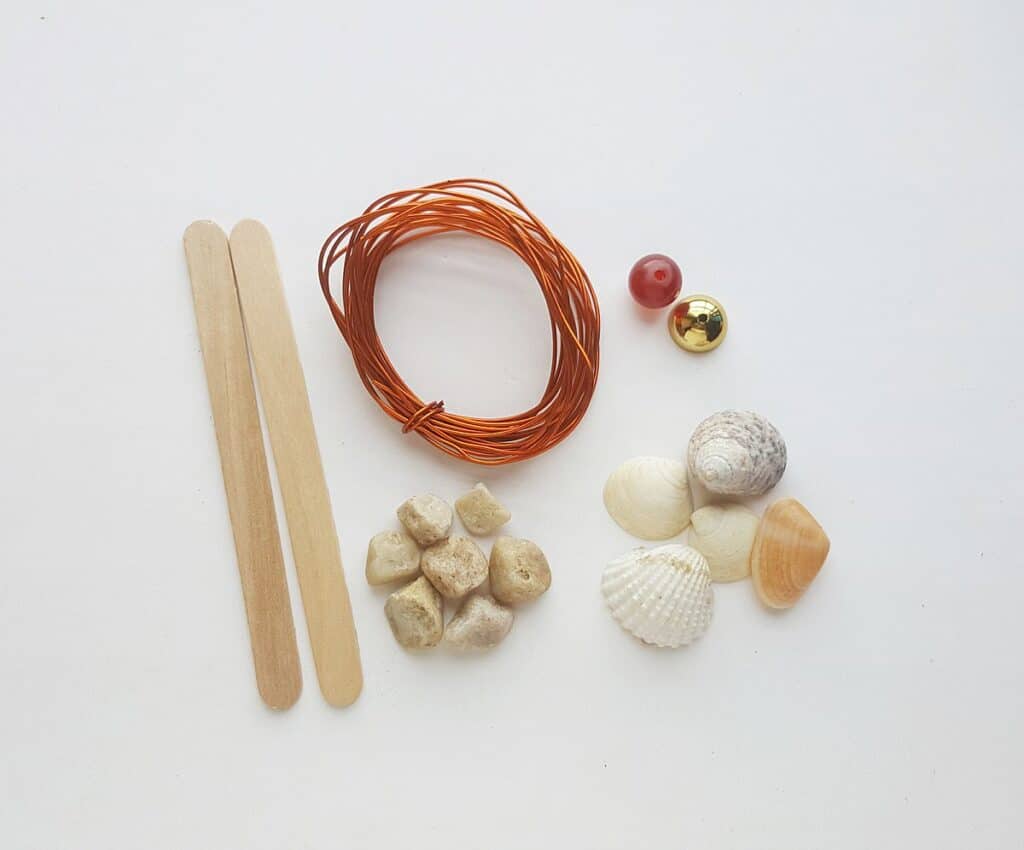
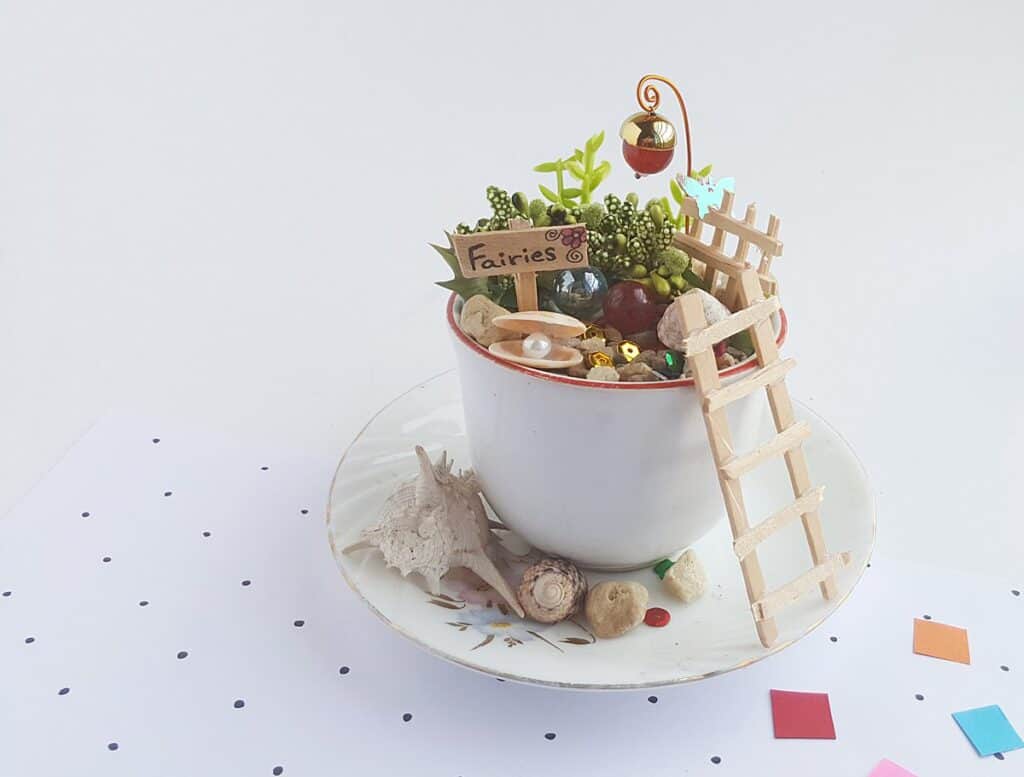
- Teacup
- Popsicle sticks
- Small stones or rocks
- Craft wire
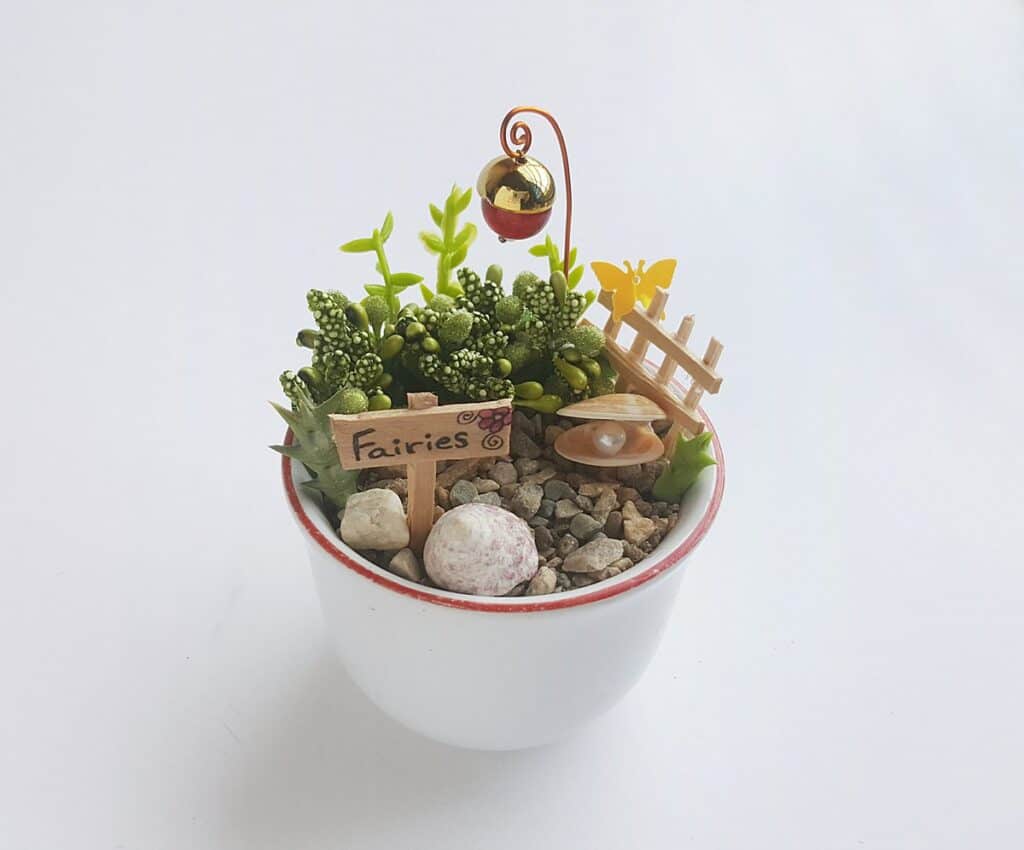
- Round crystal or glass bead
- Head pin
- Bead cap
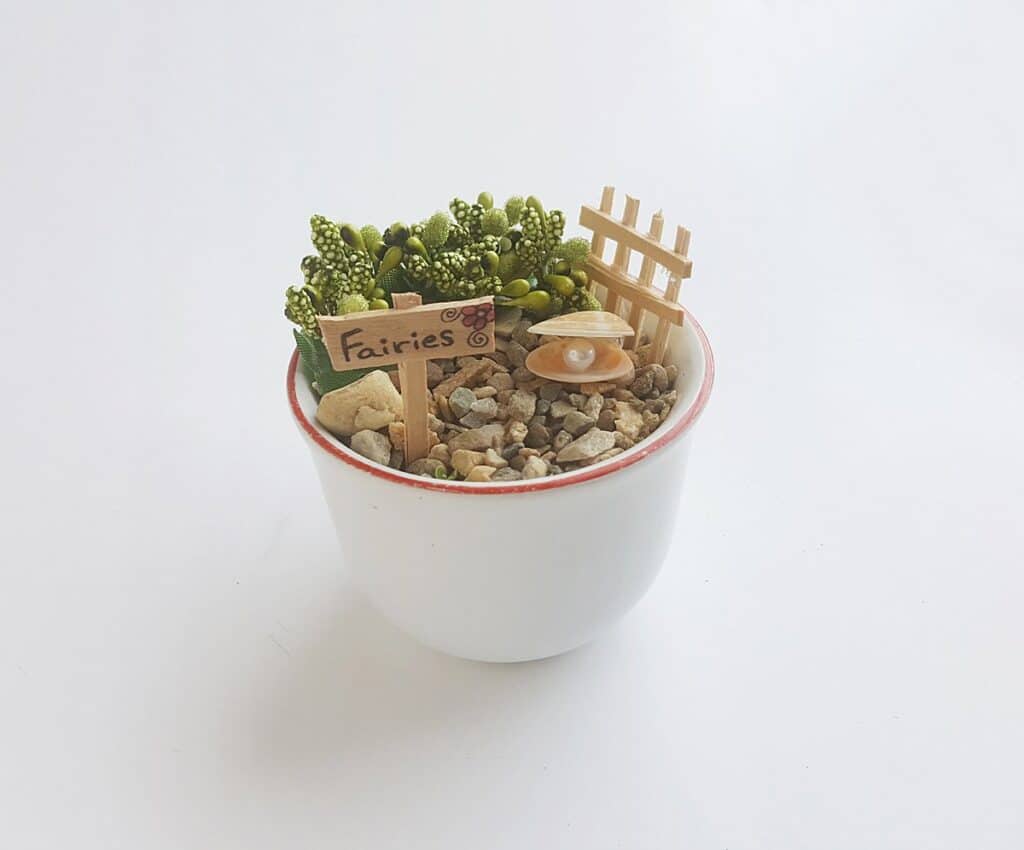
- Snail shells and sea shells
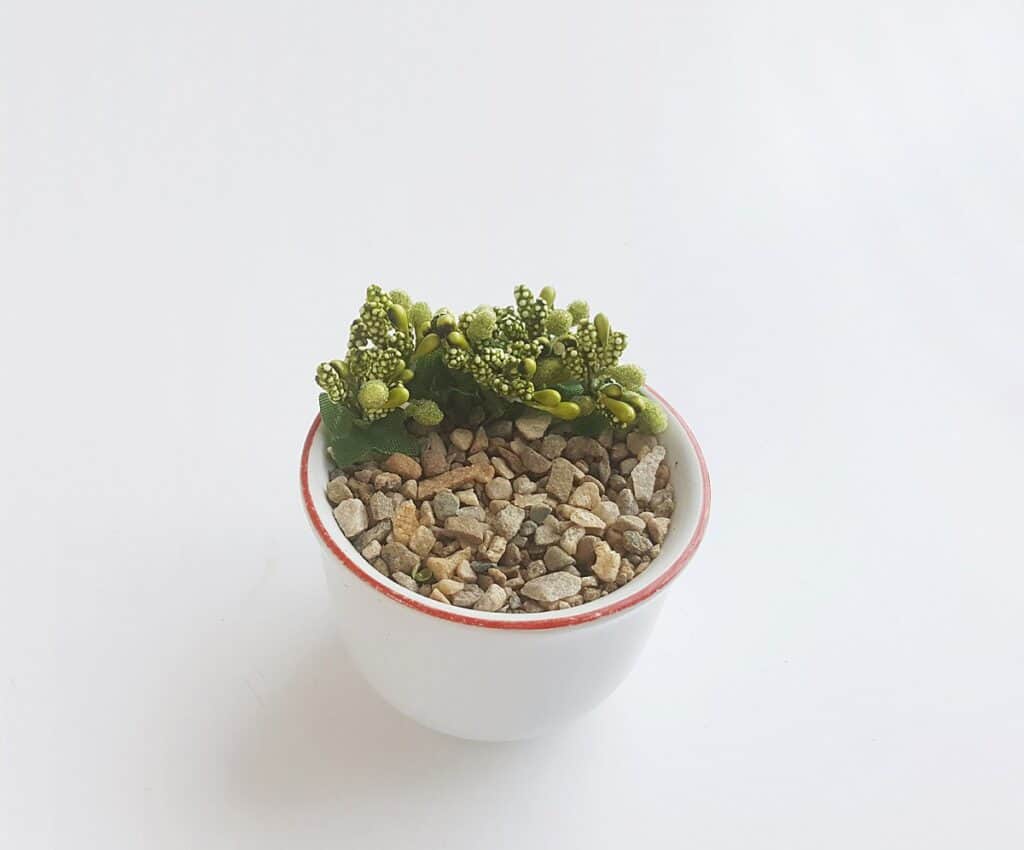
- A small plant (real or fake)
Instructions:
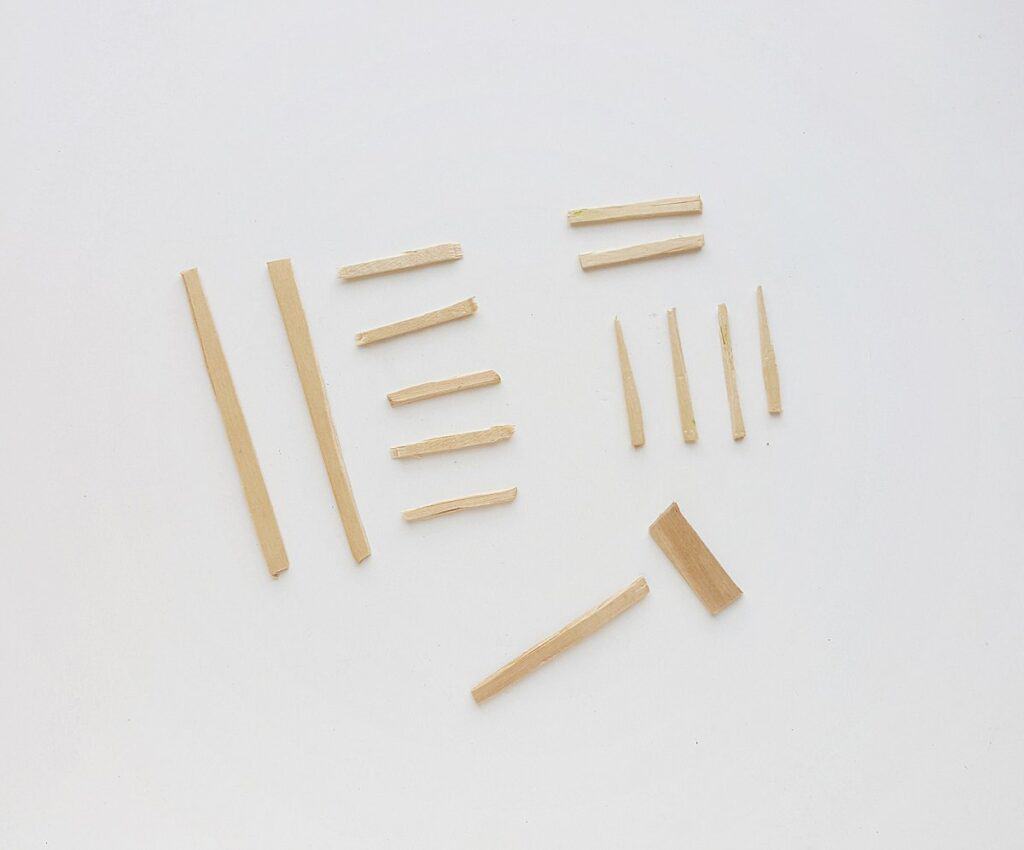
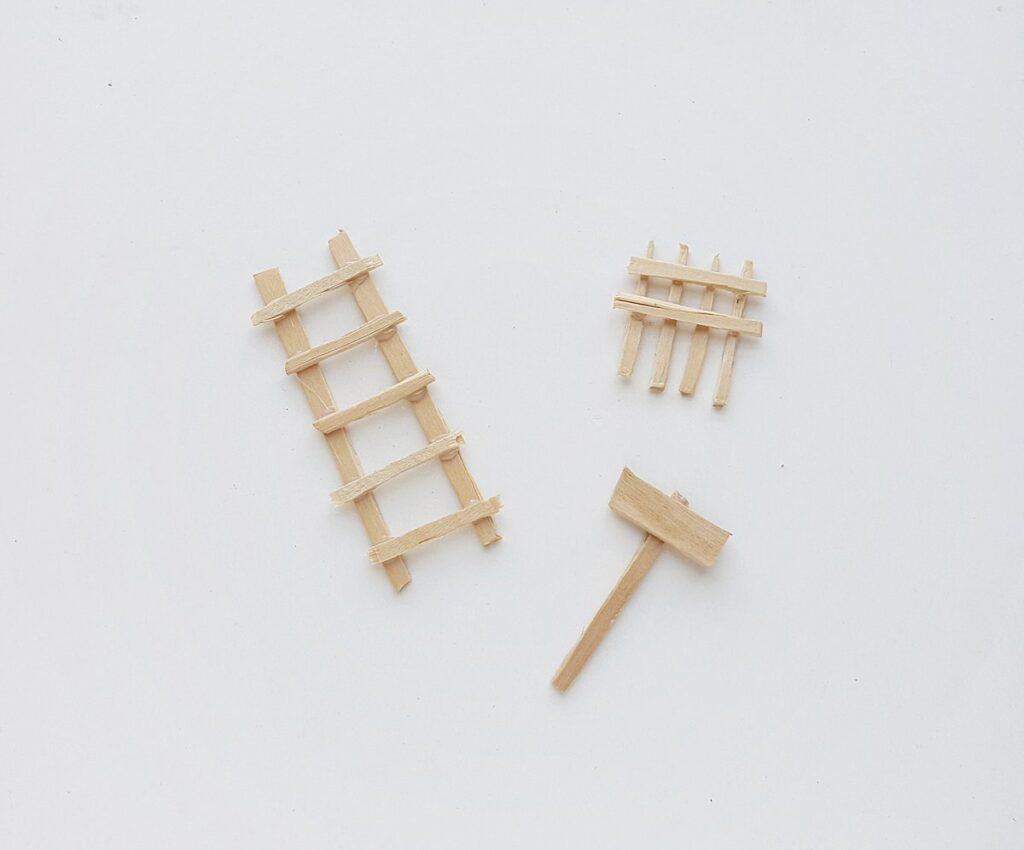
Use popsicle sticks to make the mini ladder, mini fence and mini fairy sign. You can use the actual width of the popsicles or cut them into thinner pieces, however you like it best.
For the ladder cut 2 sticks of the same length for the 2 sides and 5 or 6 smaller sticks for the steps of the ladder.
For the fence cut 2 sticks of the same length for the horizontal parts and 4 or more sticks for the vertical parts.
For the sign you will need 1 stick for the stand and 1 stick for writing the sign.
Judge the size you’d like to make based on the size of your teacup.
Glue the sticks together to create a ladder, fence, and sign.
Take a head pin and insert a round bead into it. Push the bead all the way to the stopper and create loop on the open end to secure the bead. This video will show you how.
Cut out a piece of craft wire and create a twirl pattern on one end but keep the other end straight.
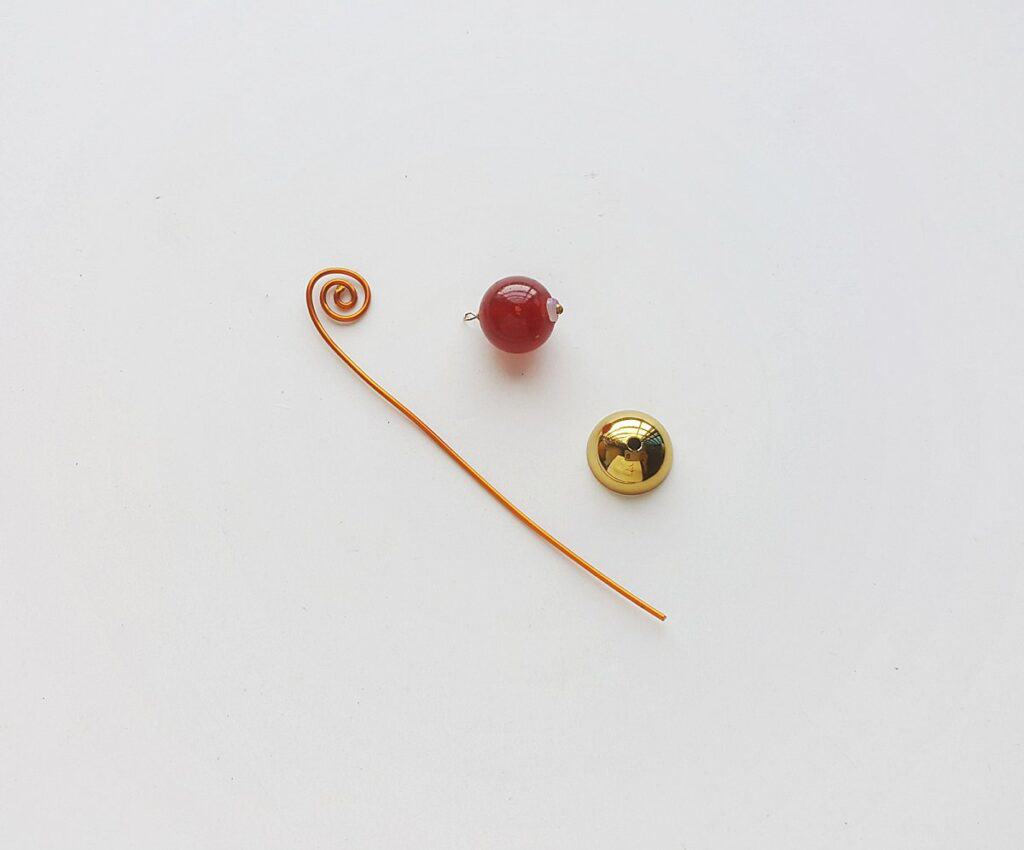
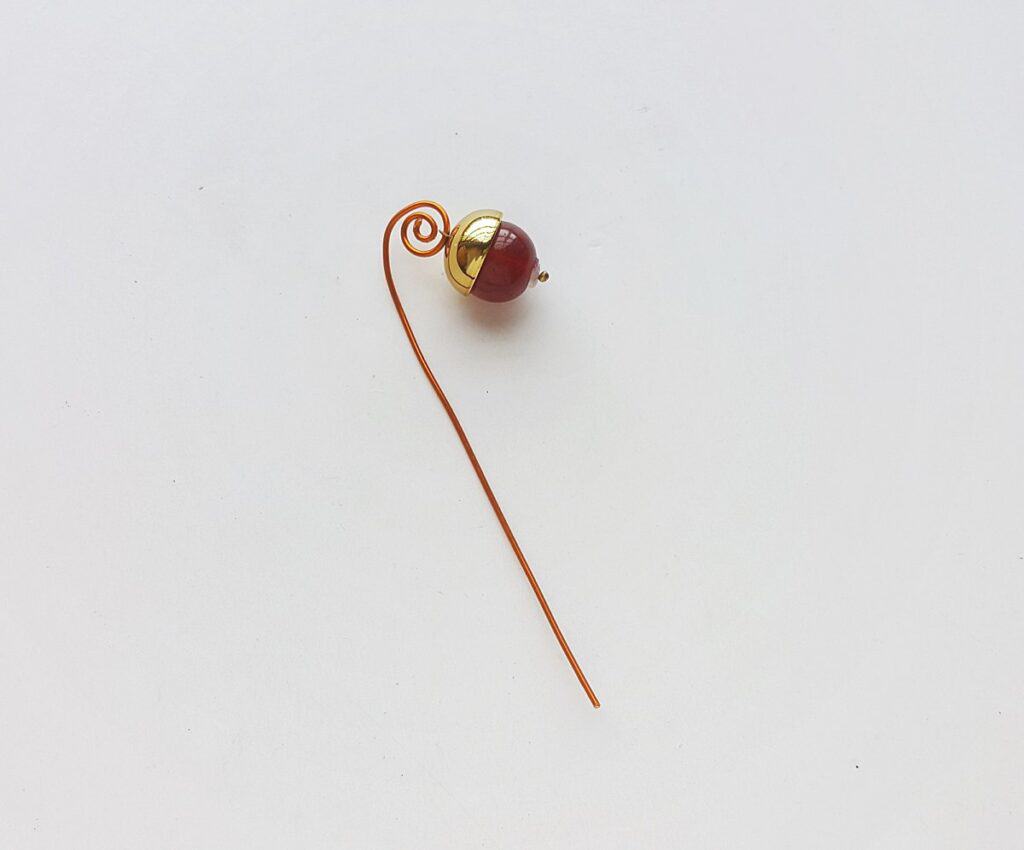
Place the bead cap on top of the bead, on the side with the wire loop. Insert the bead’s loop into the twirled part of the craft wire staff you made in the last step.
Fill the teacup with soil mix and then cover the top with small stones or rocks.

Add the plants to the cup by gently pushing the root into the soil mix. Or if you have a black thumb like me, you can choose to use fake plants.
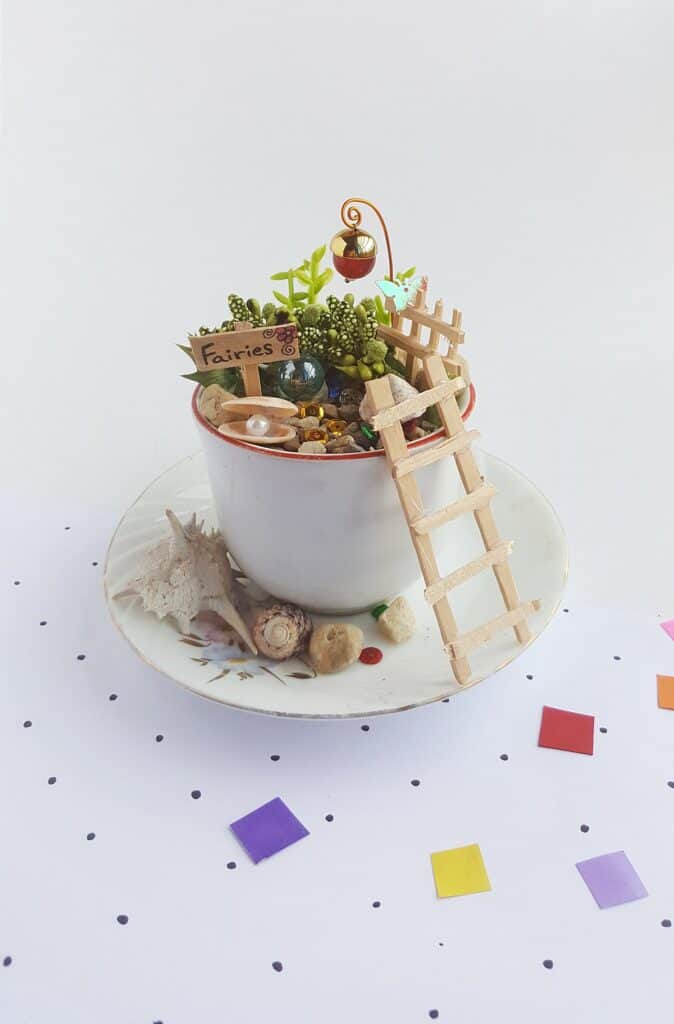
Place the fence, sign and a few decorative shells in the teacup for decoration.
Place mini lamp post by gently pushing its bottom end into the soil. Decorate the garden as you wish.
Place the teacup on it’s saucer and place the ladder leaning up to the fairy garden.
Enjoy your adorable DIY fairy garden in a teacup!