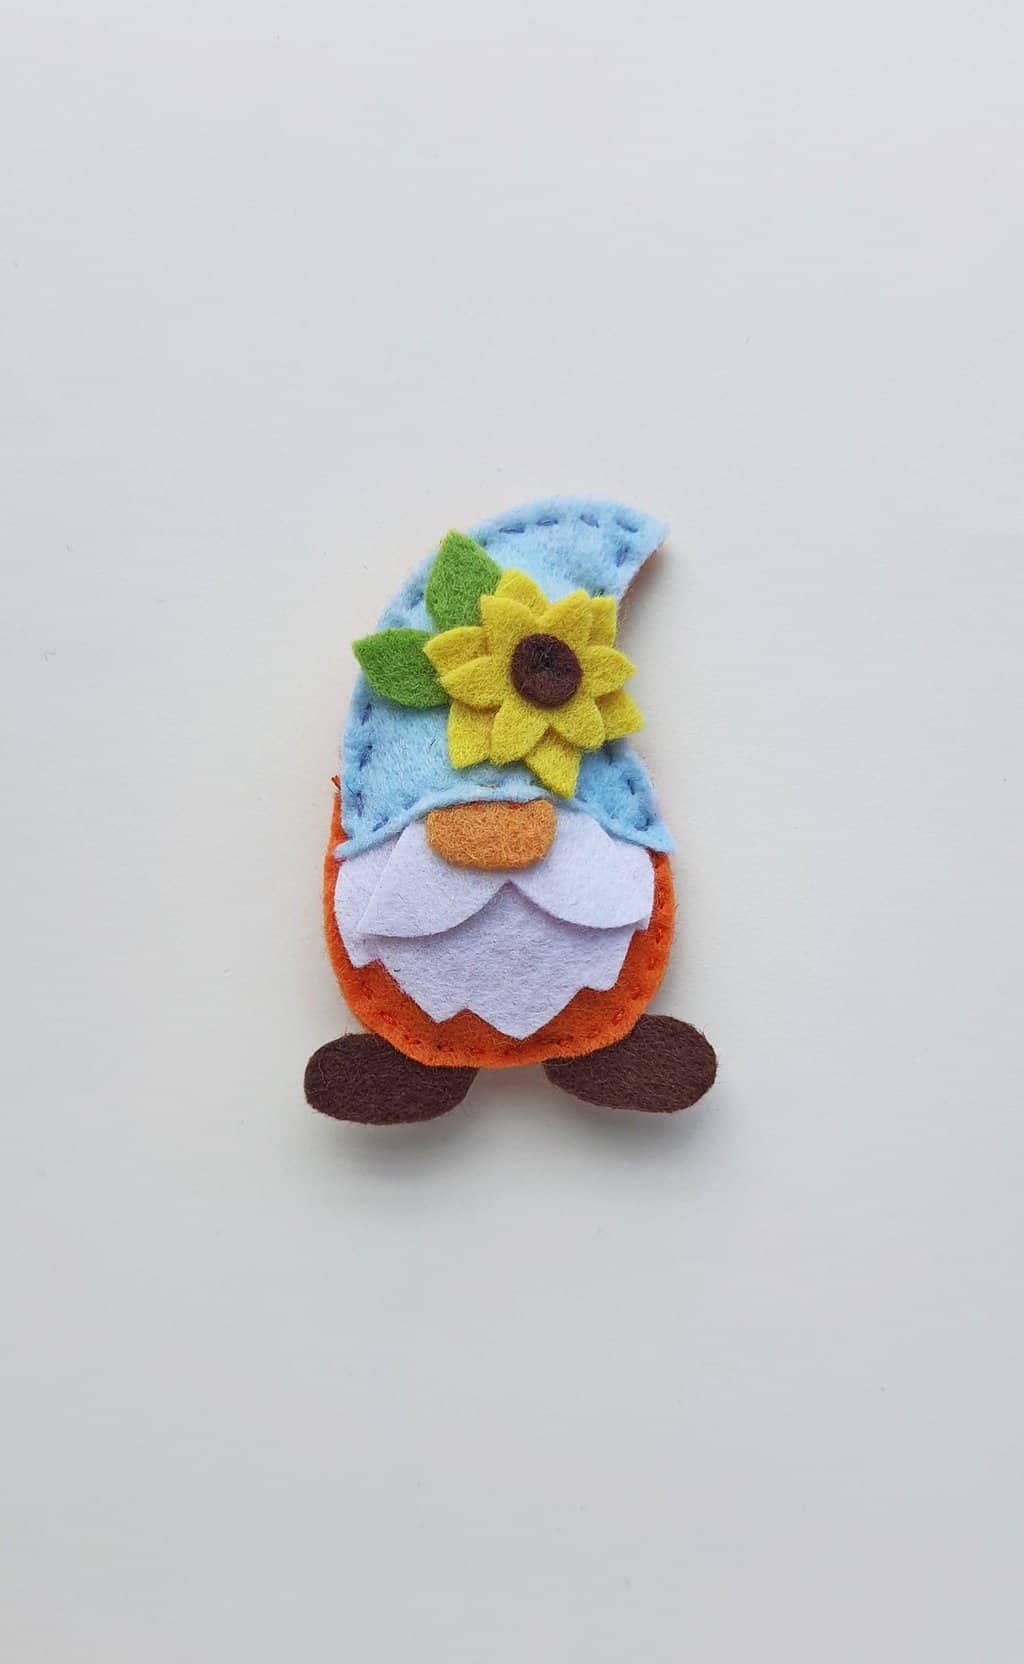
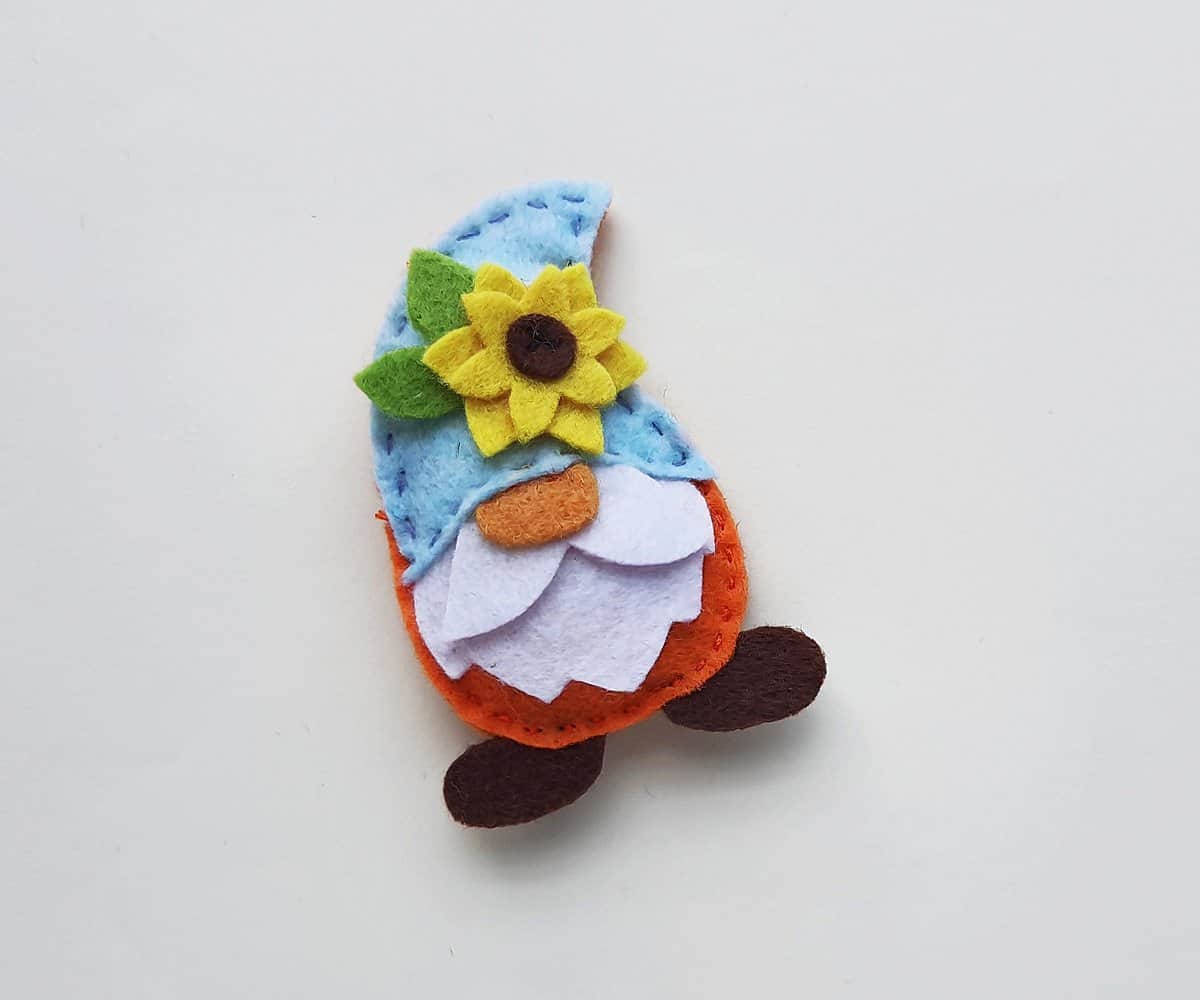
DIY Spring Gnome Craft
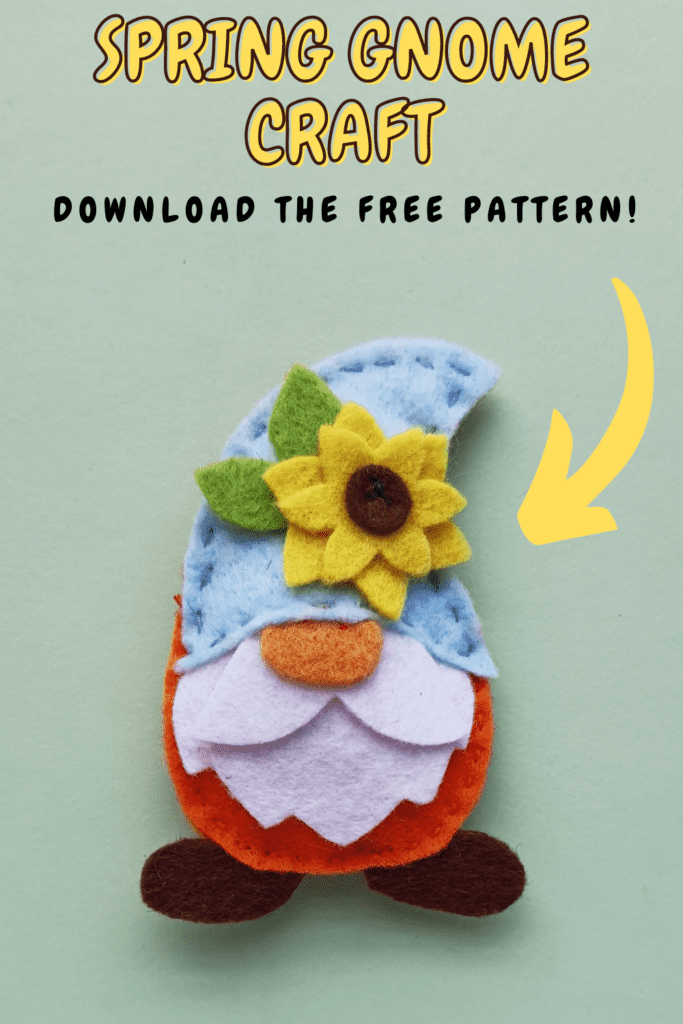
This adorable Spring Gnome craft is a fun spring decoration to create. Make the gnome as shown, or add a ribbon to create a spring gnome ornament.
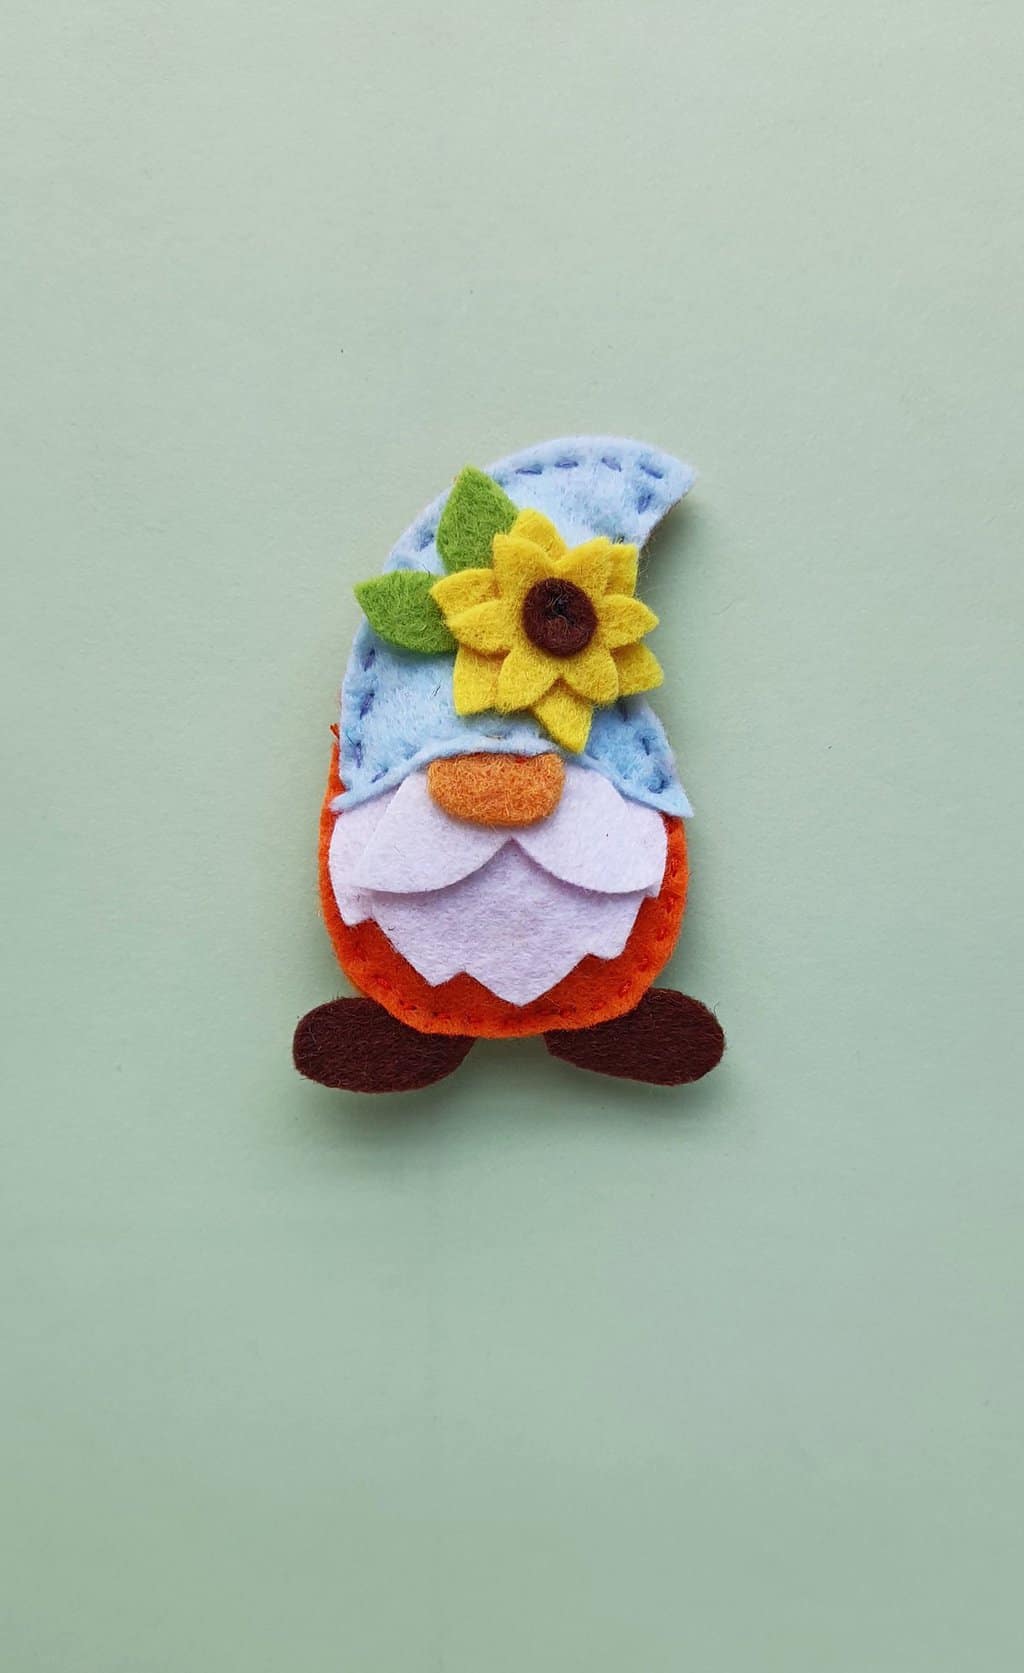
With the printable template and easy to follow instructions below, you’ll find this spring gnome craft both fun and easy to create.
Wouldn’t it be cute to add a clip or keychain to attach the spring gnome to a backpack or set of keys?

How to make a Gnome Ornament for Spring
Supplies:

- Felt fabrics in several colors
- Needle and thread
- Scrap felt or stuffing
- Scissors
- Pencil
- Template
- 4 inch piece of ribbon or thread
Instructions:
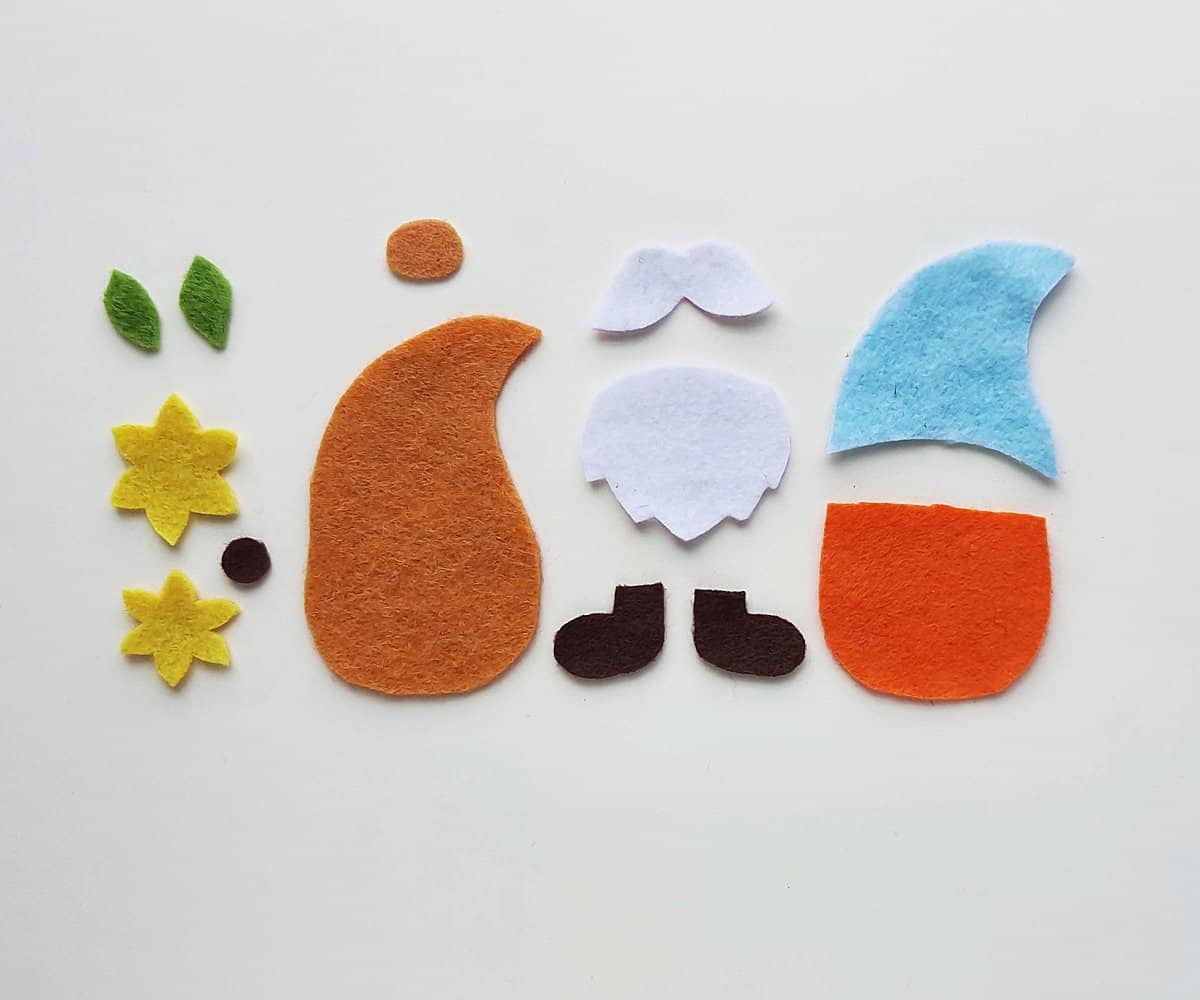
Print out the gnome template and cut out all of the pattern pieces.
Select different colored felt fabrics for the gnome craft; make sure that the colors represent a spring vibe! Trace the template pieces on the pieces of felt that you’ve chosen.
Cut out the felt pieces using scissors.
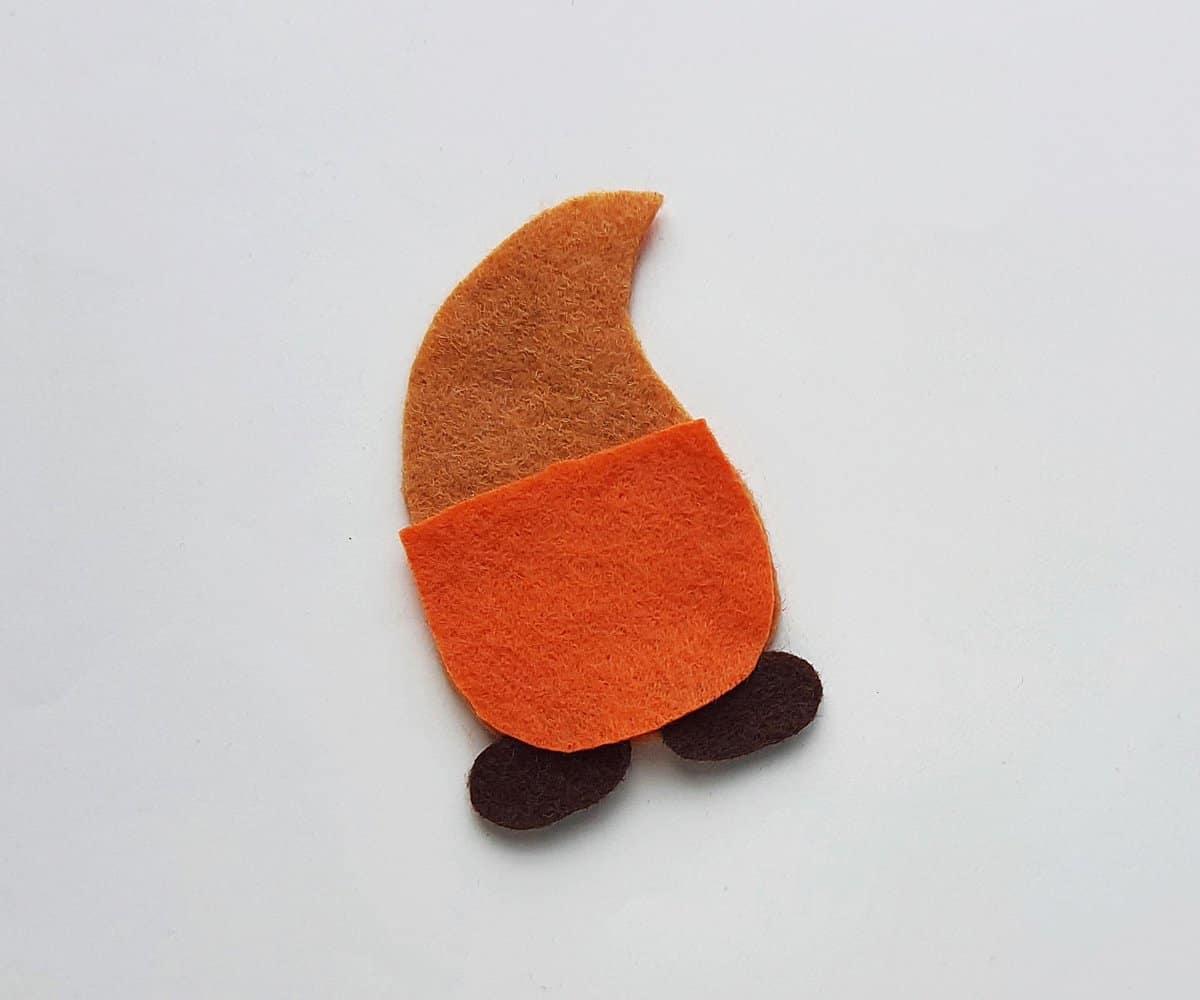
Place the base cutout on a flat surface, then place the shoe cutouts along the bottom edge of the gnome’s body. Overlap the top of the shoes with the base piece as shown below.
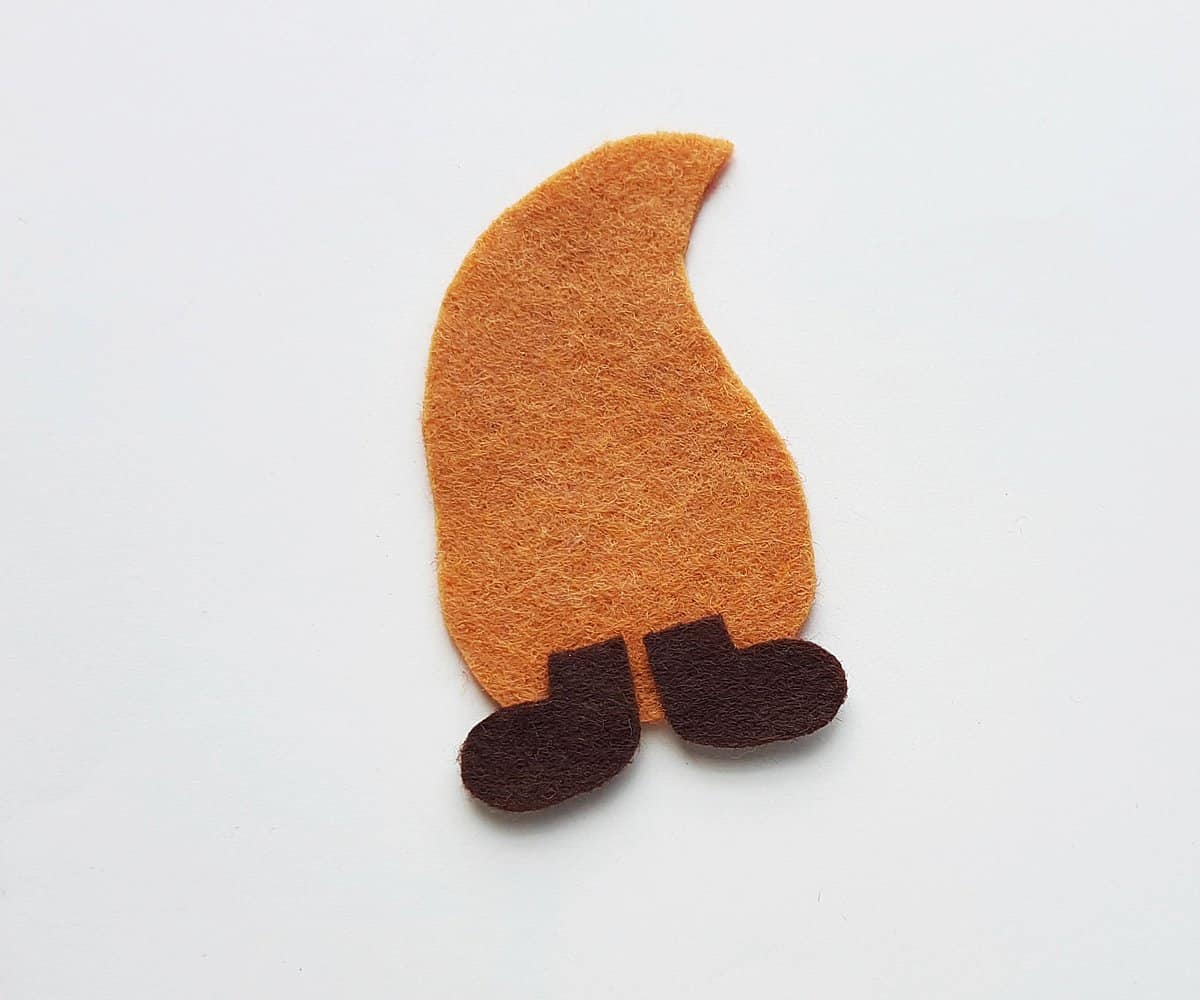
Place the gnome’s shirt on the back as you see below, sandwiching the top edges of the shoes between the back of the gnome and the shirt.
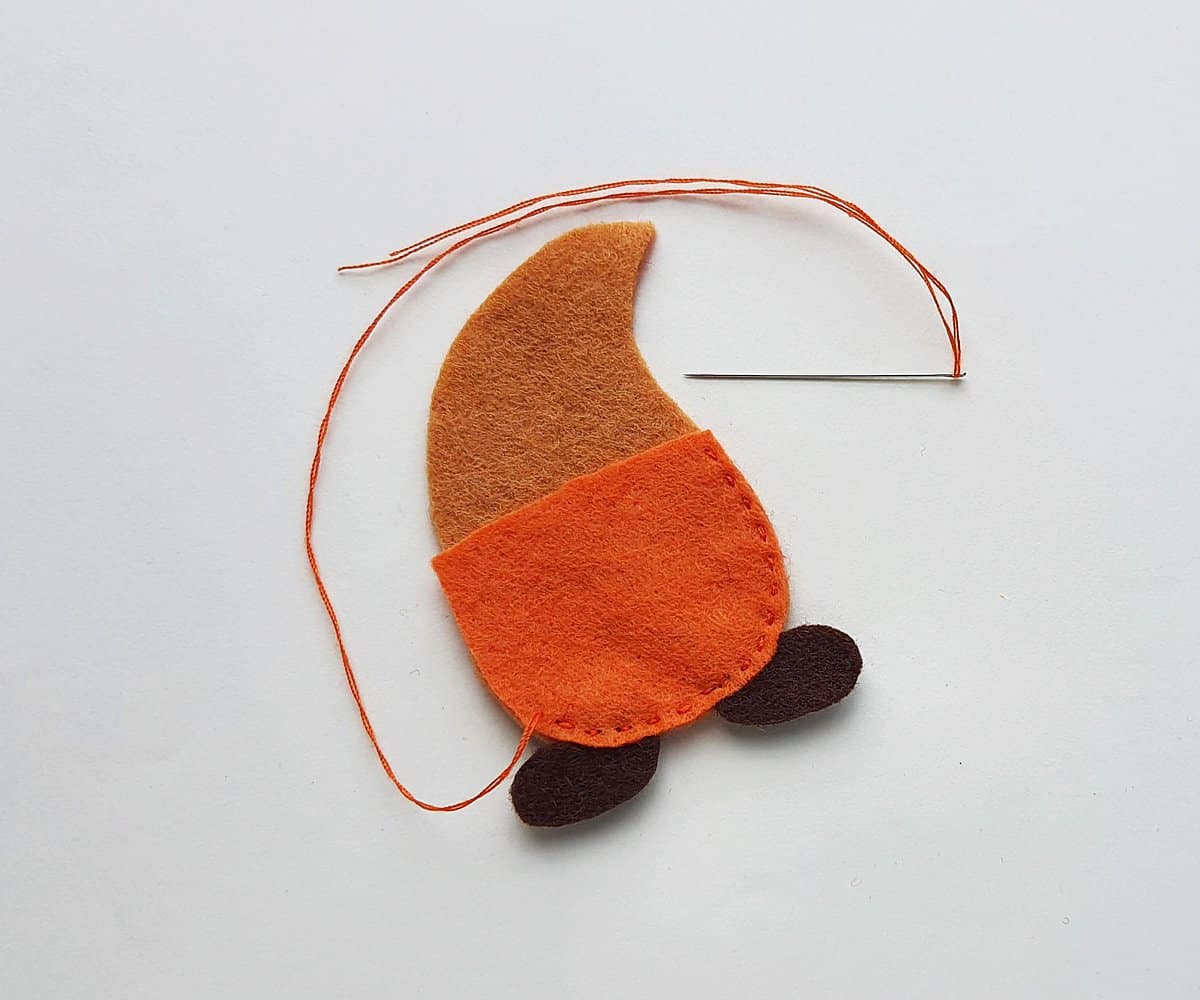
Prepare a needle and a matching thread.
Then stitch around the outside edges of the gnome’s shirt, leaving the straight line at the top of the shirt unattached.
Be sure to secure the shoes in-between the two pieces of felt as you sew around the bottom.
Take the hat piece and place 2 or 3 leaves on it.
Stack the two flower pieces and the center of the flower together.
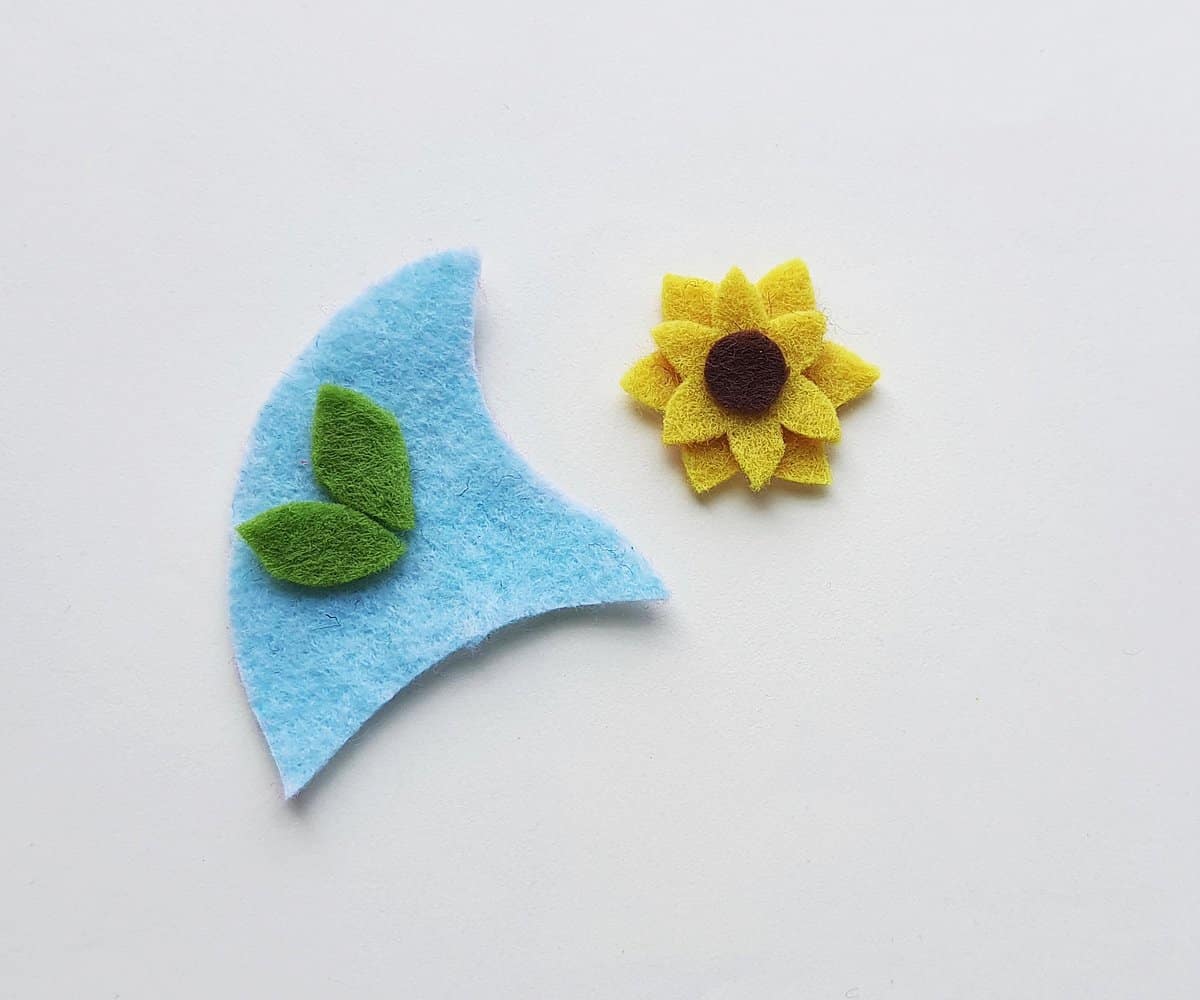
Place the flower on the hat, being sure to overlap the leaves with the center of the flower.
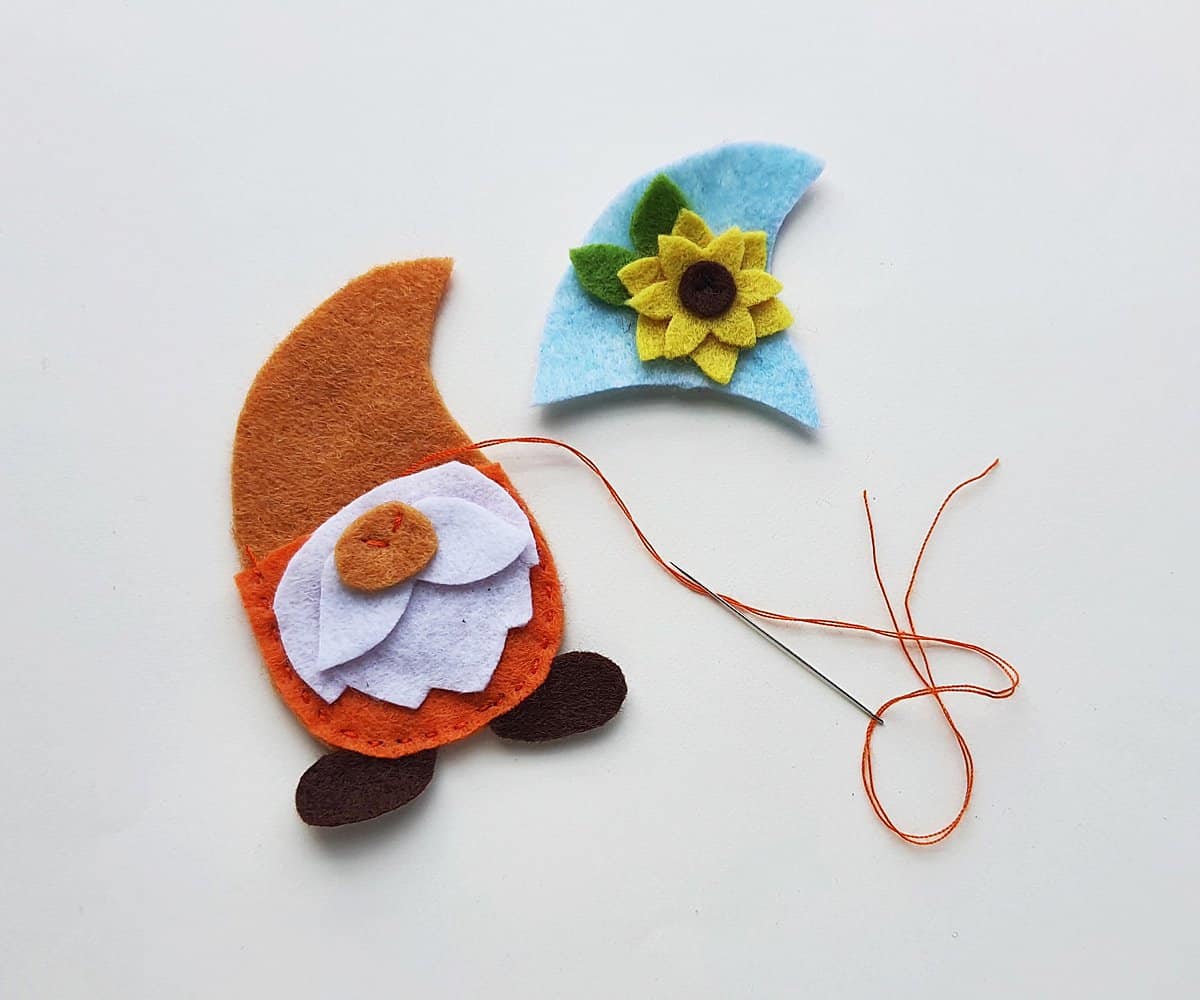
Prepare needle with thread that matches the center of your flower.
Stitch through the center of the flower to attach it to the gnome’s hat, being sure to catch all the flower and leaf pieces.

Now, place the gnome’s beard on top of this body as shown below.
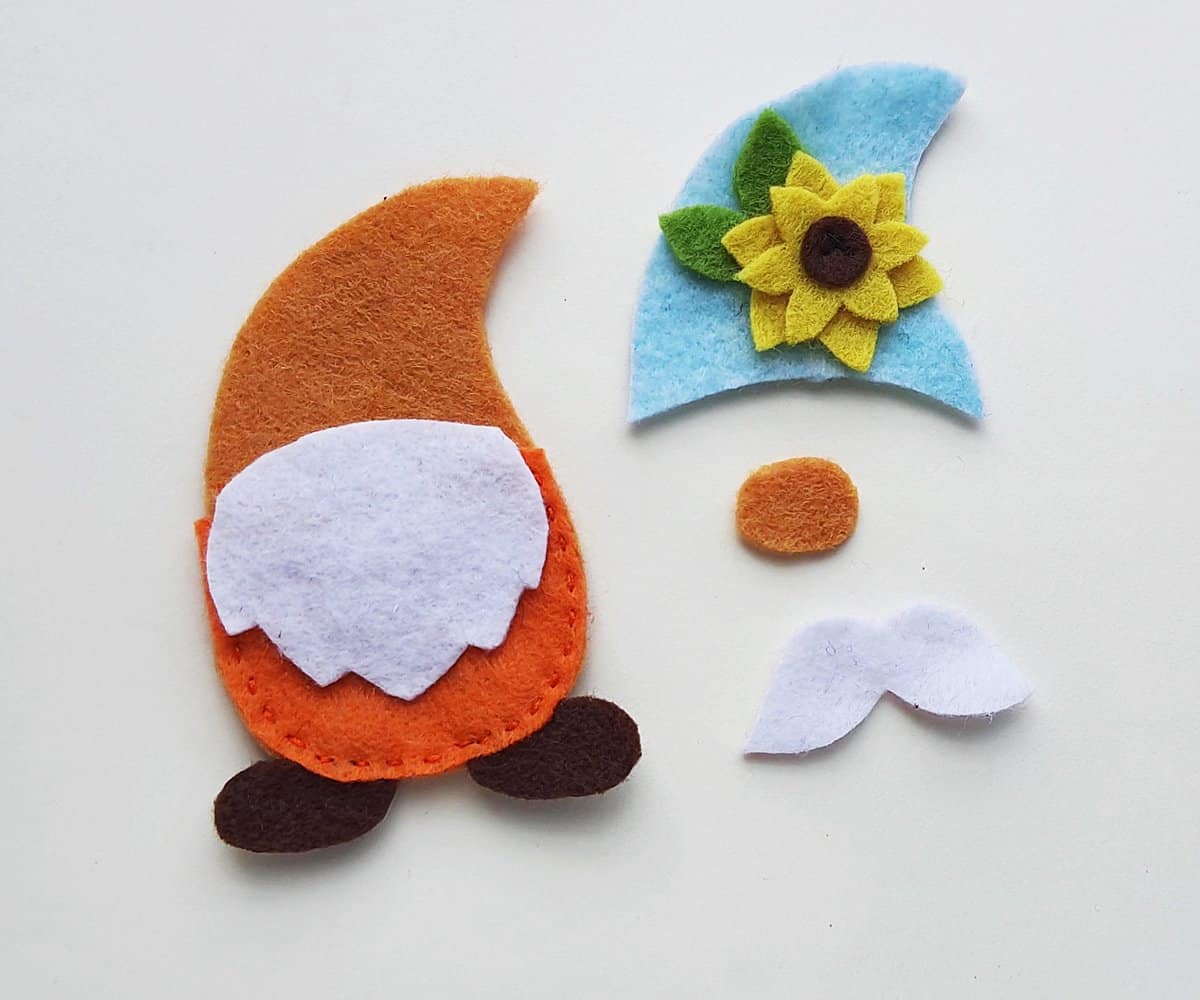
Place the mustache on top of the beard, then place the nose on the top of the mustache. See below for placement.
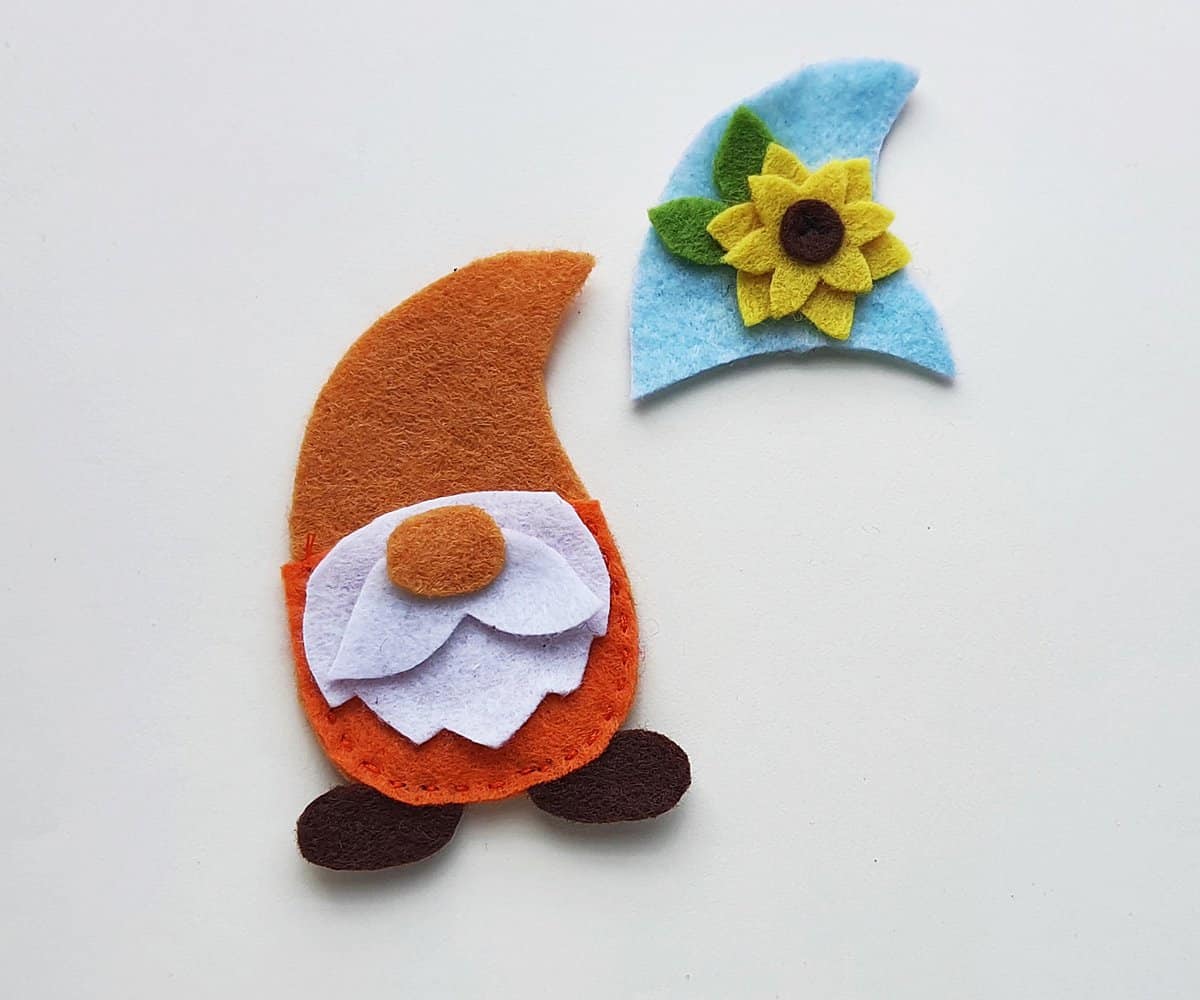
Use needle and thread to stitch through the nose to attach the nose, mustache, and beard to the gnome’s body. Use just a couple of stitches to secure the pieces.
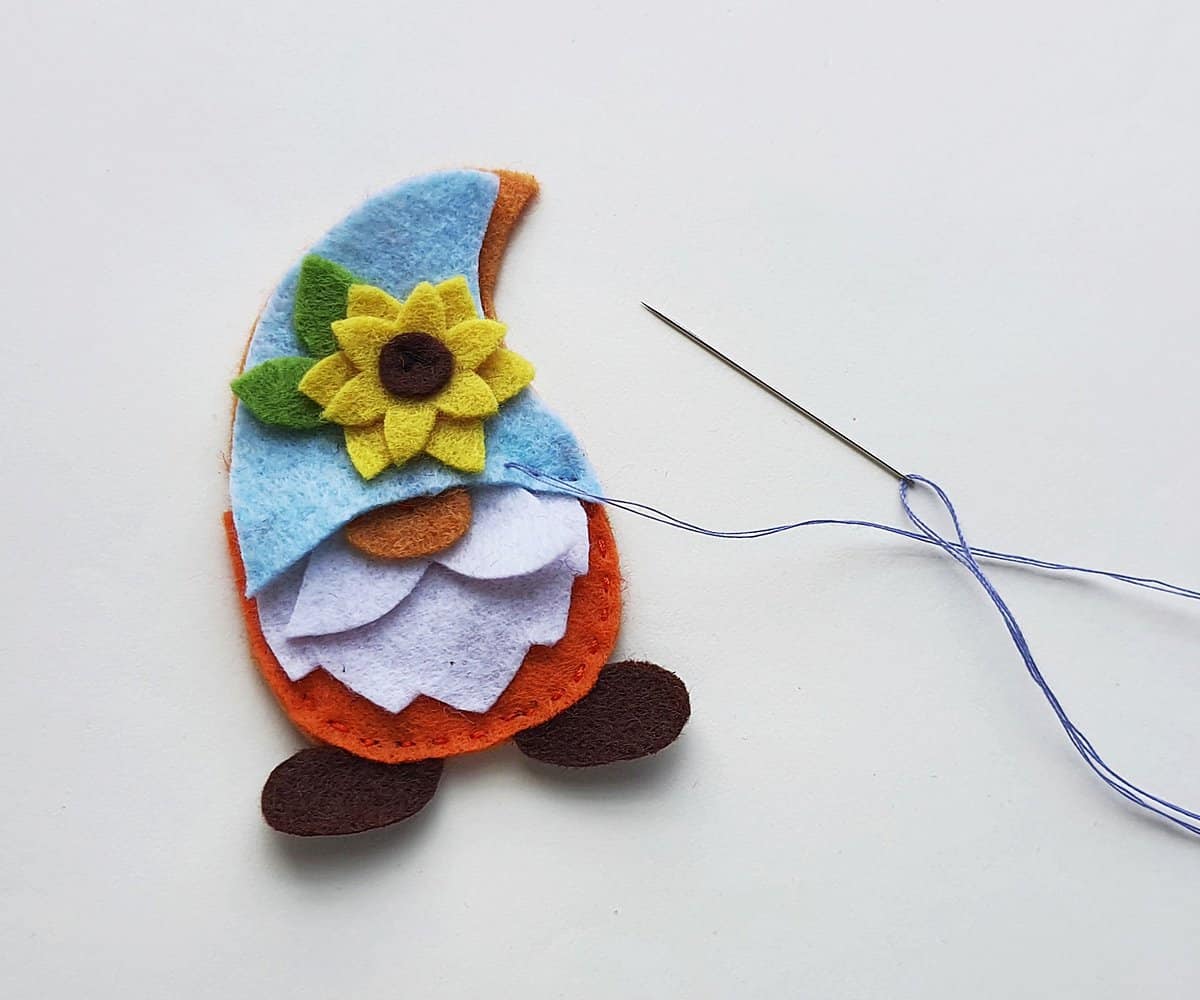
Place the hat pattern on top of the gnome; try to cover the stitched part of the nose with the gnome’s hat.
Prepare needle with thread that matches the hat. Begin to attach the hat to the back of the gnome.
**If you choose to stitch along the bottom side of the hat, be sure to fold the back of the gnome out of the way as you attach the hat only to the shirt and across the gnome’s face, so you will be able to stuff the gnome later. You can also choose to only attach the hat around the outside edges, leaving the bottom edge unattached.
Alternatively you could attach the hat brim to the gnome’s face with a little dot of fabric glue.
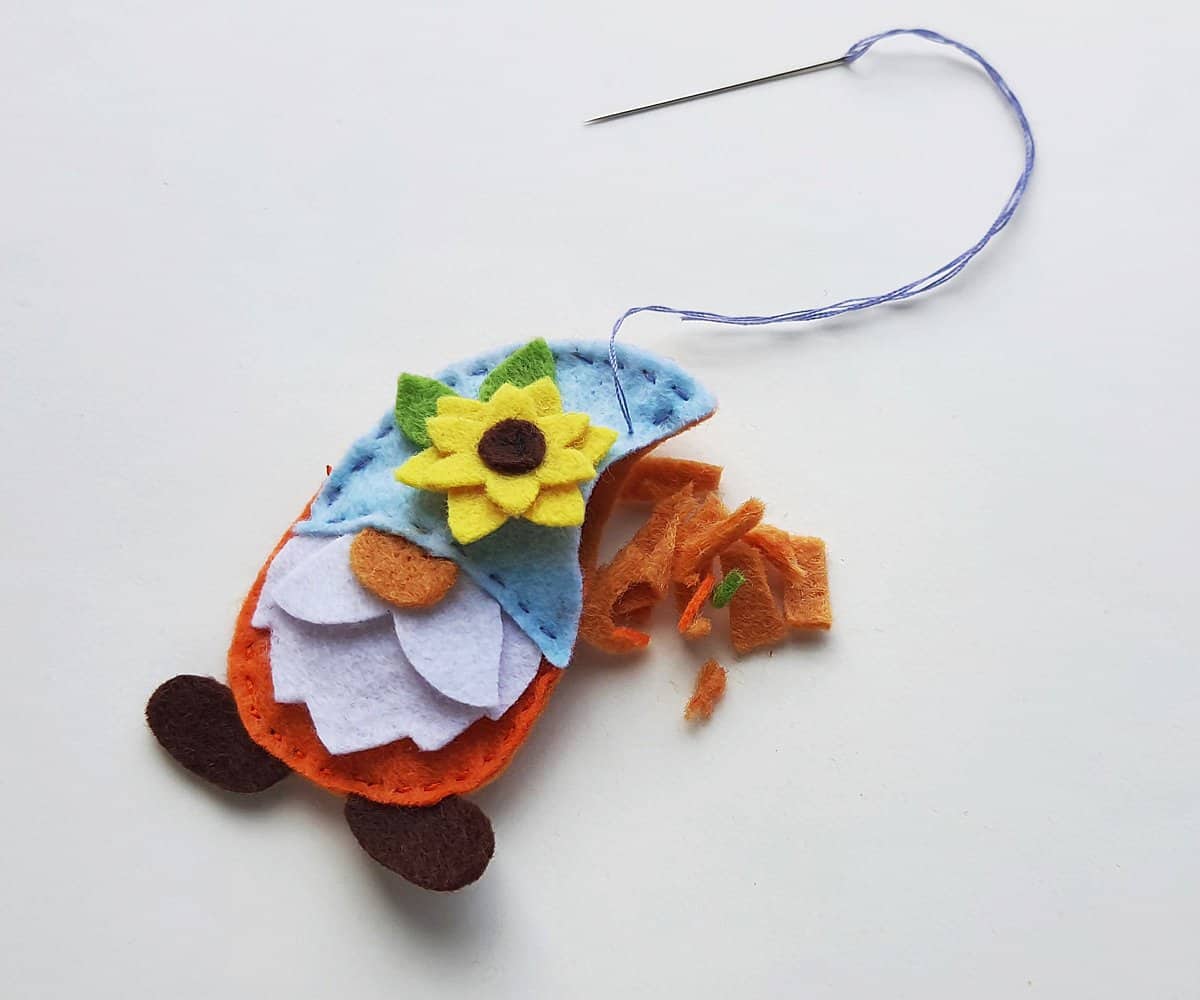
Continue stitching around the gnome’s hat, leaving a small place open to stuff the gnome.
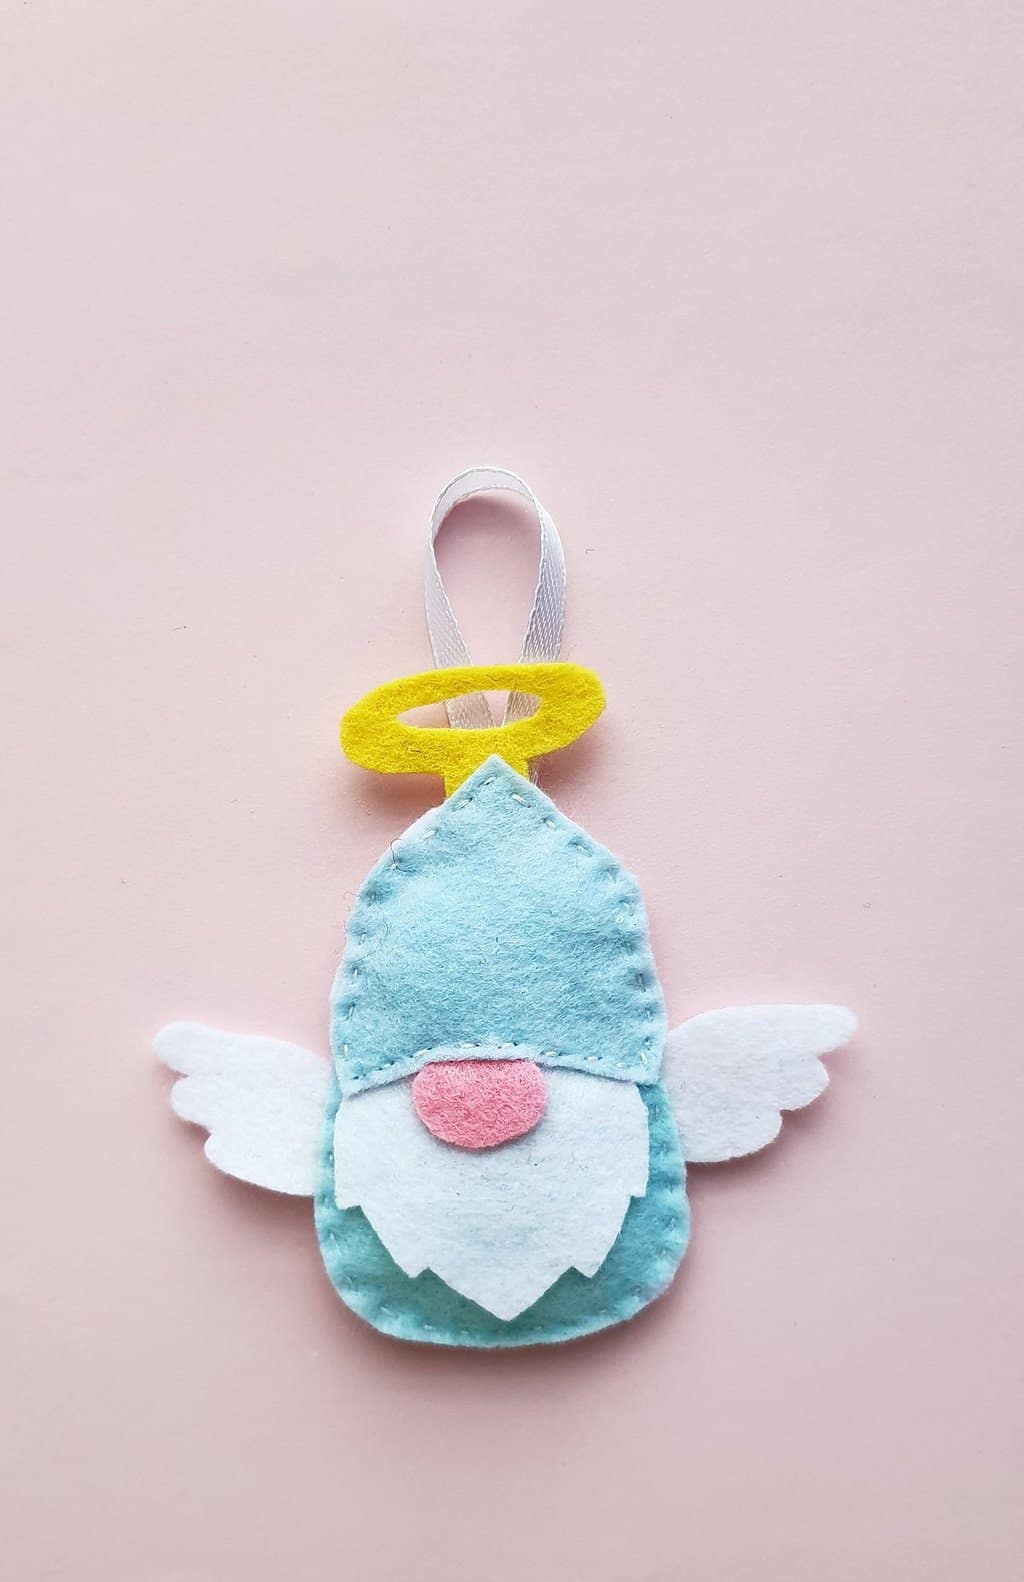
If you’d like to make your gnome an ornament, fold the piece of ribbon or thread in half and secure it between the back of the gnome and the top of the hat as you stitch around the gnome craft.
Stuff the gnome with scrap felt or batting.
Stitch and close the open end to secure the stuffing inside the gnome.
That’s it! If you loved creating this spring gnome craft, be sure to check out our Christmas gnome ornament too!