
Felt Christmas Gnome Ornament Craft
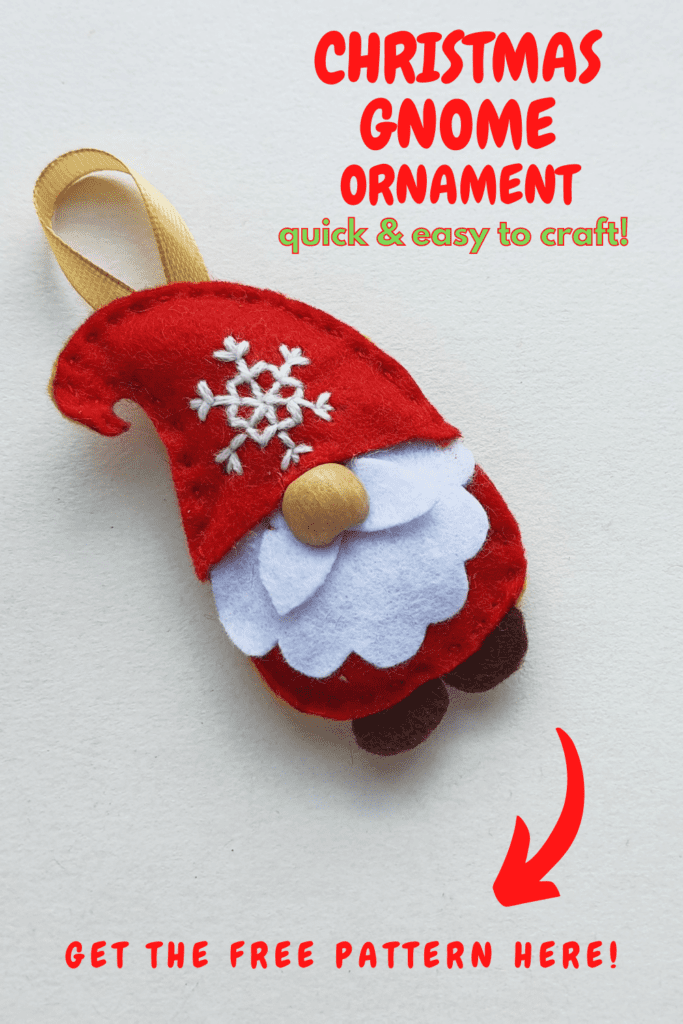
This super cute DIY Christmas Gnome Ornament made with felt is a great craft for gifting or hanging on your own Christmas tree!
Learn how to make this adorable Gnome Christmas ornament below, using the free (instant download) gnome ornament pattern.
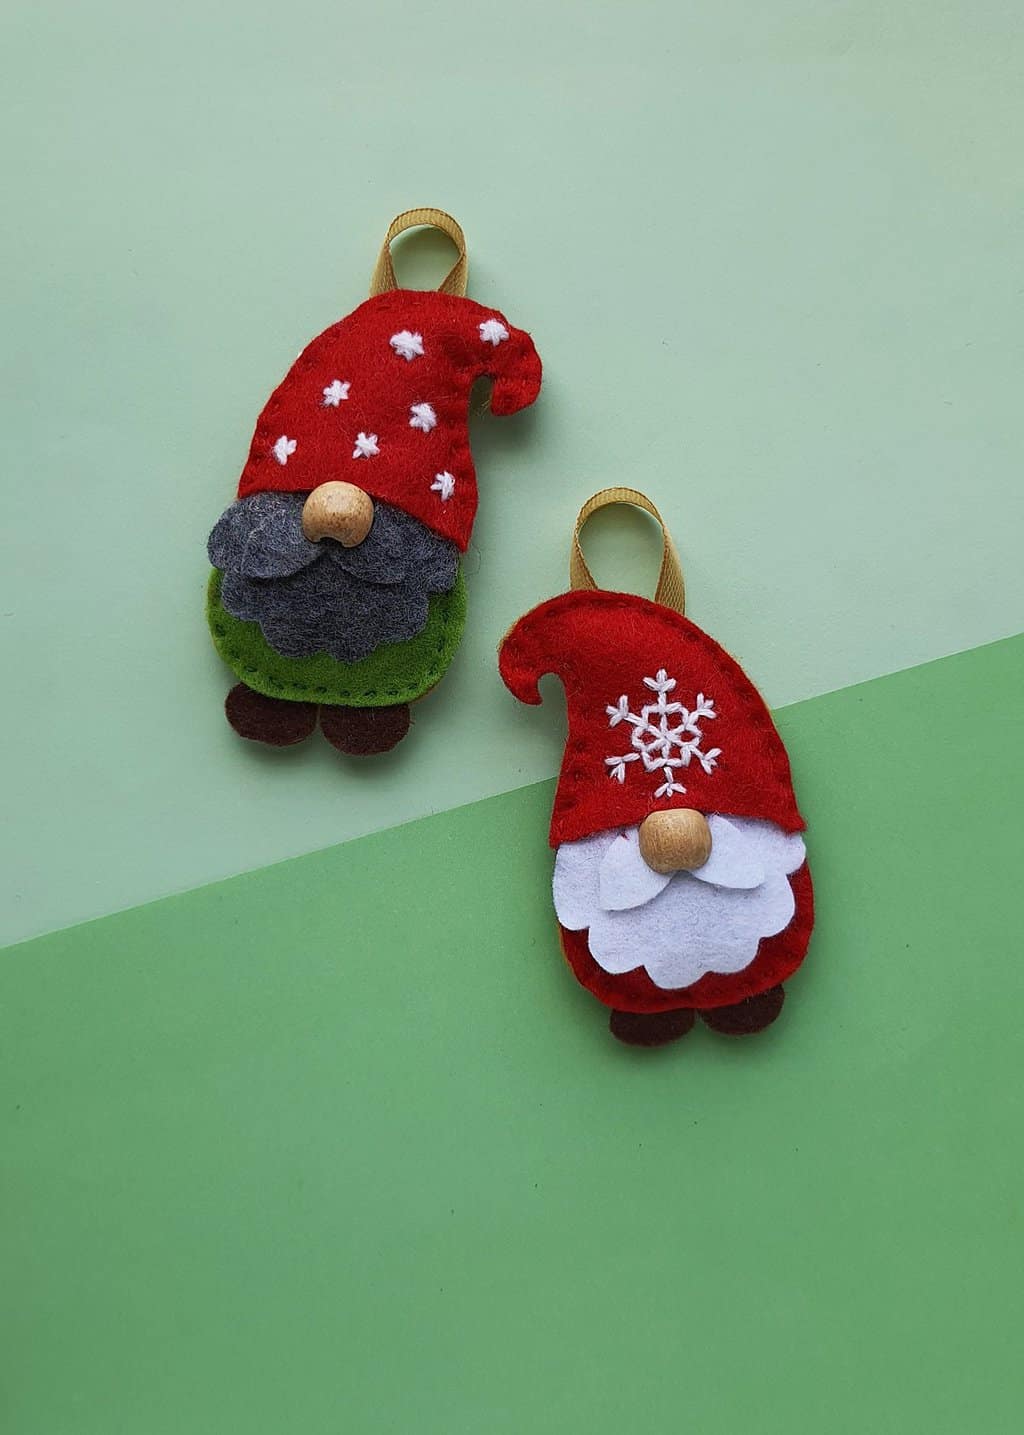
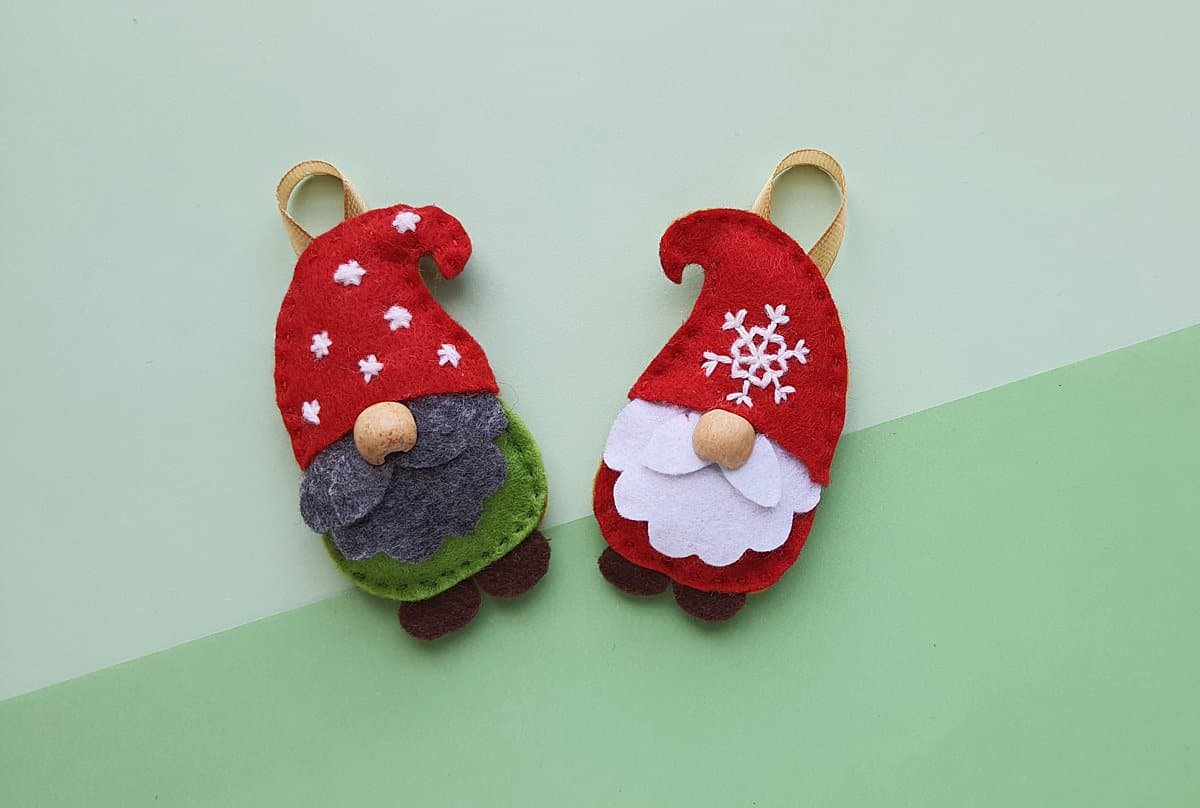
After creating this adorable Christmas gnome ornament, you’ll want to make even more varieties of Christmas gnome ornaments!
Here at Big Family Blessings you can find patterns and tutorials for so many gnome Christmas ornaments!
Big Family Blessings is reader supported. When you purchase through links on our site, we may earn affiliate commission at no additional cost to you. Learn more.
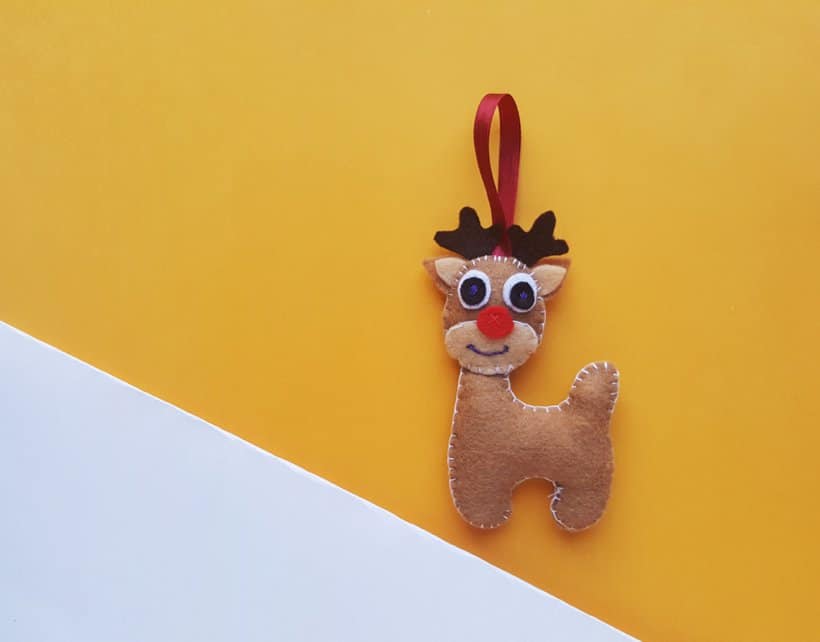
We have a Santa gnome, Mrs. Claus, Rudolph, an Elf, an angel, and even a candy cane gnome! You won’t want to miss all the adorable and FREE Christmas gnome ornament patterns we’ve shared!
If you love this adorable gnome ornament, you will also love this spring gnome ornament with a flower on it’s hat. You can easily switch out the spring colors or Christmas colors to make even more gnome Christmas ornaments to enjoy this year!
Or craft this cute DIY felt santa gnome for even more Christmas gnome craft fun!
How to Make a Christmas Gnome Ornament with Felt
Supplies:

- Felt fabrics
- Wooden bead
- Needle
- Thread
- Fabric glue
- Pencil
- Scissors
- Stuffing
- Pattern Template
Instructions:
Print out the pattern template and cut out all of the pattern pieces.
Choose felt fabrics for the gnome ornament and trace the template patterns on the chosen pieces of felt.
Start by stitching a snowflake on the gnome’s hat. You can draw dots to guide your stitches as shown below. Or, you can make the star sewing free hand.
Start with your thread in the center of the snowflake, then stitch out from the center to create 6 snowflake arms.
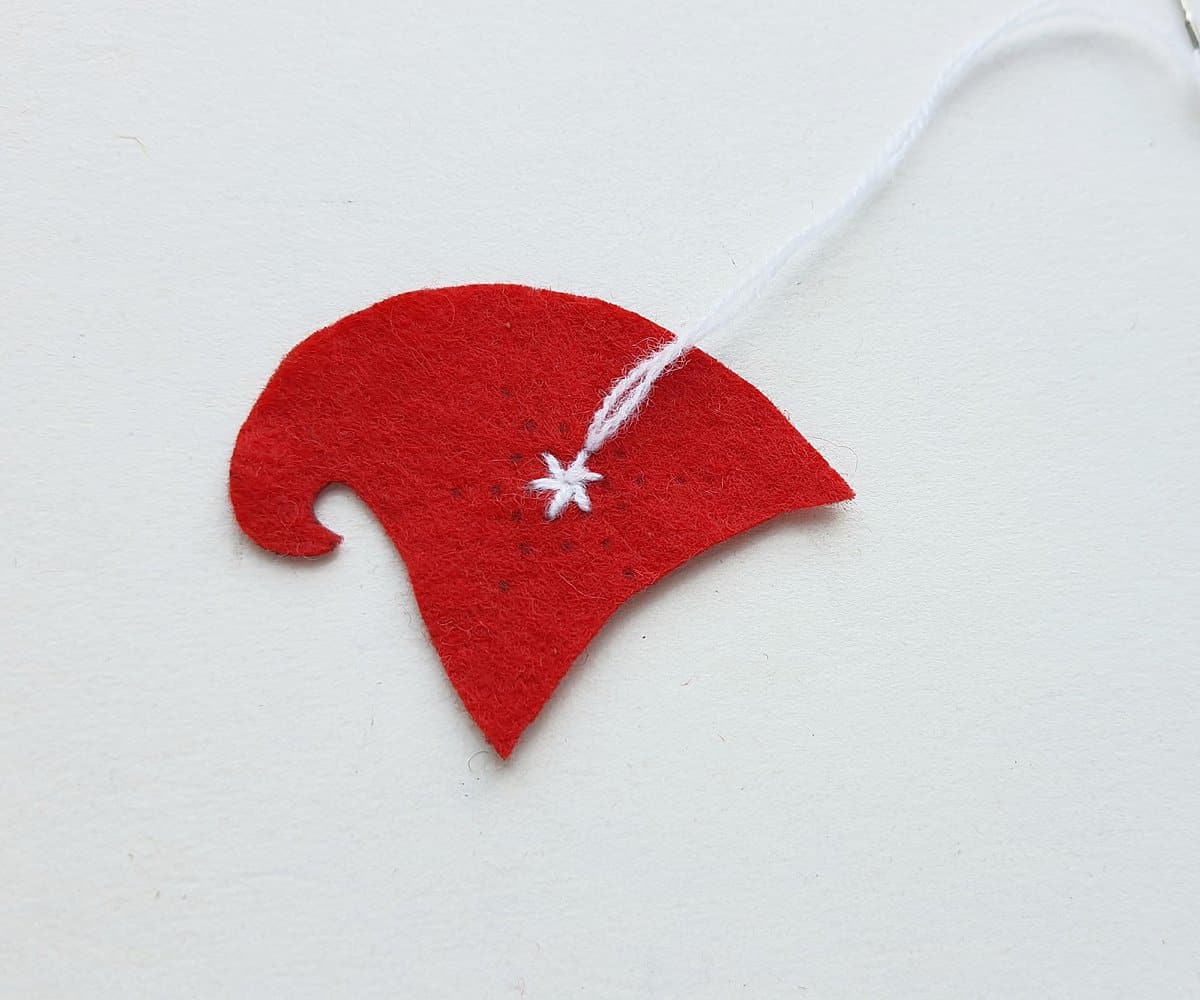
Join the ends of the stitches arms by sewing a triangle shape to join the arms together, as shown below.
No you have a star with 6 points.
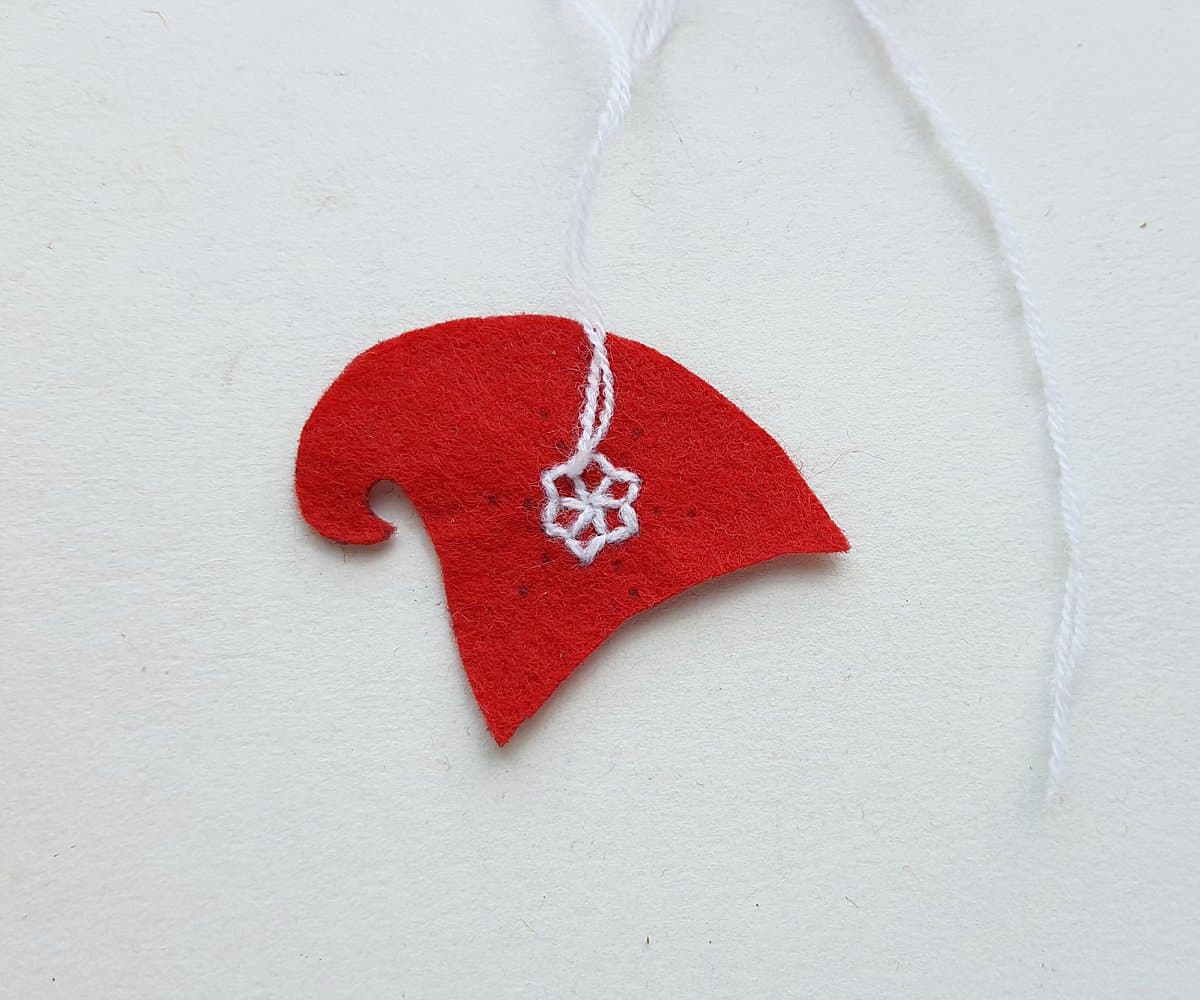
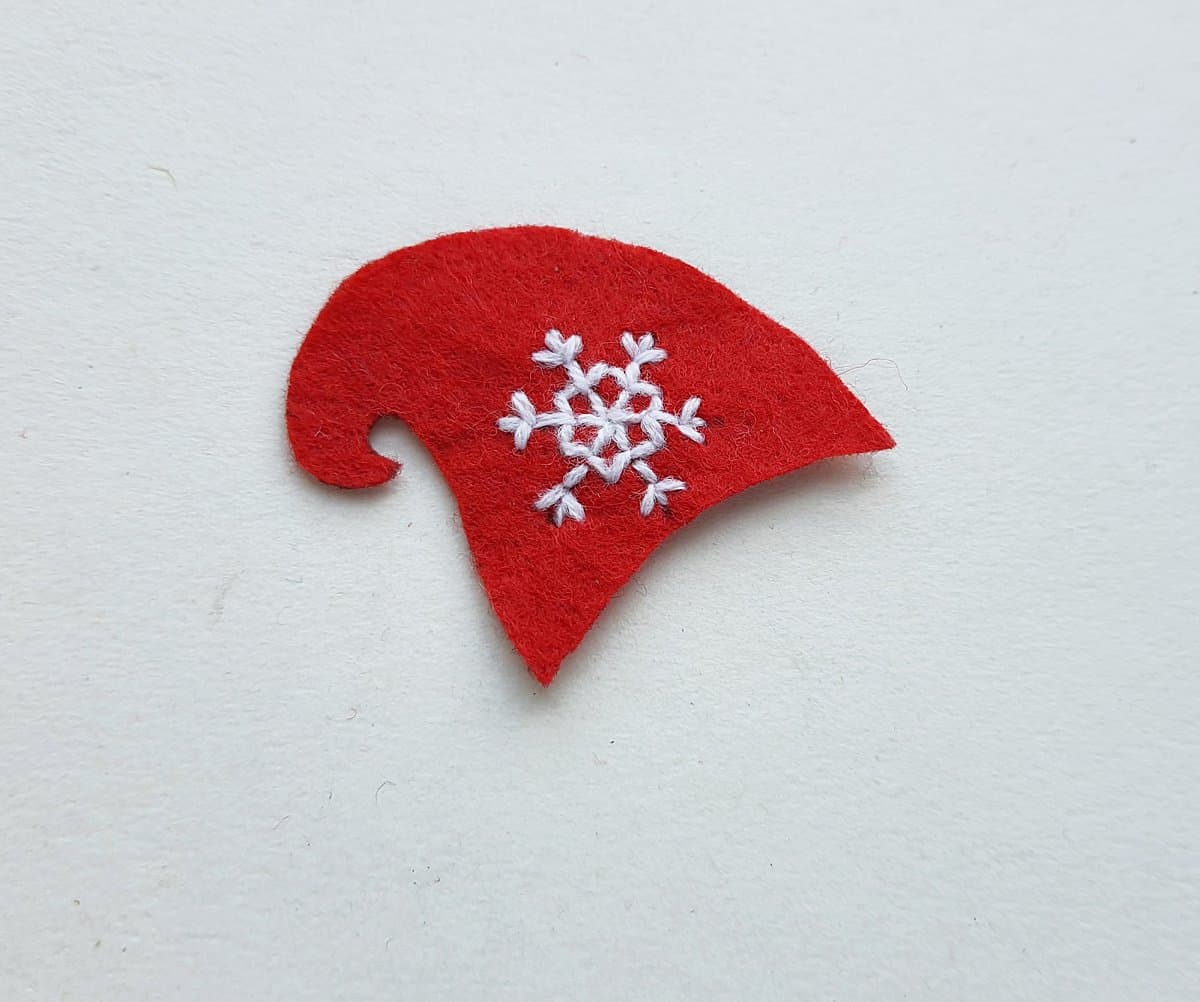
Now, stitch the outer arms of the snowflake to complete the snowflake. Once you are finished making the snowflake, pull the needle to the back of the hat and tie a knot before cutting off the extra thread.
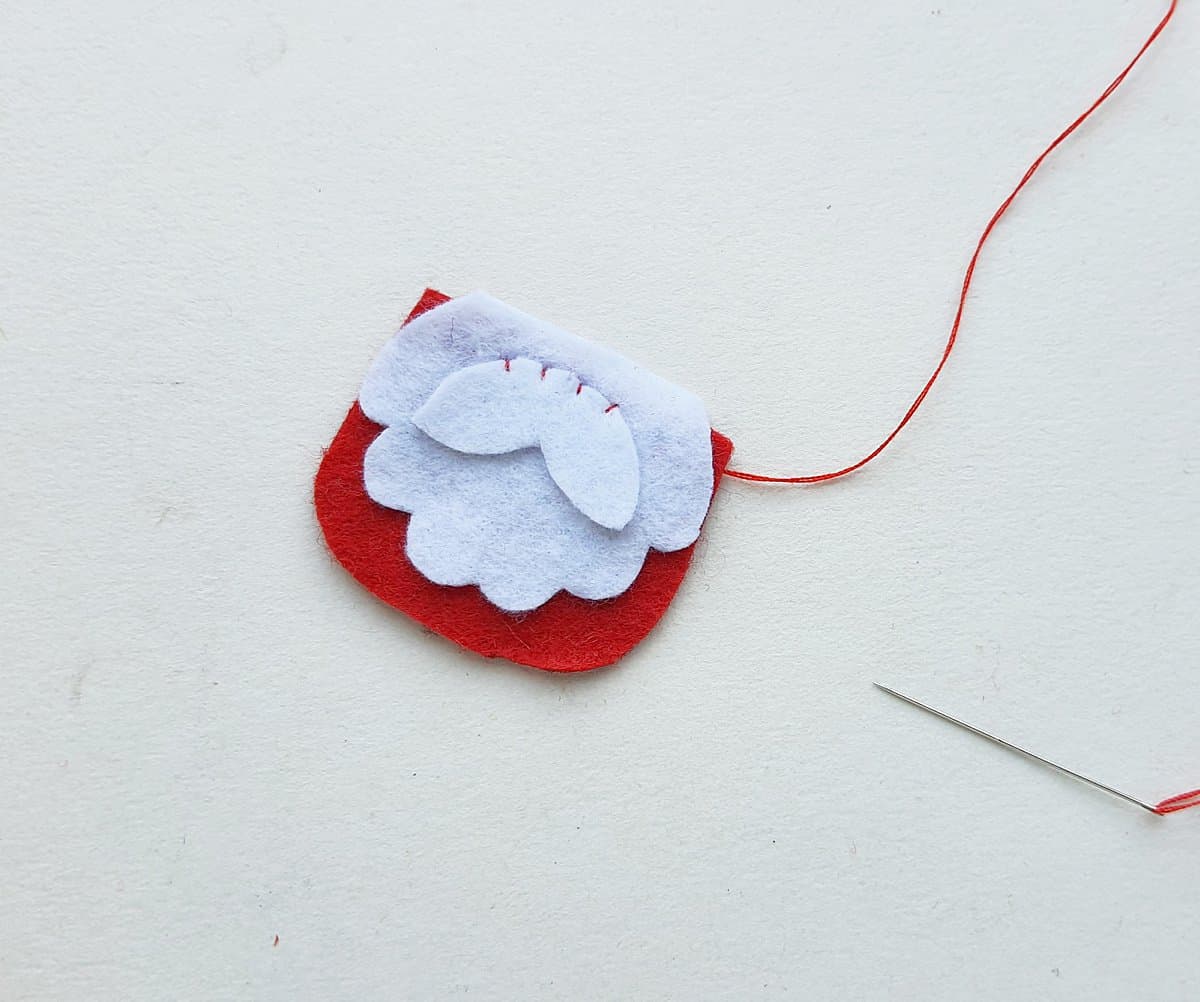
Place the gnome’s mustache near the topof the beard piece, then place the beard at the top of the gnome’s shirt piece.
Stitch through the top of the mustache to join the beard, mustache and shirt together.
Place the shoes on the bottom side of the ornament base, slightly overlapping them on the base.
Optional- You can stitch or glue the shoes in place at this time. You’ll be sewing them onto the ornament in the next step, but if you are new to sewing it may help you to secure the shoesin this step.
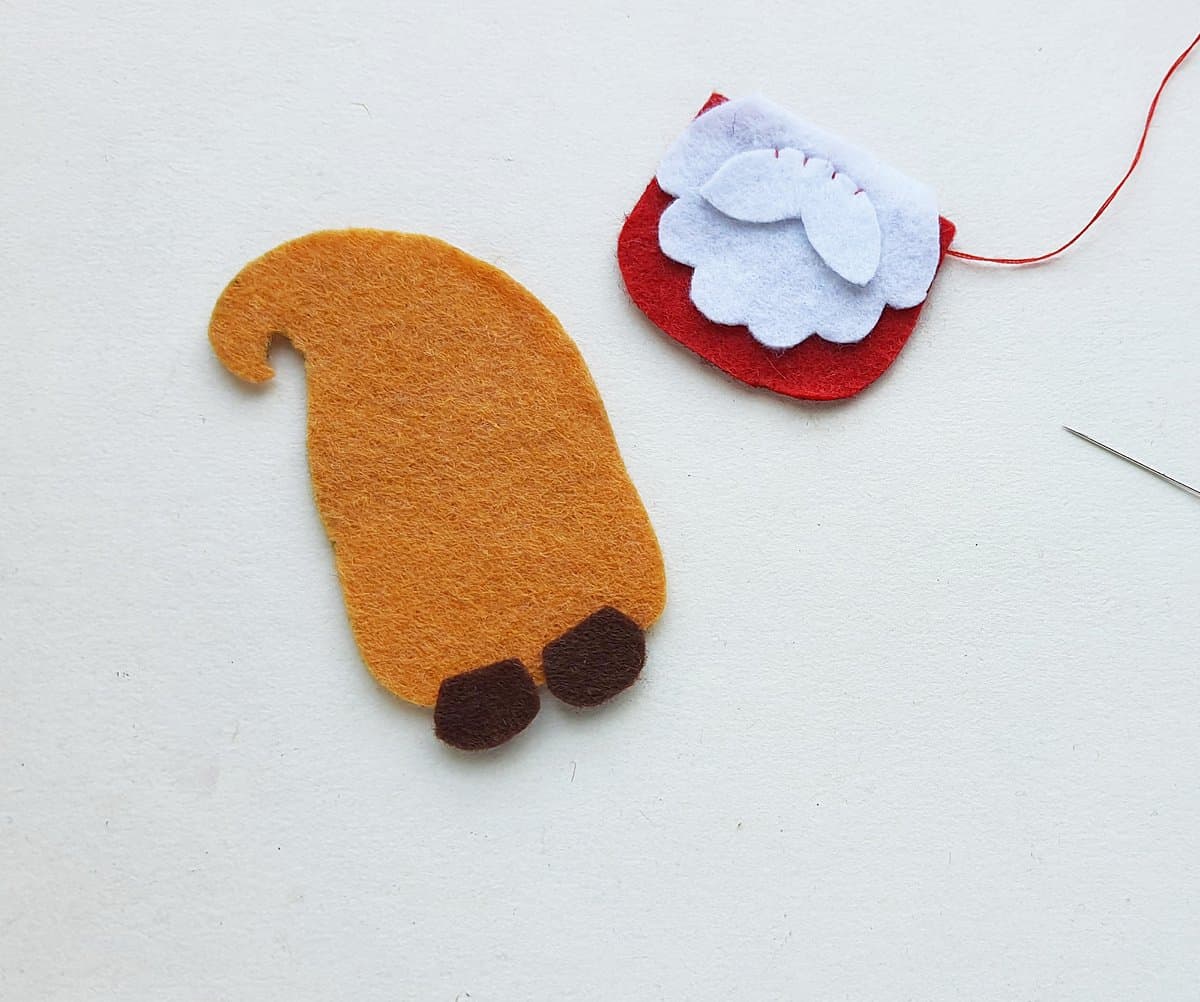
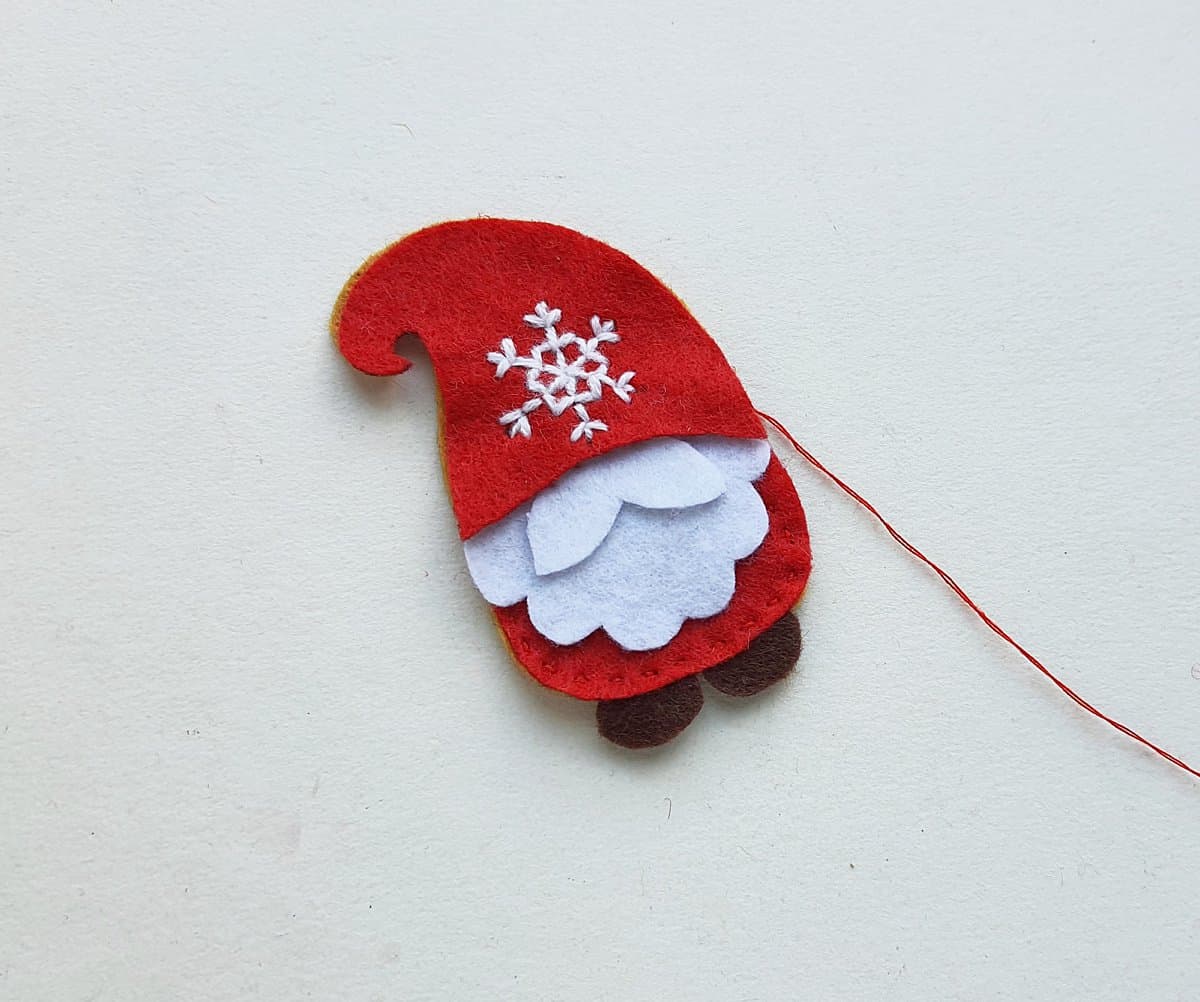
Place gnome’s shirt/beard/mustache piece on the ornament base, overlapping the shoes. Prepare the needle with matching thread and stitch all the way around the outer edge of the shirt.

Place the hat pattern on the top of the ornament base (this will cover the top of the mustache and the beard slightly).
Now, stitch around the outer edge of the hat to attach it to the ornament, leaving a small opening in one side for the stuffing.
Stuff the felt gnome ornament using cotton or scrap felt.
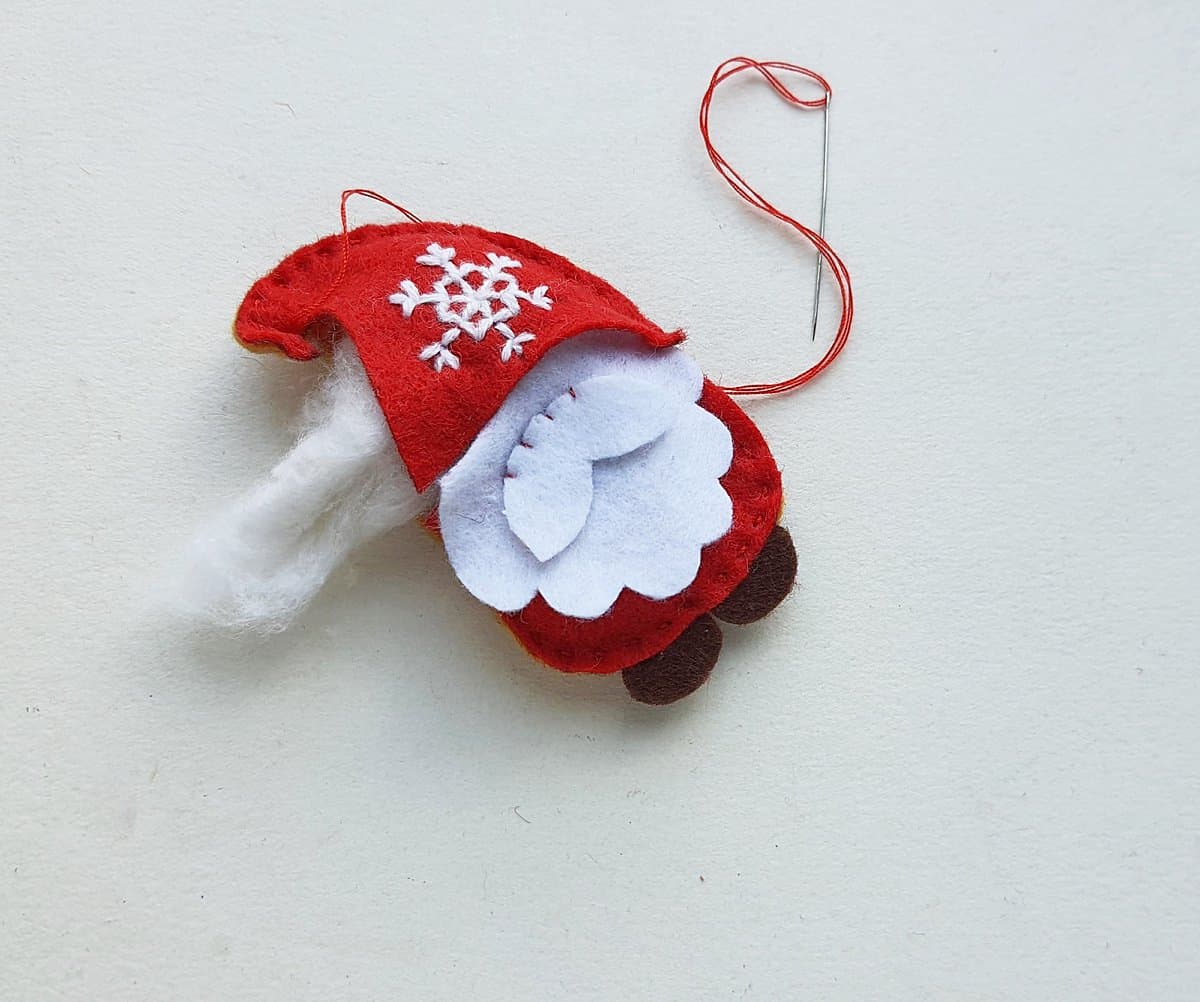
After stuffing the felt gnome pattern, stitch the open area closed.
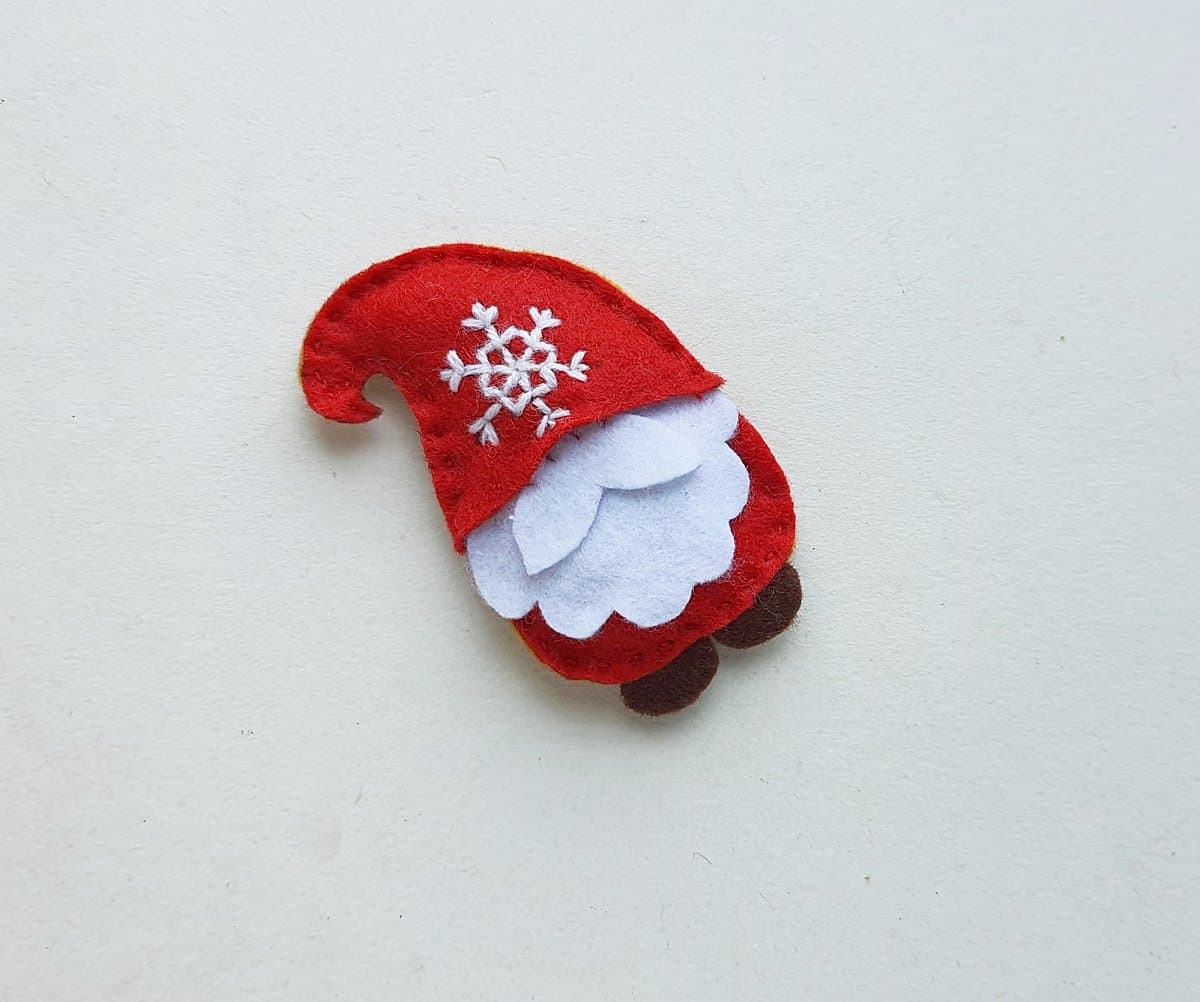
Cut a small wooden bead in half and use fabric glue to attach a half cut-bead in place to be the gnome’s nose.
Use glue to close the bottomof the hat (or you can stitch it closed).

Cut out a small piece of ribbon and form a loop with it.
Attach the ribbon loop with fabric glue, or a small stitch on the back of the felt gnome to make it an ornament.

Now that you’ve created this fun Christmas gnome, be sure to check out this other adorable Santa gnome and free template!


Such a cute gnome! How did u cut the wooden bead nose in half? Thanks!
You can use a pair of wire clippers, a sturdy knife or even a pair of sharp scissors. I find the wire clipper method to be easiest.
You could also use a small pompom
Yes, that would be adorable too!
I think you can buy ‘half beads’ at Michaels. They come in a small bag.
Thats good to know! Thanks!
Yo hice la nariz recortado un círculo de fieltro del tamaño de una moneda y la rellené, quedó excelente.
Super cute – and great instructions. Thanks for the inspiration!
You are welcome! I hope you enjoy making your gnomes!
Love this!! Will be starting on them soon for Christmas gifts!!
I’m so glad you love it!
Thank you for your ideas. I made these but used white thread around the hat for an accent. Then added a tiny gold jingle bell at the end of the hat. They’ll make cute package embellishments or tree decorations. Could put a pocket on the back and make silverware holders.
Looking forward to many more ideas for Christmas or everyday gifts/decorations.
Cynthia
Wonderful Cynthia. I’m so glad you enjoyed making them!
Oh my gosh these are so cute!! My nieces will be here over thanksgiving, this is a perfect craft to do together! Thank you so much for making the template so readily available, can’t wait to make some adorable Christmas gnomes!
Have fun with your nieces!
I subscribed but made a mistake in my email address. Can it be corrected?
Simply fill out the form again with your correct email address.
How did you cut the beads – what did you use to cut them with?
Thanks. I am looking forward to making a lot of these for family gifts this year.
We simply used a sharp pair of scissors. A knife on a cutting board will also work. I’ve also had some readers switch out the nose bead for a pom pom or even a tiny button, if they didn’t want to cut a bead. Enjoy!
Está hermoso, lo hare
Wat zijn dit leuke ideetjes,ga ze maken met m’n kleinkinderen
What lovely clear instructions. Have downloaded and will be making these for grandchildren. Thank you for your generosity in sharing. From New Zealand.
I’m so glad you enjoyed them!
I can’t find where to download the pattern. I found a lot of other downloads, but not for that.
The form to get the download is directly below the supply list.