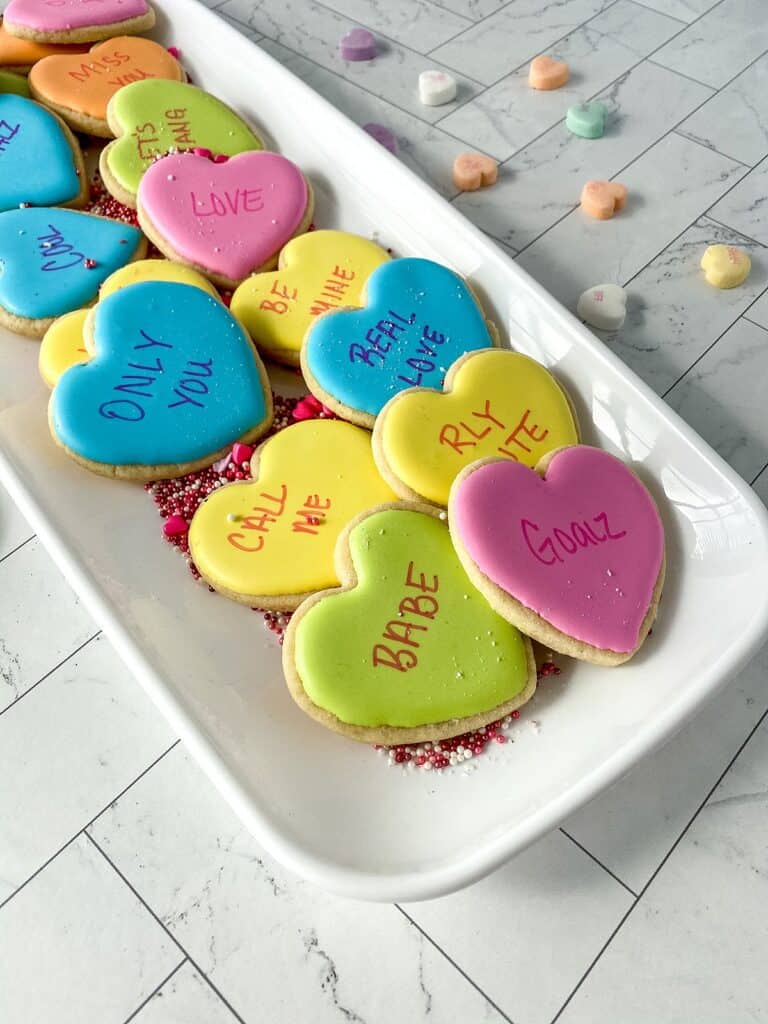
How to Make Sugar Cookie Conversation Hearts
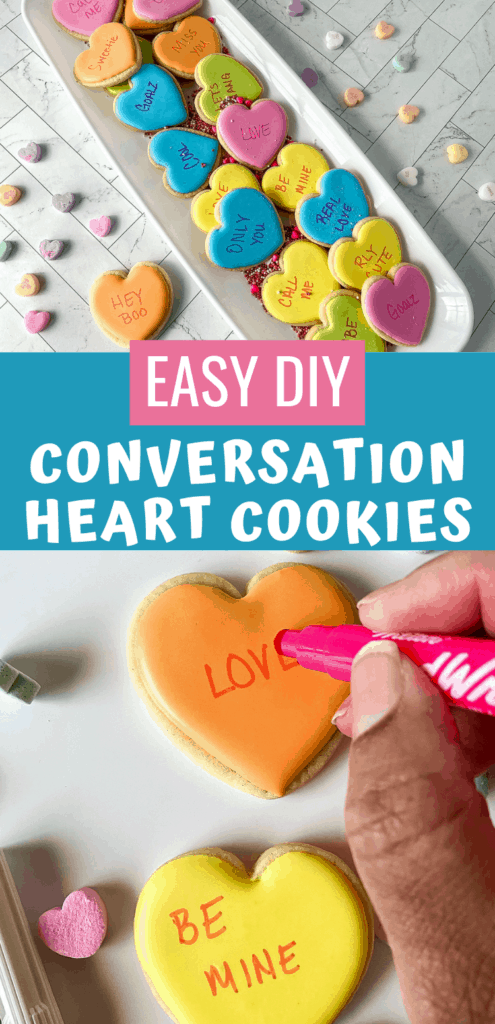
It wouldn’t be Valentine’s Day without conversation hearts! Those adorable little candies with cute sayings like “Be Mine” and “BFF” always bring back childhood Valentine’s Day memories. I never really liked the taste of those candies though, the box of conversation heart candies always ended up in the trash, uneaten, after Valentine’s Day.
This year, we are skipping the conversation heart candy in favor of creating our own Conversation Hearts. Except ours will be made from delicious sugar cookies!
We are a participant in the Amazon Services LLC Associates Program, an affiliate advertising program designed to provide a means for us to earn fees by linking to Amazon.com and affiliated sites.
How to make DIY Conversation Hearts
First you’ll need baked, heart shaped sugar cookies. Use your favorite sugar cookie recipe for the dough. Or, take the easy route (like me!) and buy a tube of sugar cookie dough from the grocery store.
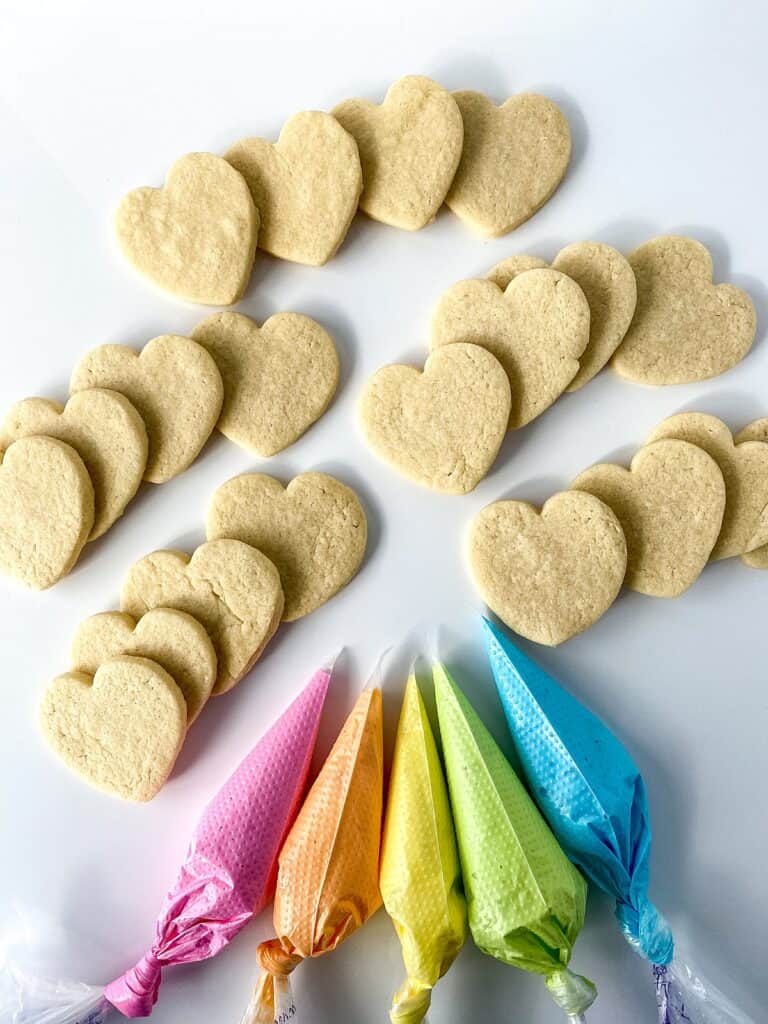
Roll out the dough and cut the cookies into heart shapes with cookie cutters. You can use a variety of heart shapes and sizes, but I find that 2.5 to 3 inch hearts work best.
Gather the rest of your supplies and make the icing while the heart shaped sugar cookies bake and cool. You’ll need scissors and a toothpick or skewer while icing the cookies.
To ice the sugar cookies you’ll need Royal Icing. You can make your own, but we are trying to keep this as easy as possible, right!? I recommend Wilton Royal Icing Mix for icing these conversation heart cookies.
You’ll need gel food coloring to tint the icing. I like this set of vibrant gel colors – it has all the colors you could possibly need for an affordable price.
You’ll also need piping bags for applying the icing to your cookies. You can use any piping bags and tips you have on hand, but if you don’t have icing tips these tipless piping bags work great for icing these cookies without needing to invest in a set of icing tips.
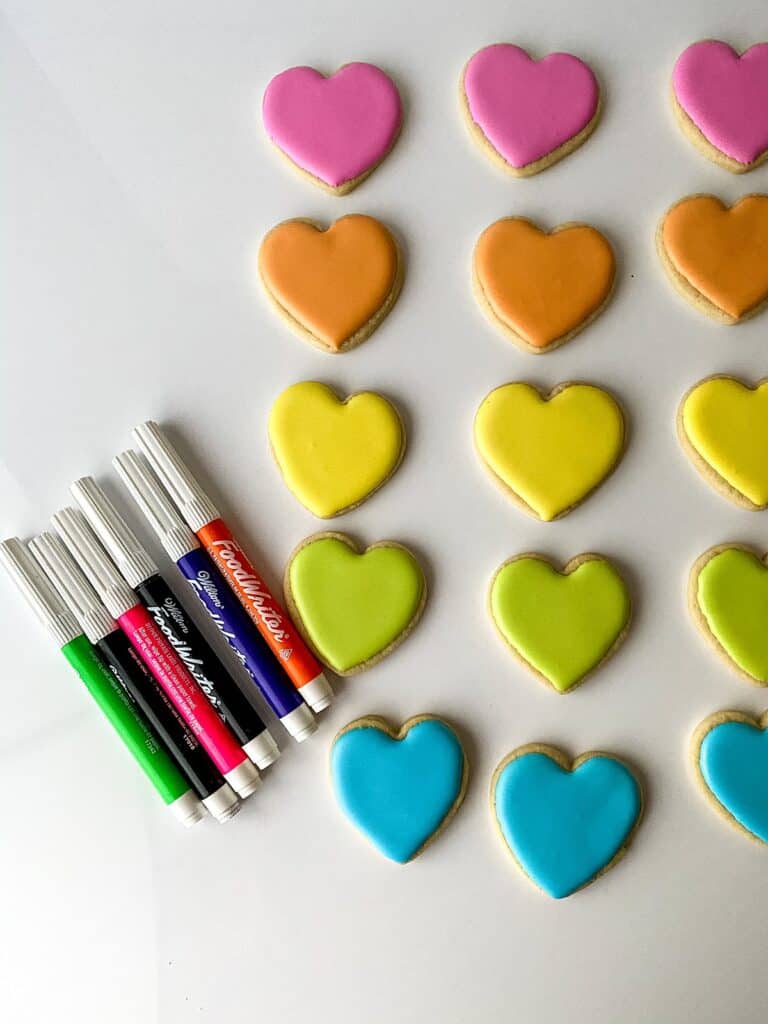
Finally, you’ll want a set of edible markers for adding wording to your conversation heart cookies. These neon food markers from Wilton are my go to food markers.
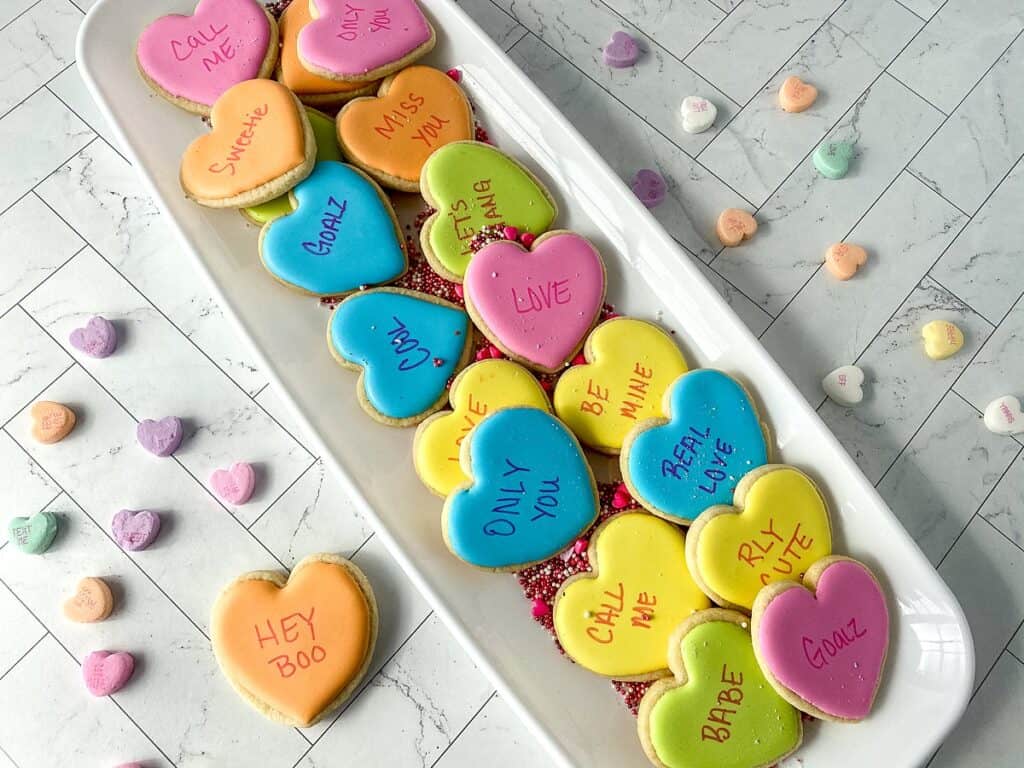
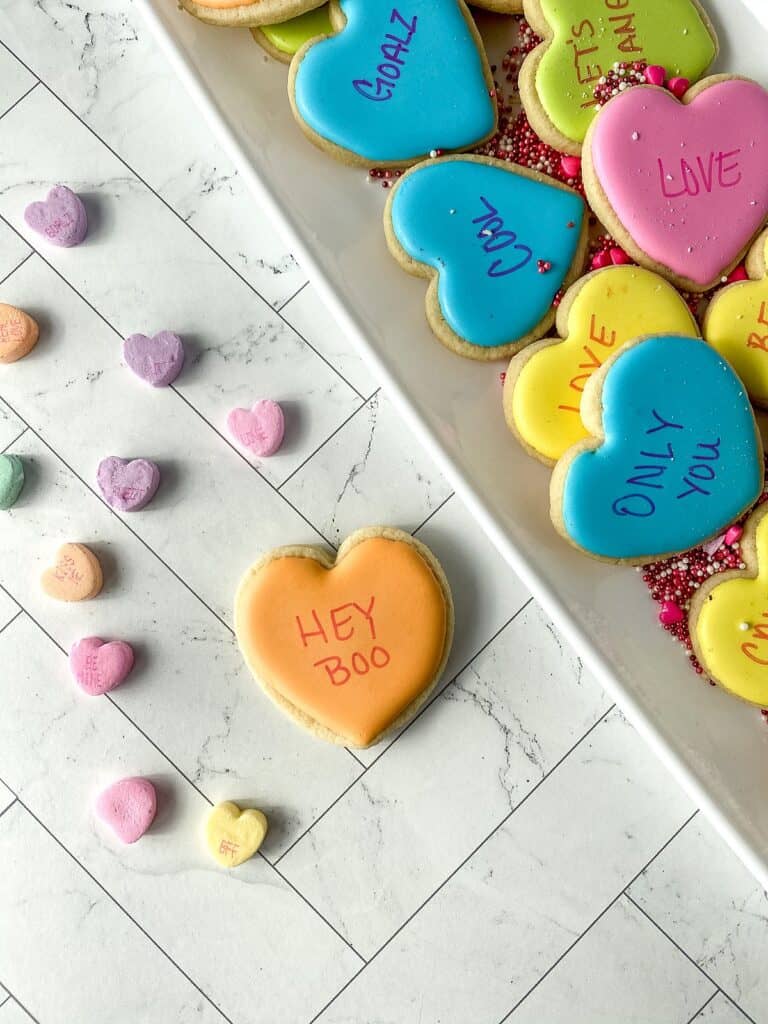
While your cookies are cooling, color your royal icing as many colors as you’d like to use. I chose pink, orange, green, blue, and yellow for my conversation hearts.
You’ll need to lighten your colors up to a pastel by adding some white gel food coloring to each color.
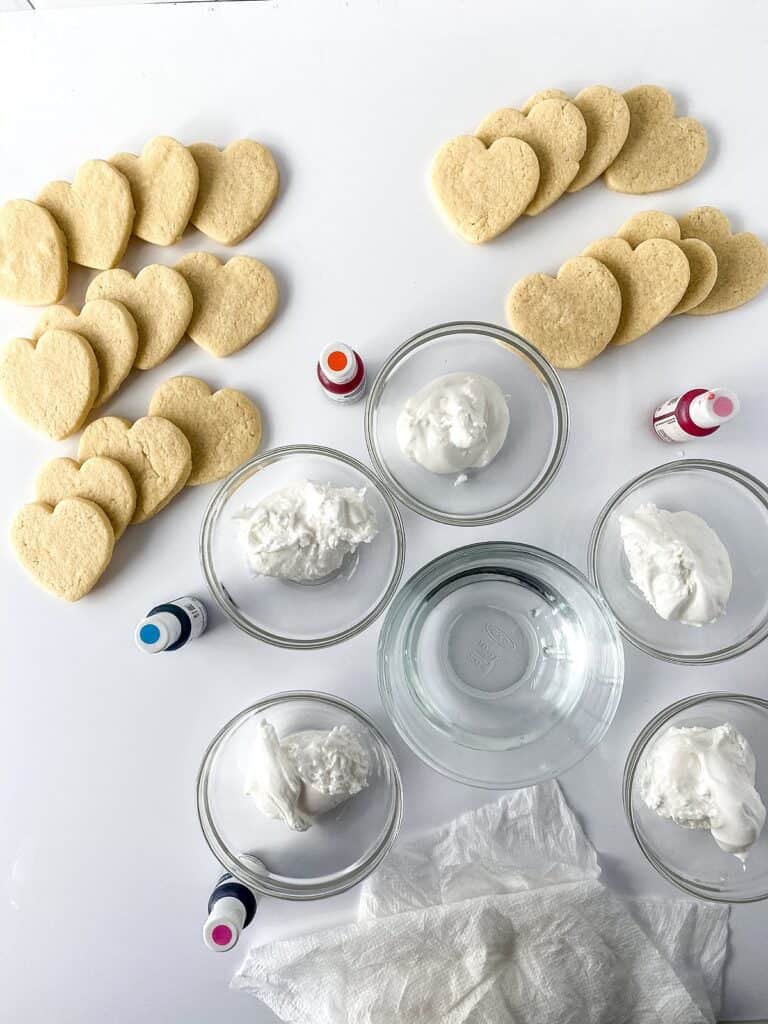
Fill each of the piping bags with its own color and seal the open end of the bag.
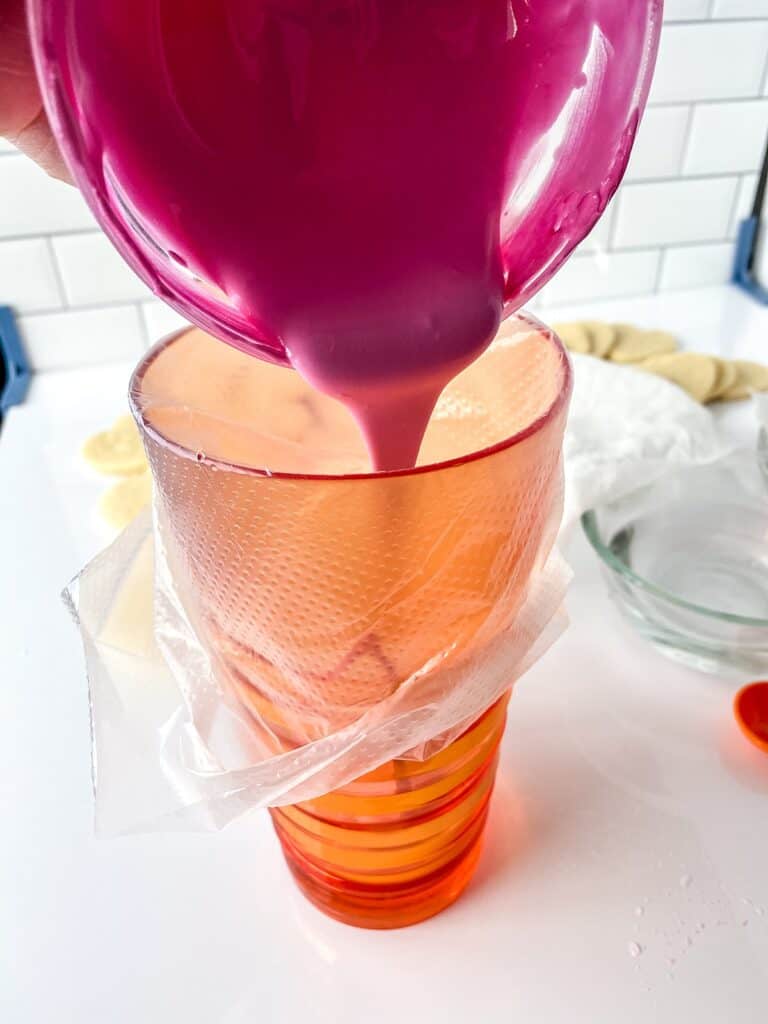
To easily fill your piping bags, use a tall cup and place the piping bag inside of the cup. Fold the edges down around the outside of the cup to create a open area to fill the bag with icing. Remove the bag from the cup and seal it with a knot or rubber band.
Now, assemble your icing bags and cookies.
Cut the tip of each piping bag slightly, and test out how the icing flows out of the bag. Start with a small hole, and gradually make it bigger until you get the desired flow of icing from the bag.

Outline the heart shaped cookie with icing. Next add icing to the center of the cookie. Use the toothpick or skewer to move the icing around on the cookie to flood it with icing.
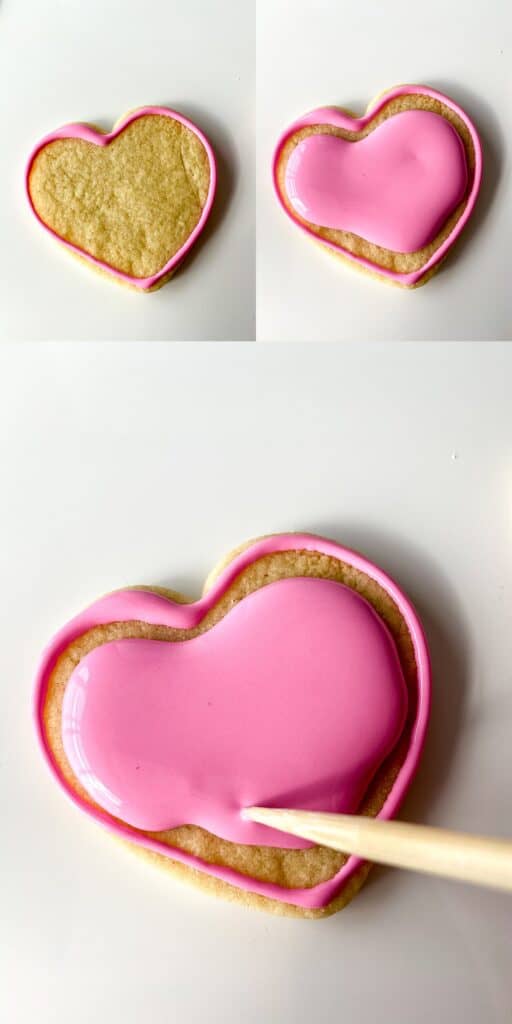
You’ll want the icing to be puffy on the cookie, rather than completely flat.

Place the flooded cookies on a baking sheet to dry. You can place the cookies in front of a fan to speed up the drying process.
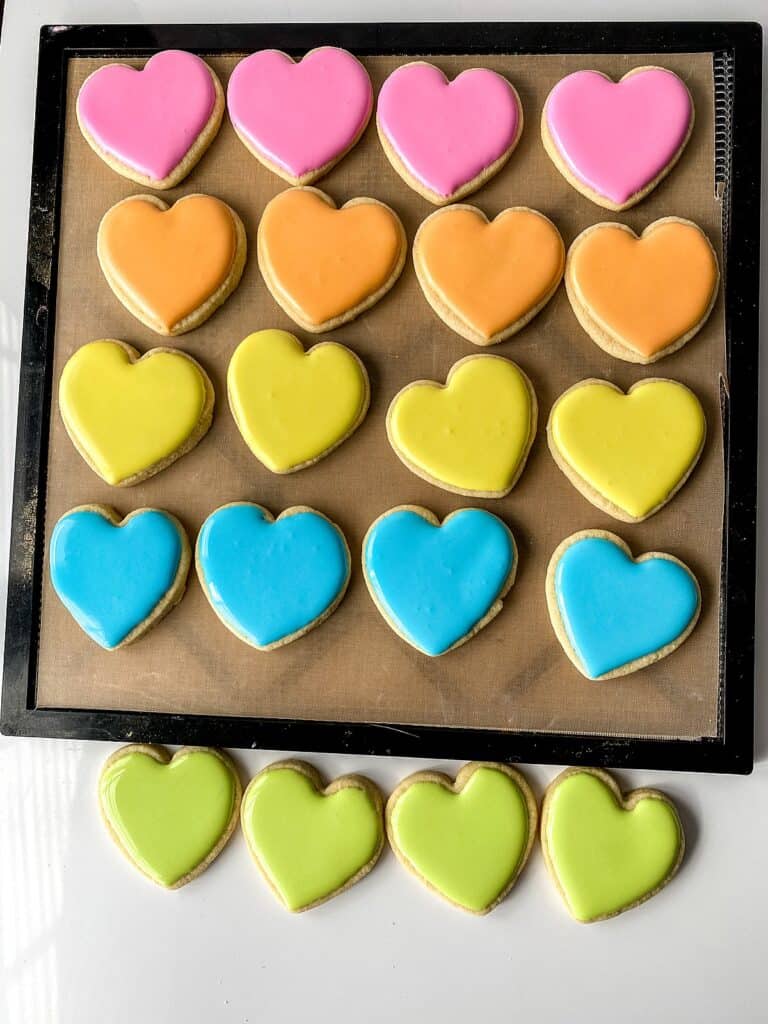
Wait until the cookie icing is hard to the touch before beginning the next step.
Use the Pink Wilton Food Writers to write your love notes onto the cookies. The pink is the closest to mimicking the actual Conversation Heart cookies, but any color writer will work.
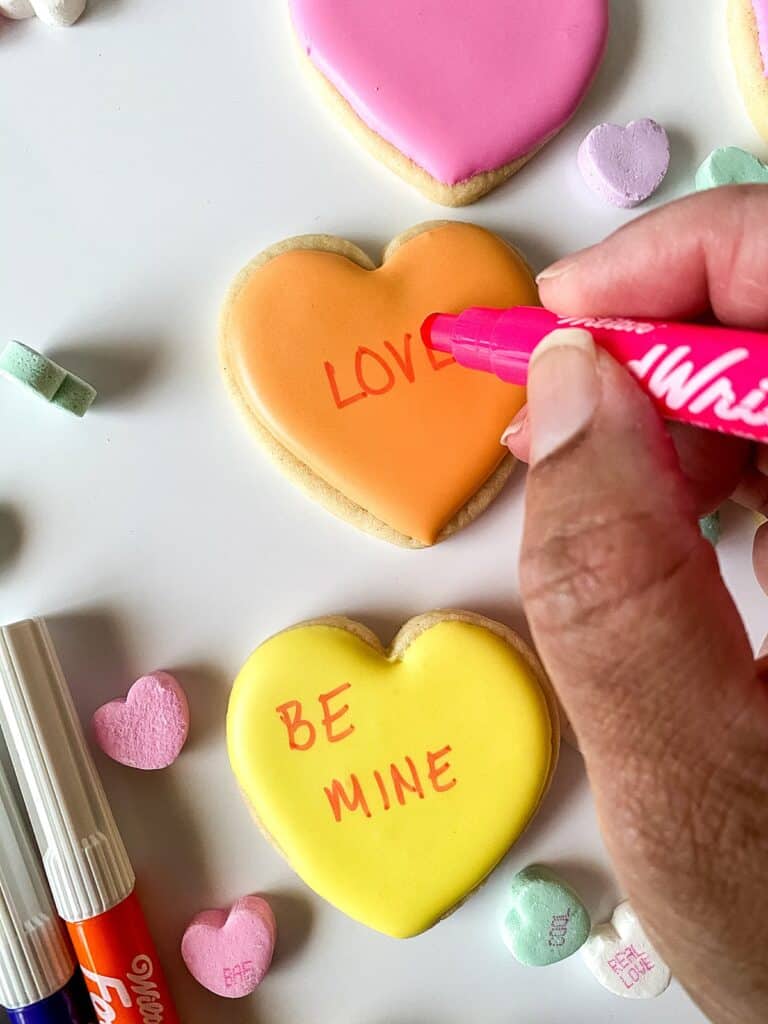
*Edible food markers will dry out faster than a regular marker so please keep the tops on when not in use.

Now, you have delicious conversation hearts that you will actually want to eat! Save them all for yourself, or wrap them up and give them to your Valentine!