
DIY Fall Paper Garland
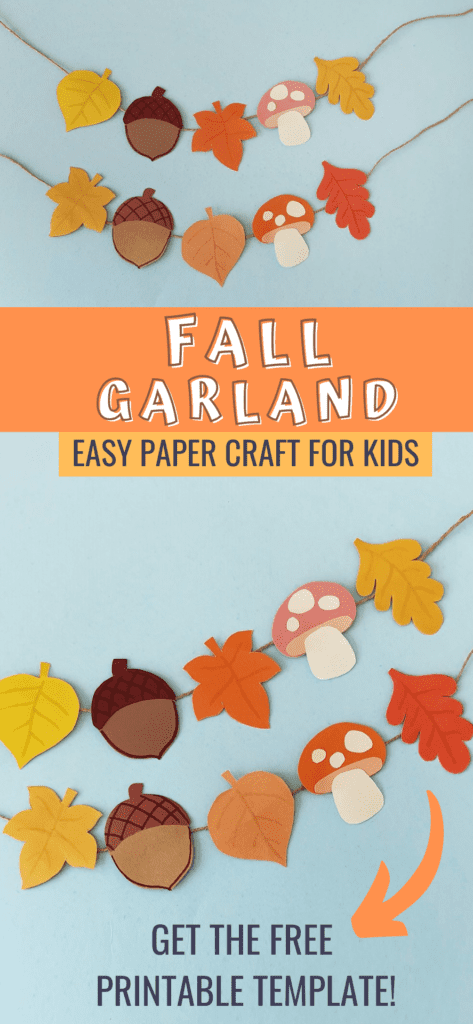
This adorable DIY Fall Paper Garland is a great fall craft for kids of all ages.
Teens will enjoy creating this fun fall craft and decorating their bedroom door or headboard. This DIY Paper Garland is super easy to make, so younger kids will also love making it too!
Simply print out the free template below, and follow the simple step by step instructions to make this fun paper craft for fall. After crafting, use the Fall Garland to decorate your home for the season!
How to make a Paper Fall Garland
List of Supplies:
- Colored craft papers
- Pencil – to trace the template
- Craft glue
- Marker or gel pen
- String
- Template
Instructions:
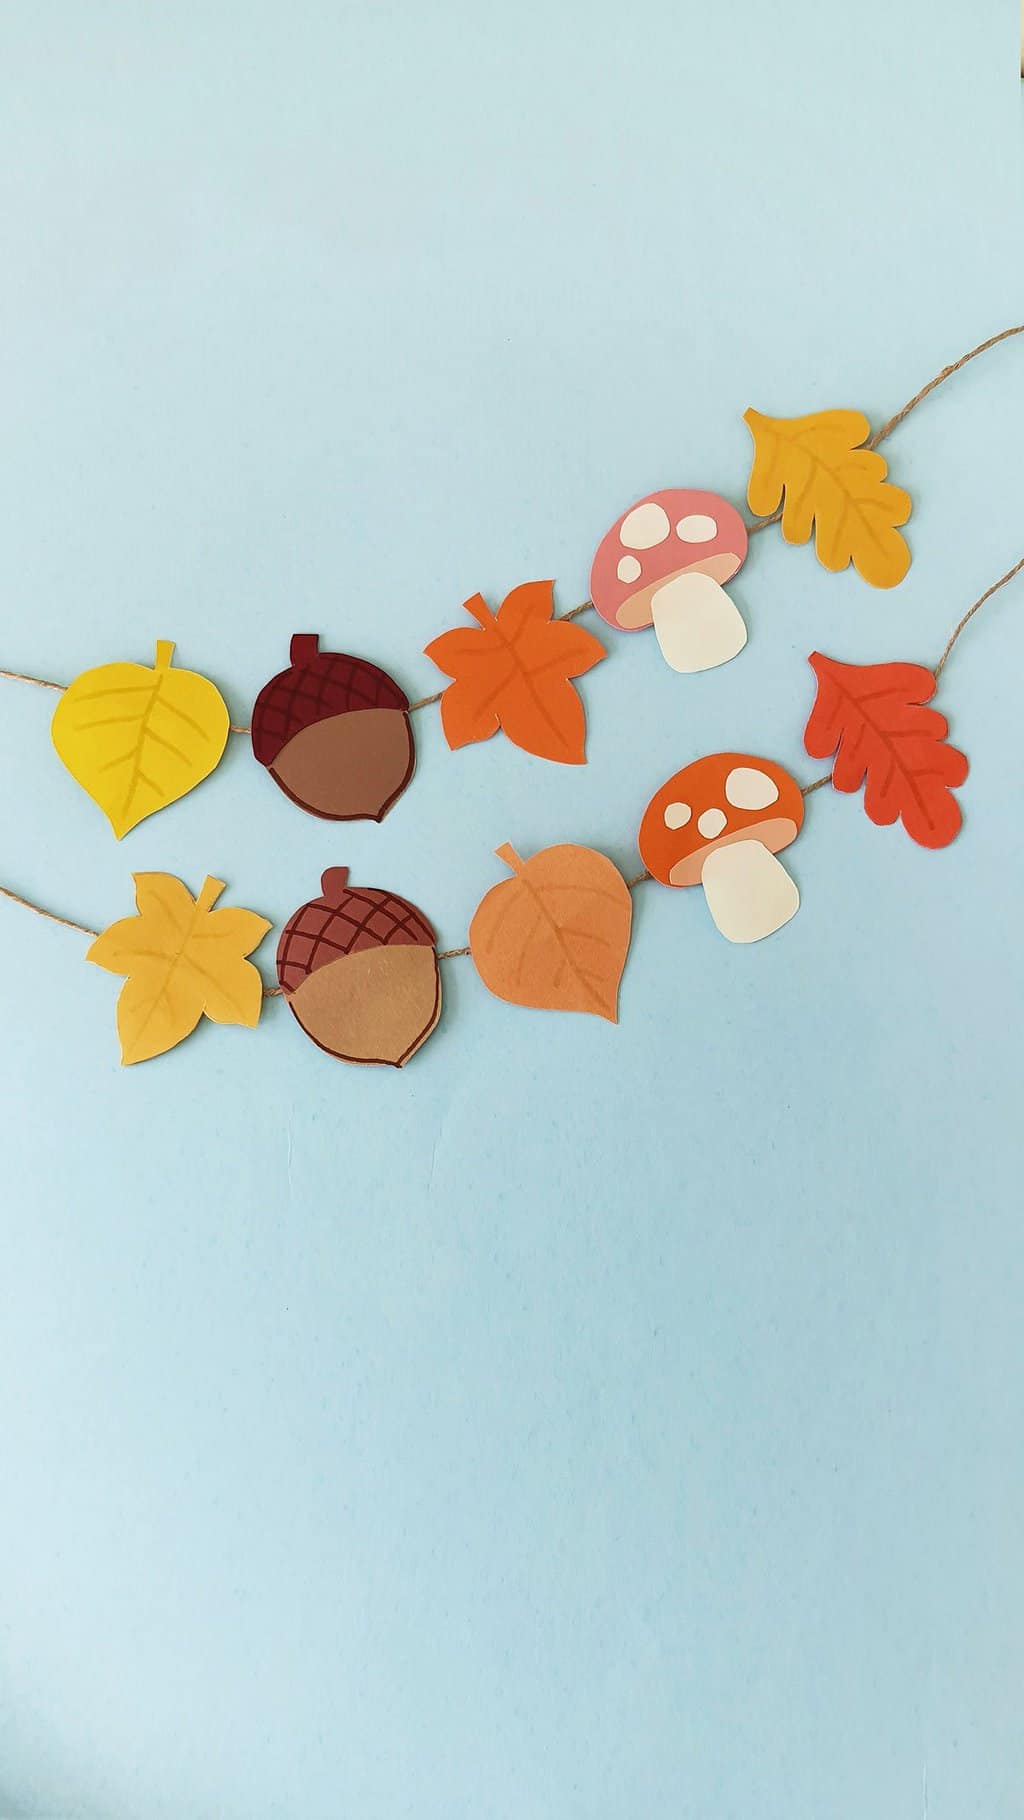
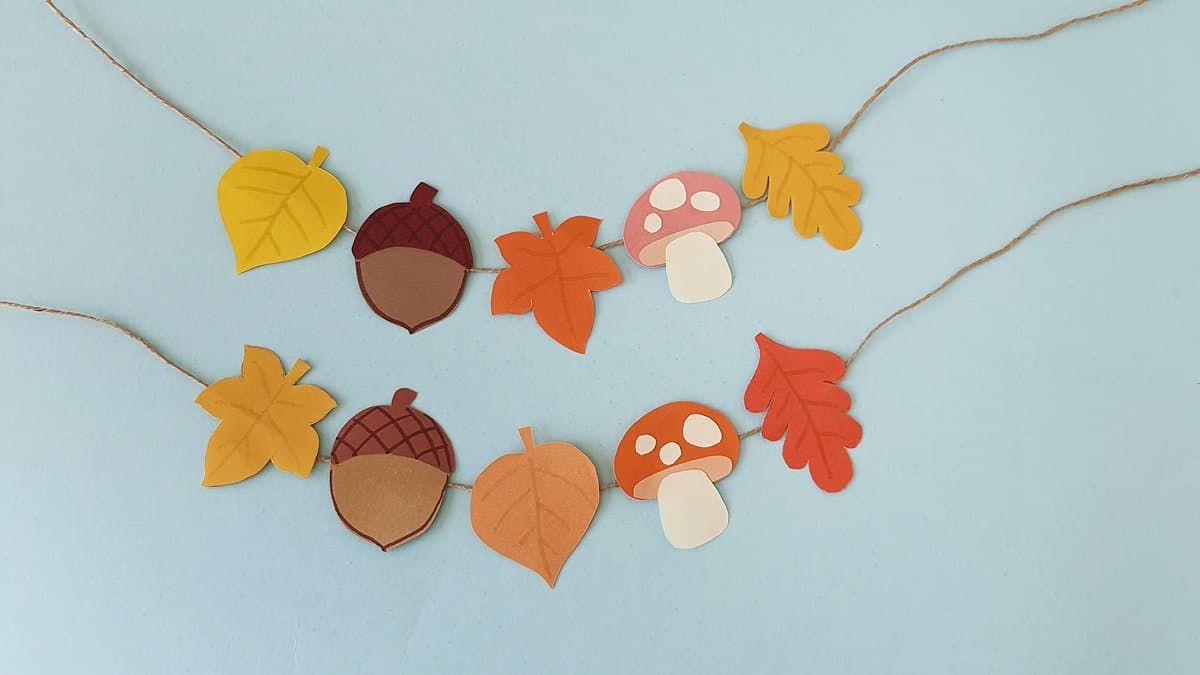
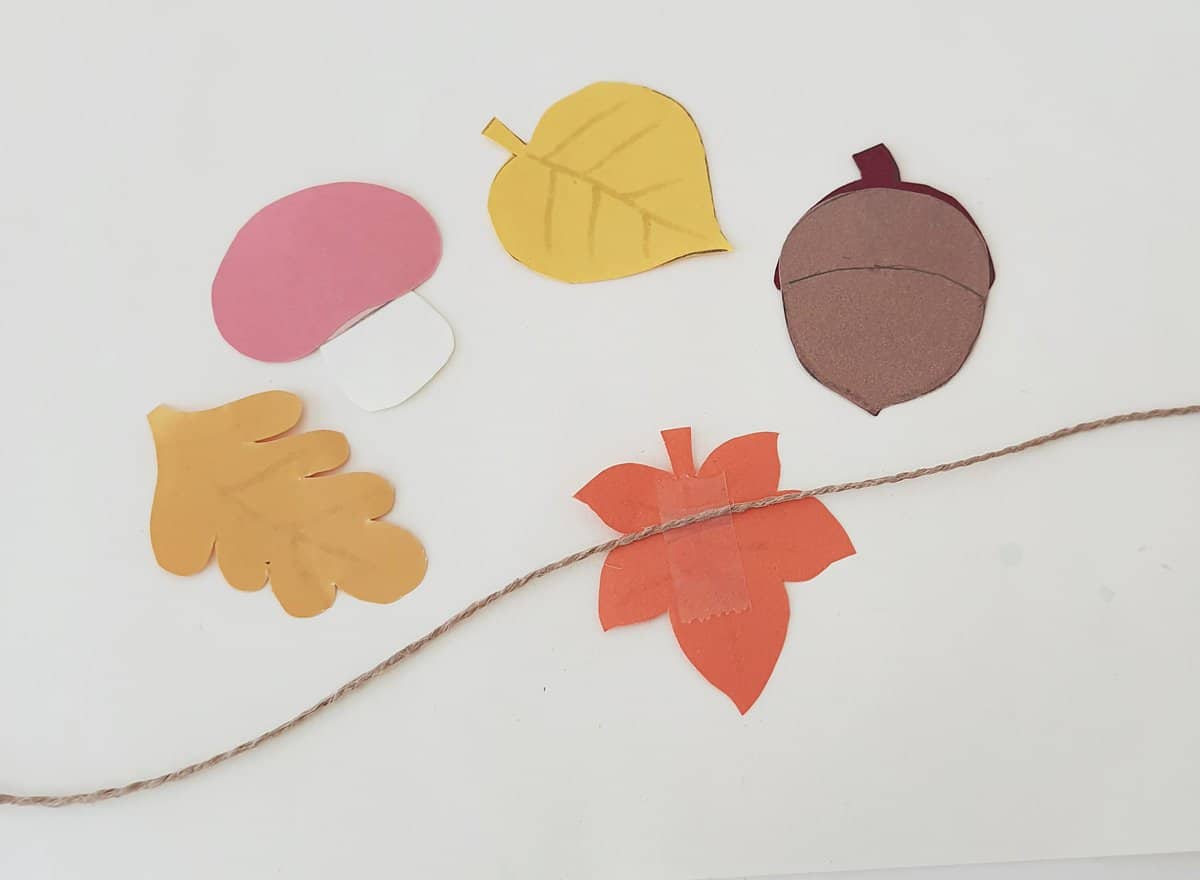
Print out the fall garland template and cut out all of the pattern pieces.
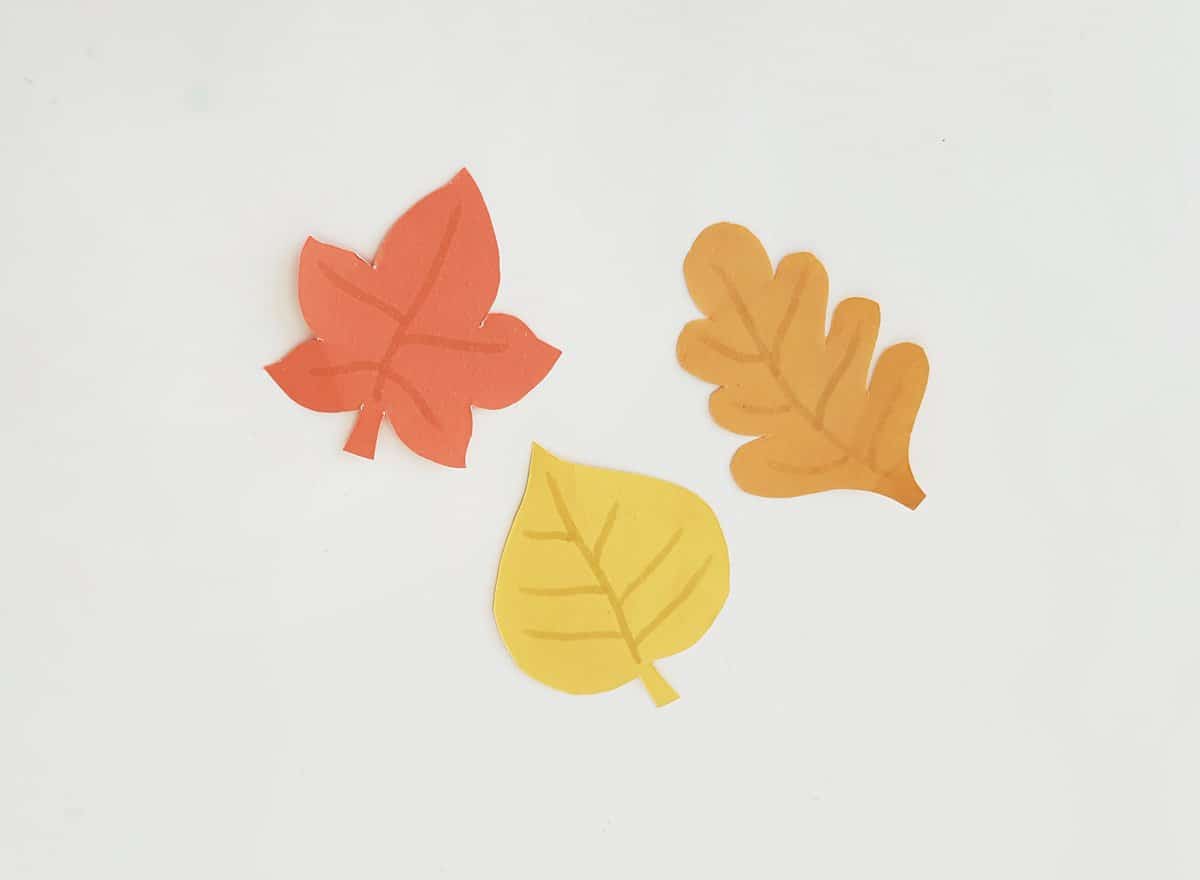
Select fall themed colored craft papers for this garland. The template includes fall leaves, acorn and mushrooms. Trace and cut out the patterns nicely.
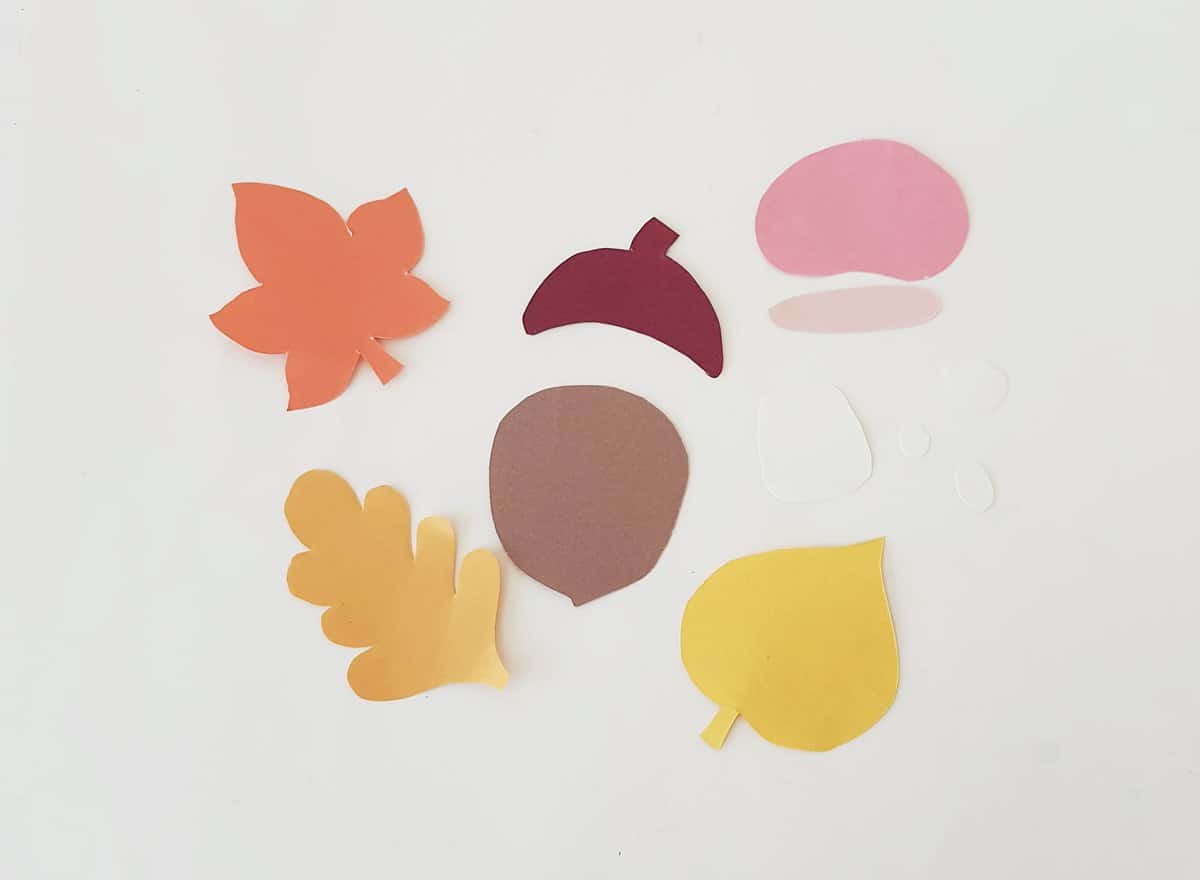
Glue the large oval and smaller spots onto the mushroom cap.
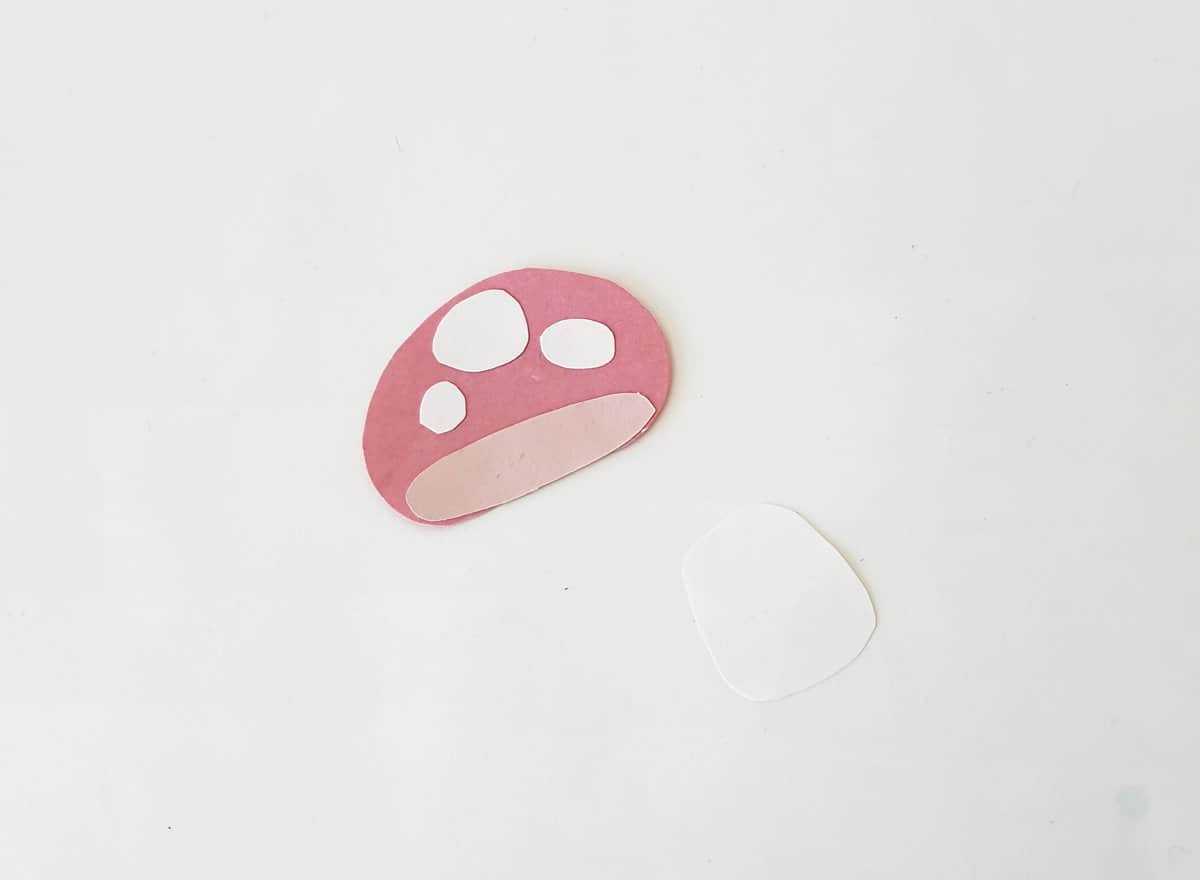
Glue the mushroom stem onto the mushroom cap.

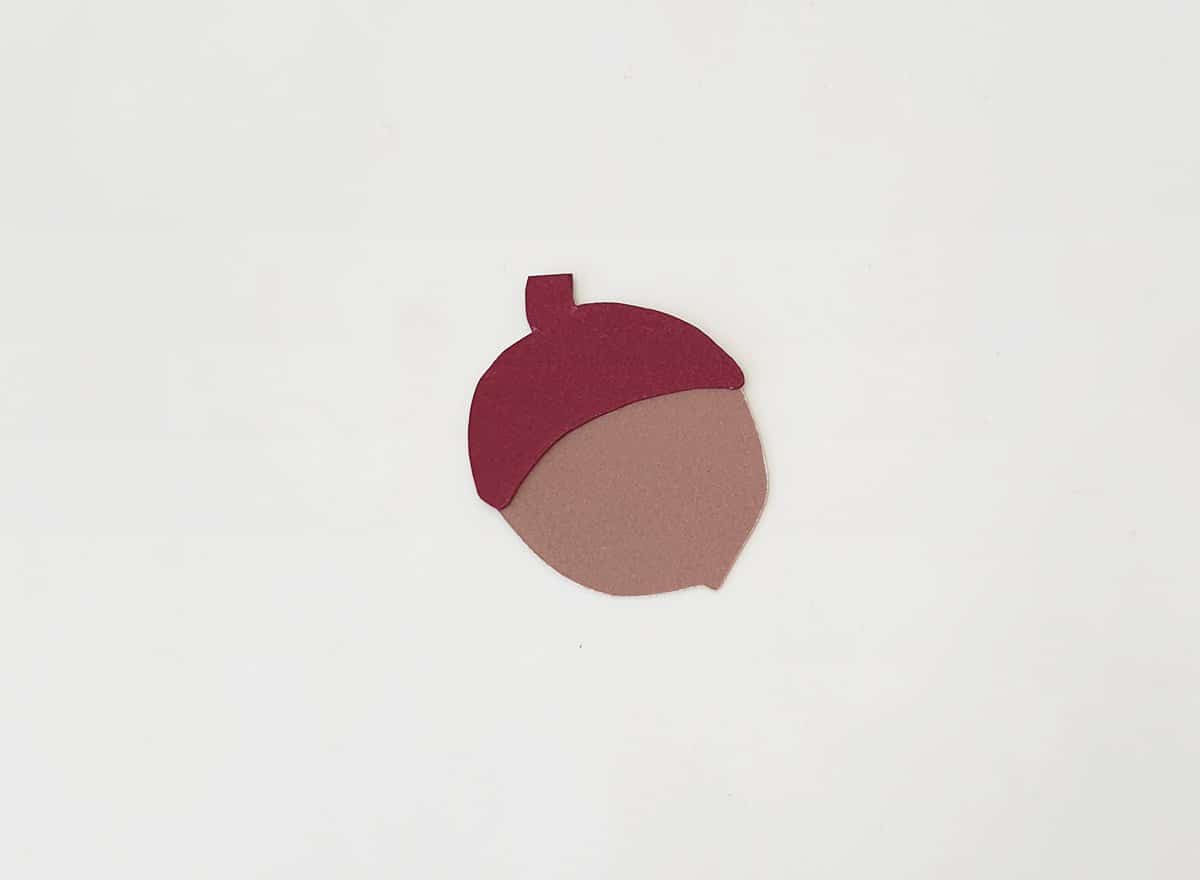
Glue the acorn cap onto the other acorn piece.
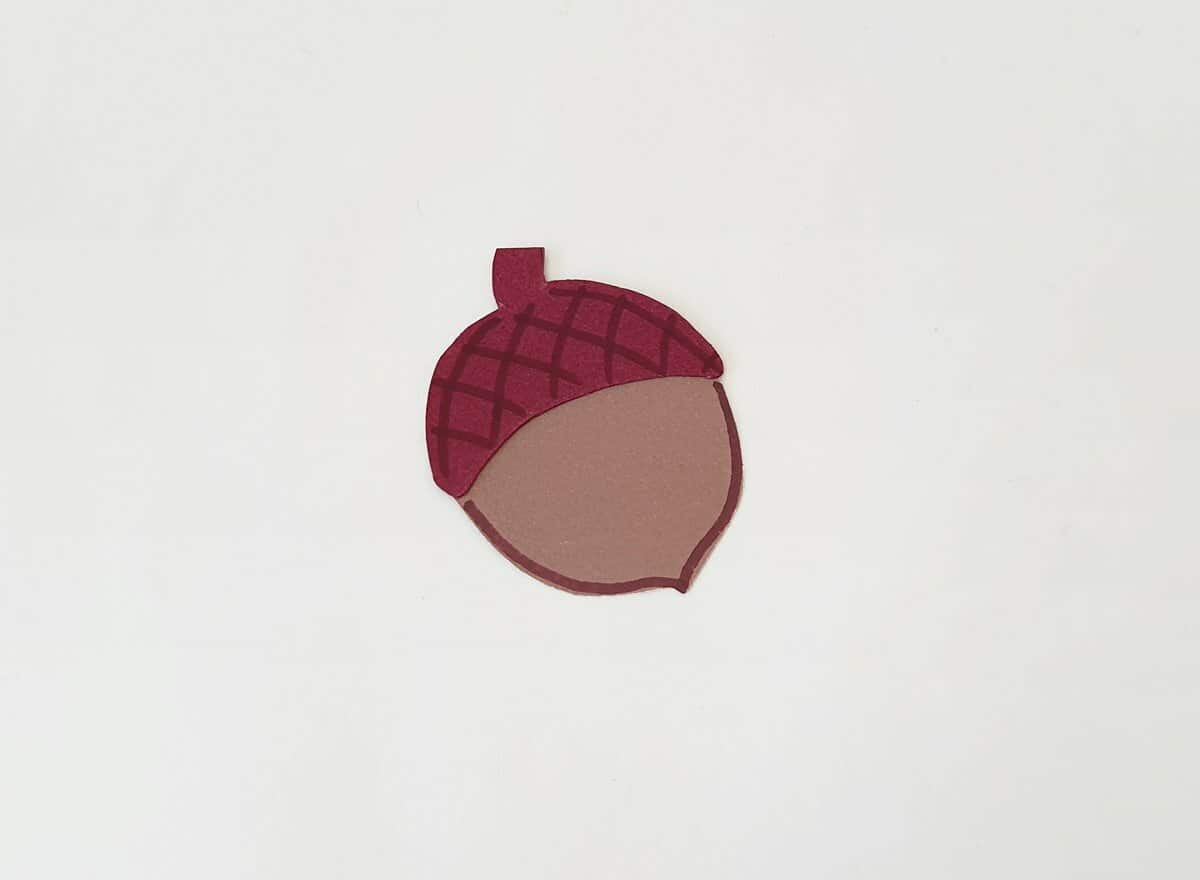
Use a maker to draw checkered pattern on the top cap of the acorn piece.
Use matching markers to trace veins on to the fall leaf cutouts.
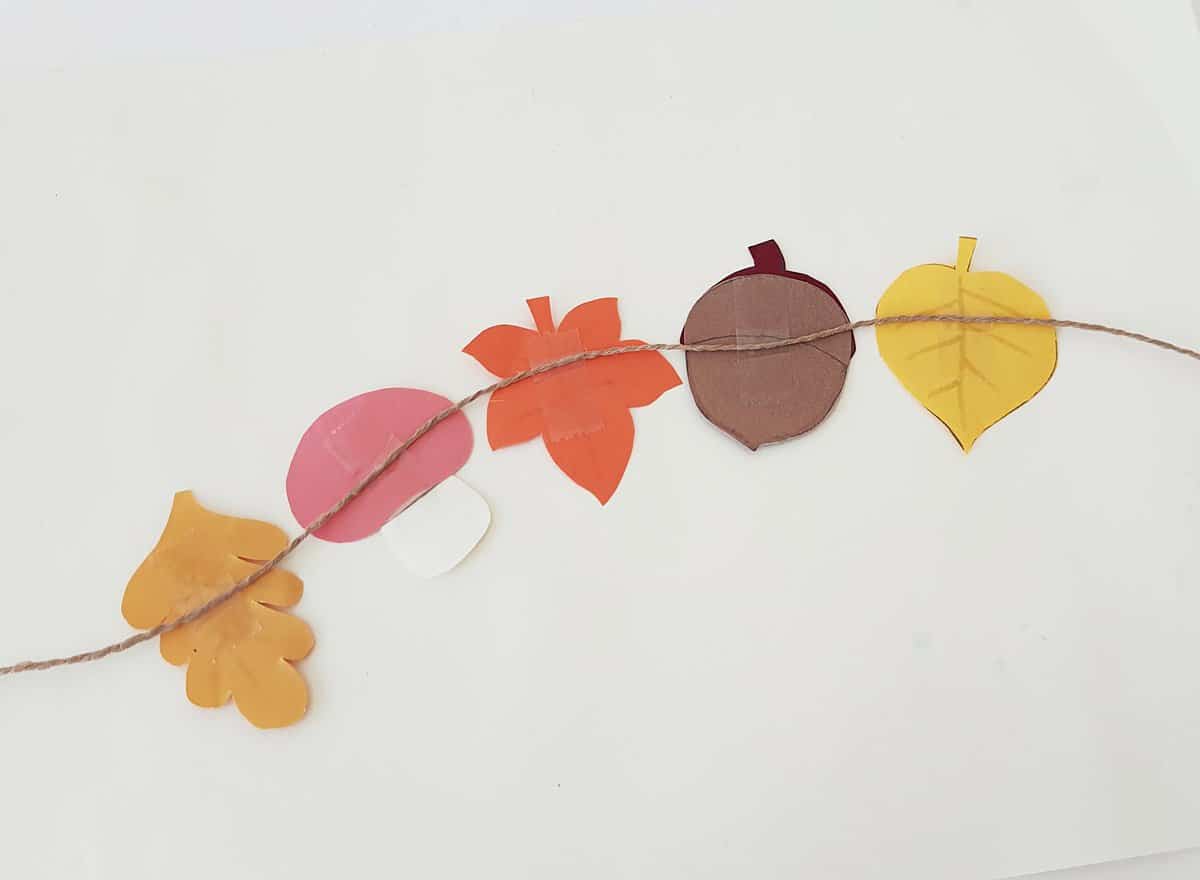
Select a long piece of string to hang with fall paper pieces on.

Attach the fall paper items on the string using craft glue or clear scotch tape.
Continue glueing or taping the paper fall items to the string until all pieces are attached.
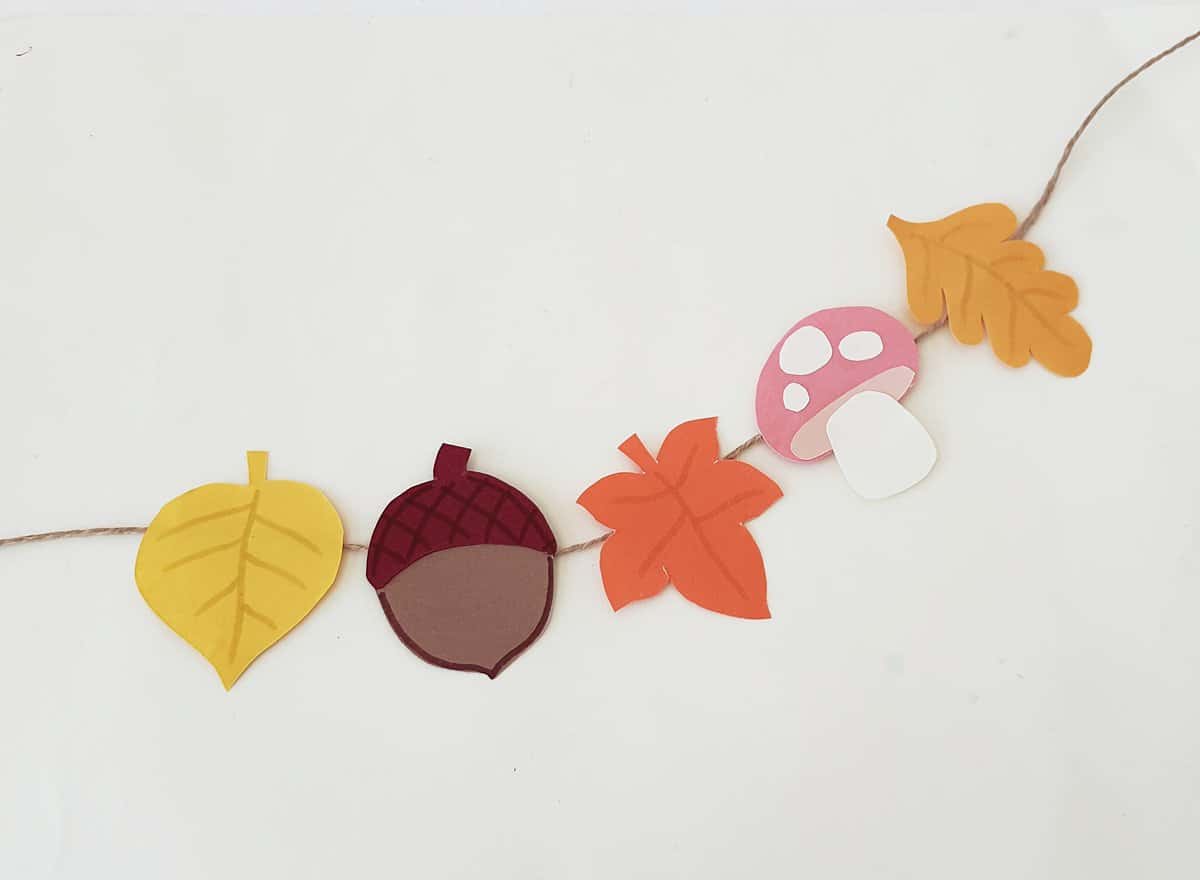
Once you’re done attaching enough items to the string, carefully flip the garland to the right side. Now hang it on a wall.


This craft is so cute!
I’m gad you love it!
Cute!