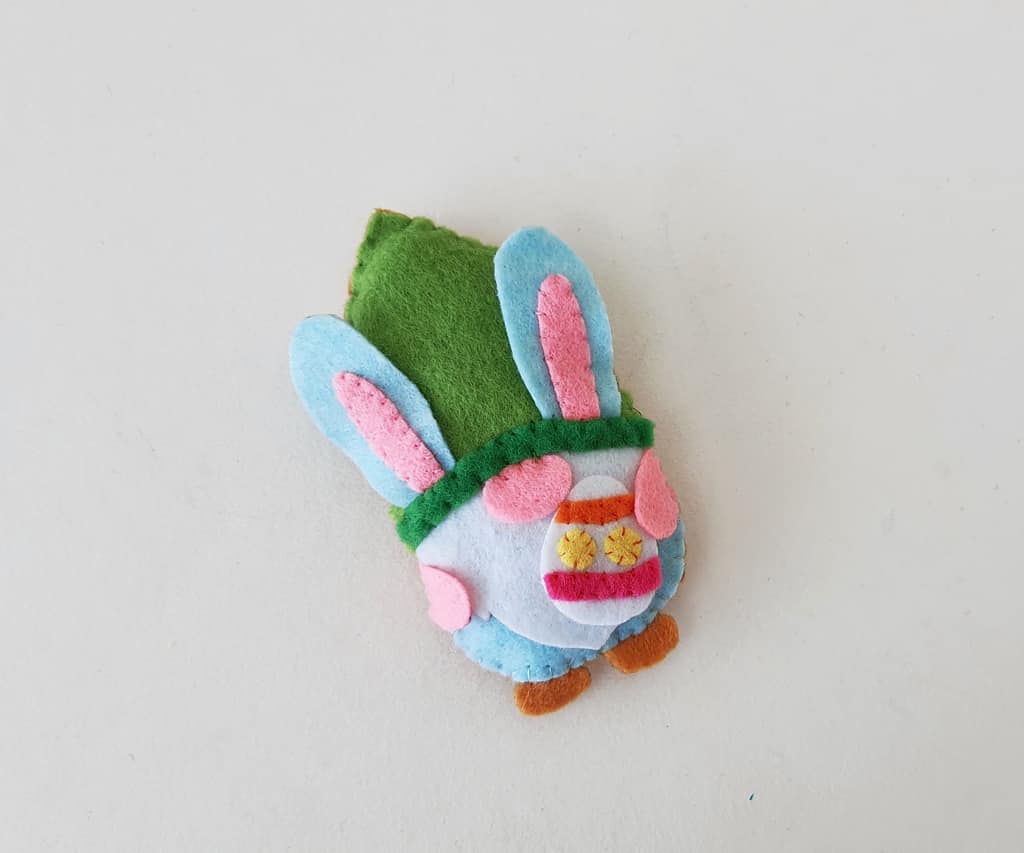
Gnome Easter Bunny Craft
Looking for the cutest Easter Bunny Gnome craft ever? This DIY felt Gnome craft is an adorable craft for Easter!
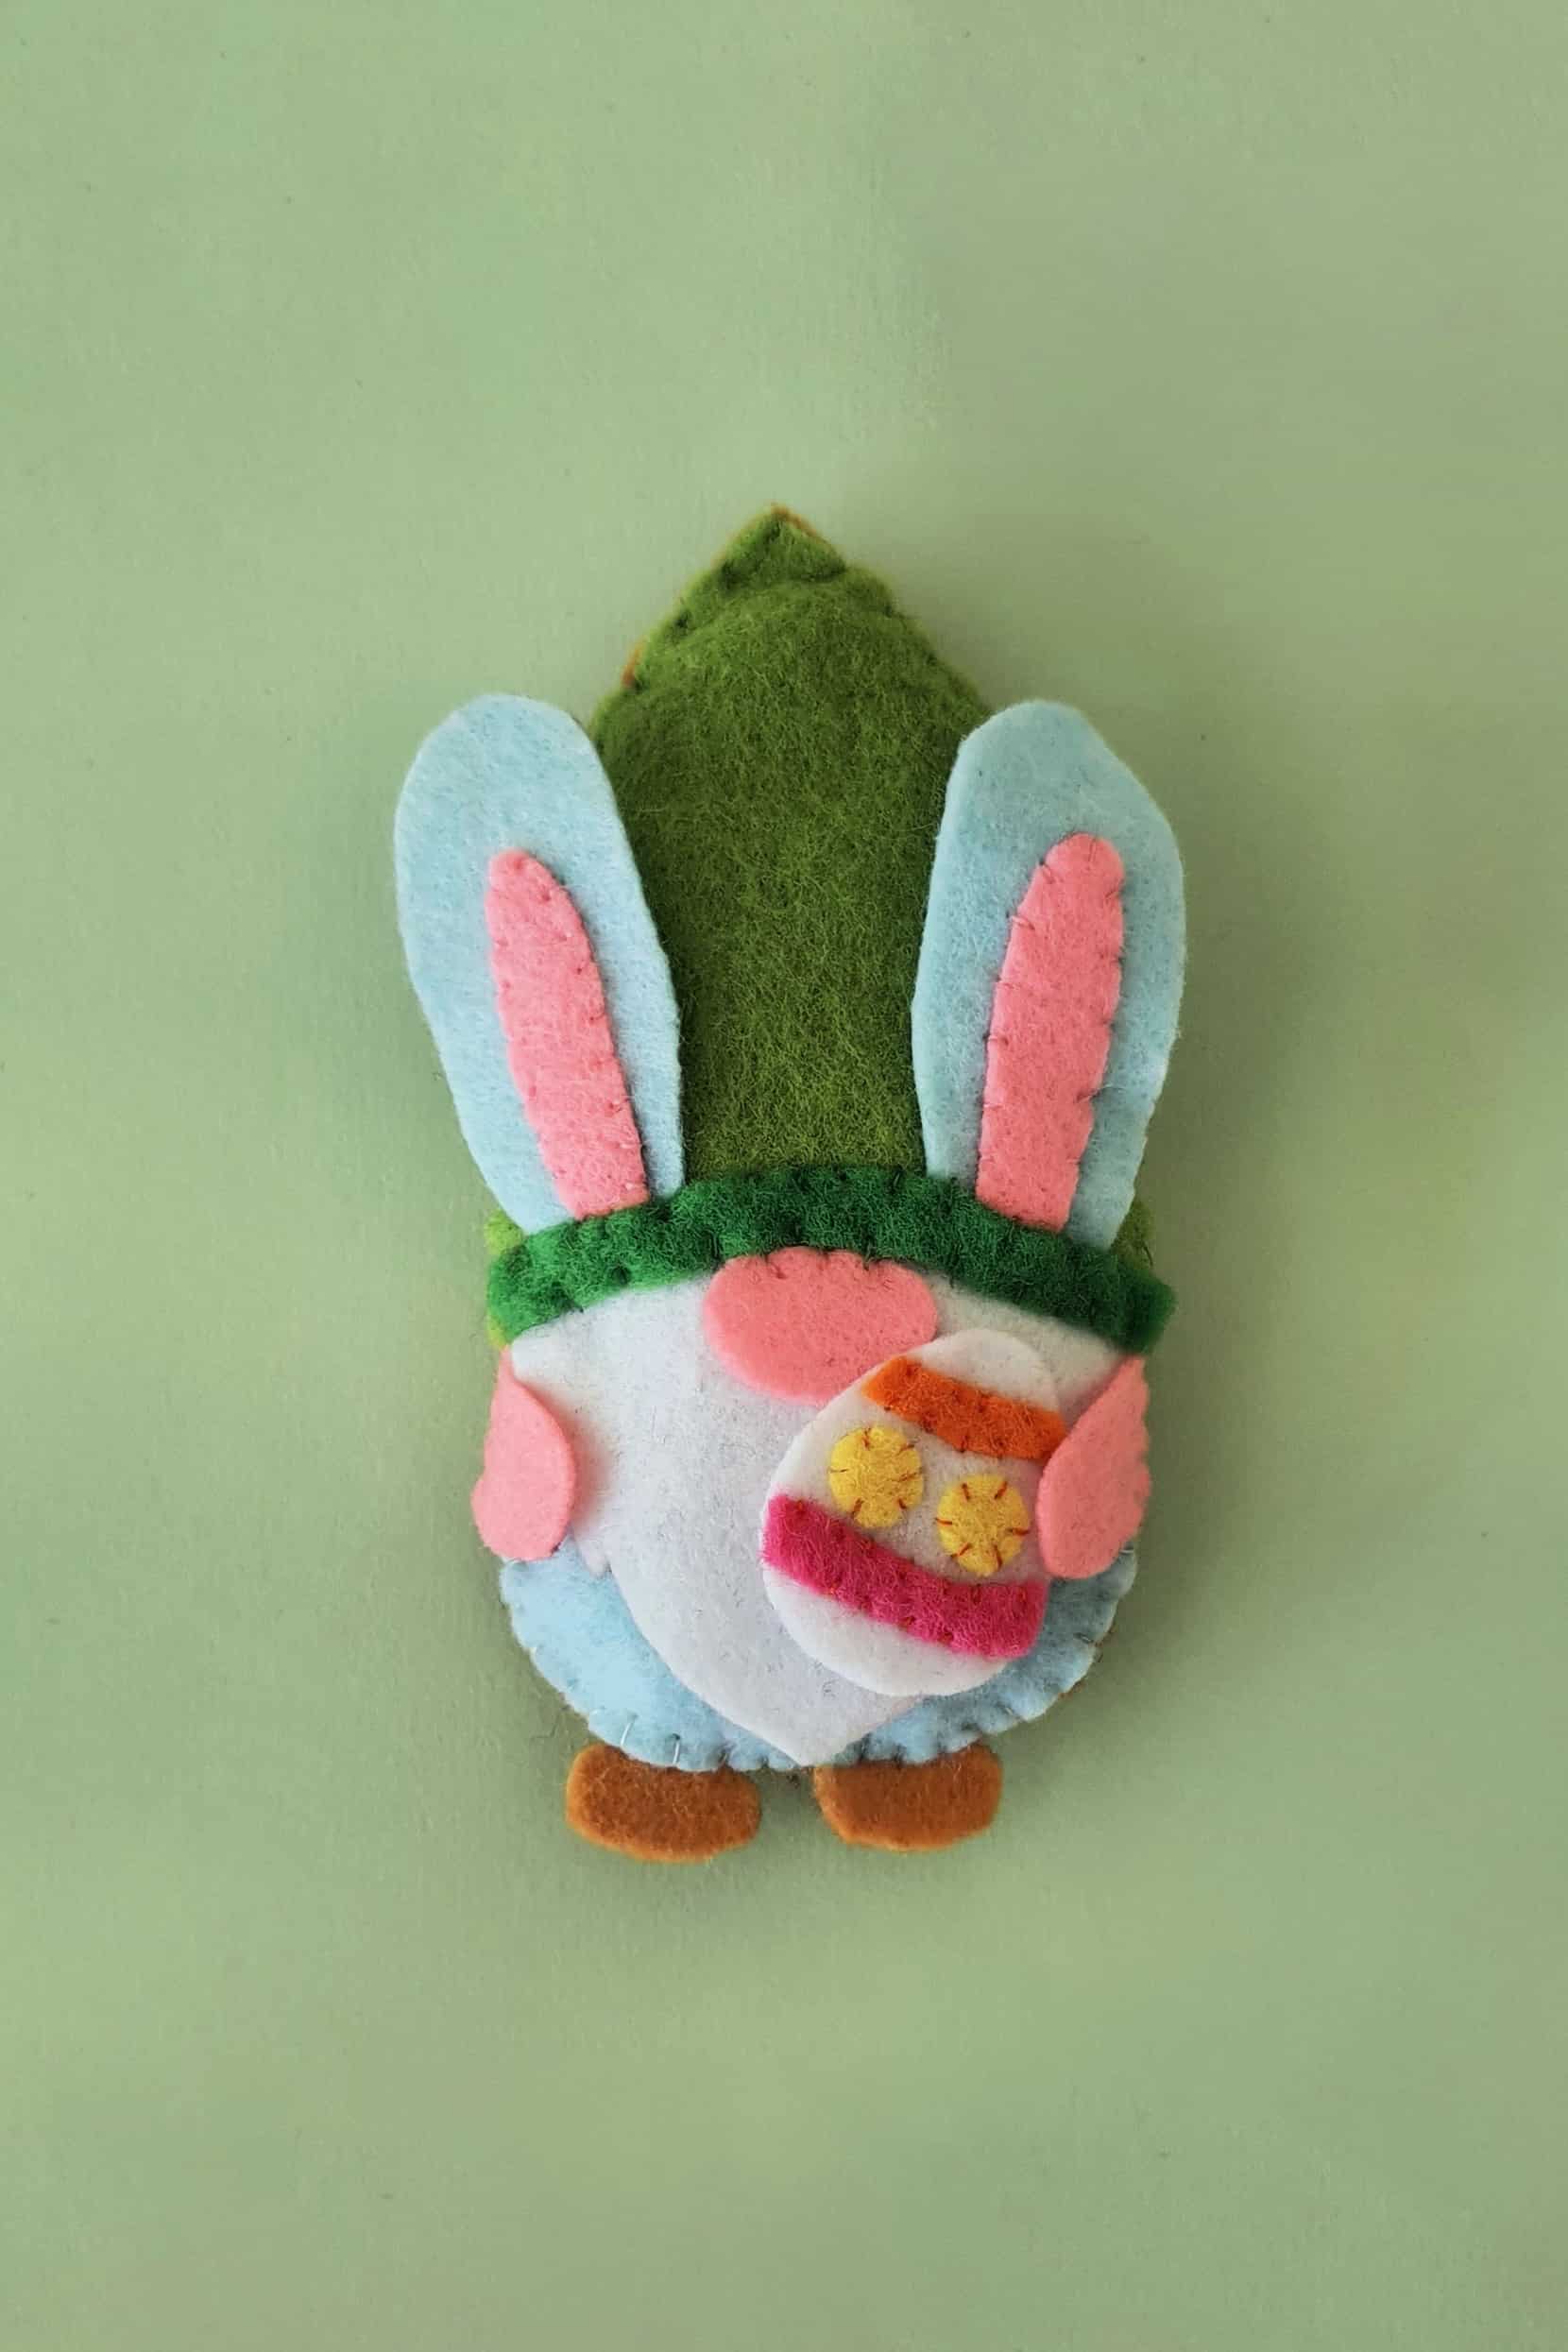
This adorable Easter Bunny gnome is the perfect craft for older kids, teens, and adults this spring! With just a few craft supplies and about half an hour and you’ll have an adorable gnome to display all Easter long.
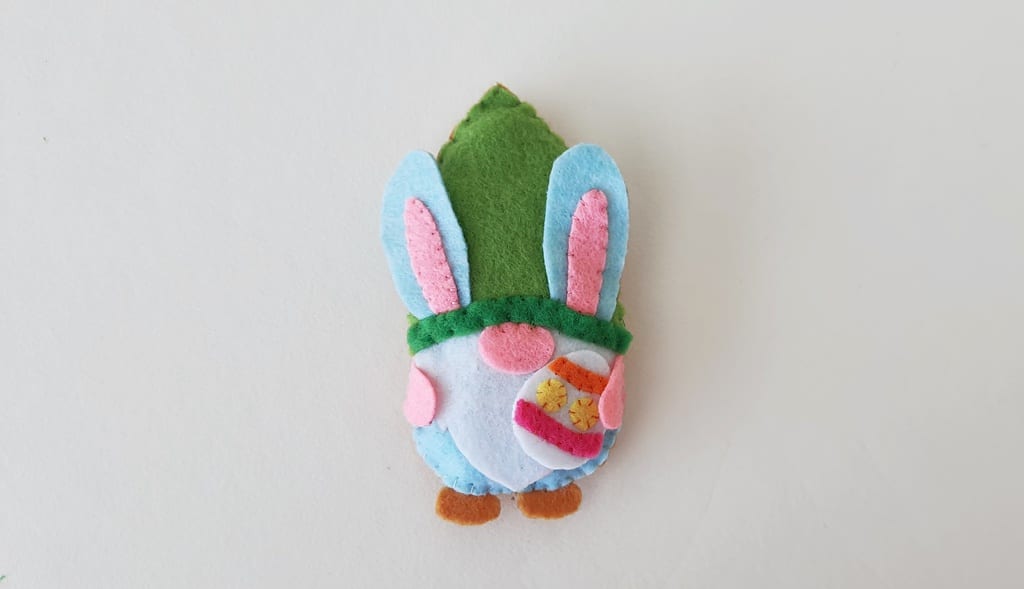
This adorable Easter gnome craft is the perfect addition to your Easter decor. You can simply sit the gnome up in a window sill, or make into a magnet, plant stake, keychain, or ornament.
Simply glue a magnet to the back for an adorable refrigerator magnet. Sew a slender dowl rod or popsicle stick to the back for a plant stake.
To make an ornament make a loop of thread or ribbon and sew it between the layers of the hat as you stitch the gnome together.
Or you could even make it a keychain by sewing a carabiner or key ring to the back.
If you loved creating this cute Easter Bunny Gnome, you’ll want to make this Spring Garden Gnome too!
How to make an Easter Bunny Gnome
List of Supplies:
- Felt Fabrics
- Needle
- Matching threads
- Pencil or fabric maker – to trace the template
- Cotton batting or scrap felt
- A pair of scissors
- Template
Instructions:
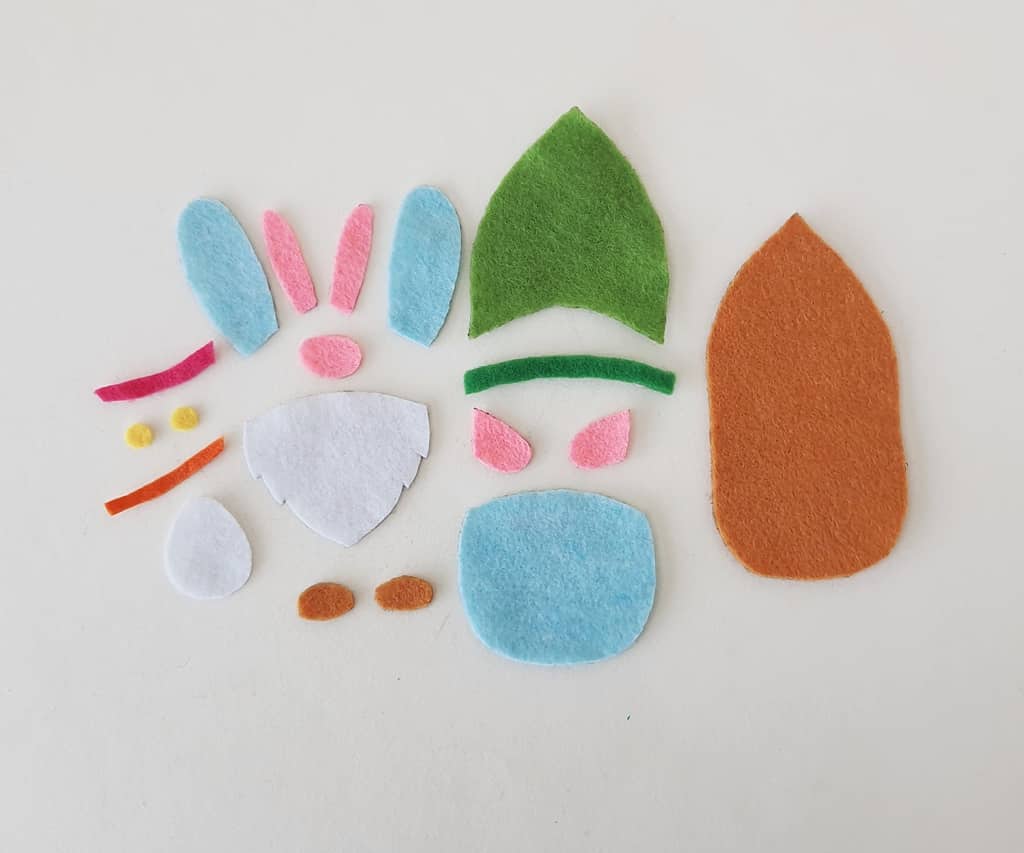
Download and print out the Easter bunny gnome template. Cut the template pieces out.
Select felt fabrics of your choice and trace the patterns on them.
Cut out the traced felt pieces.
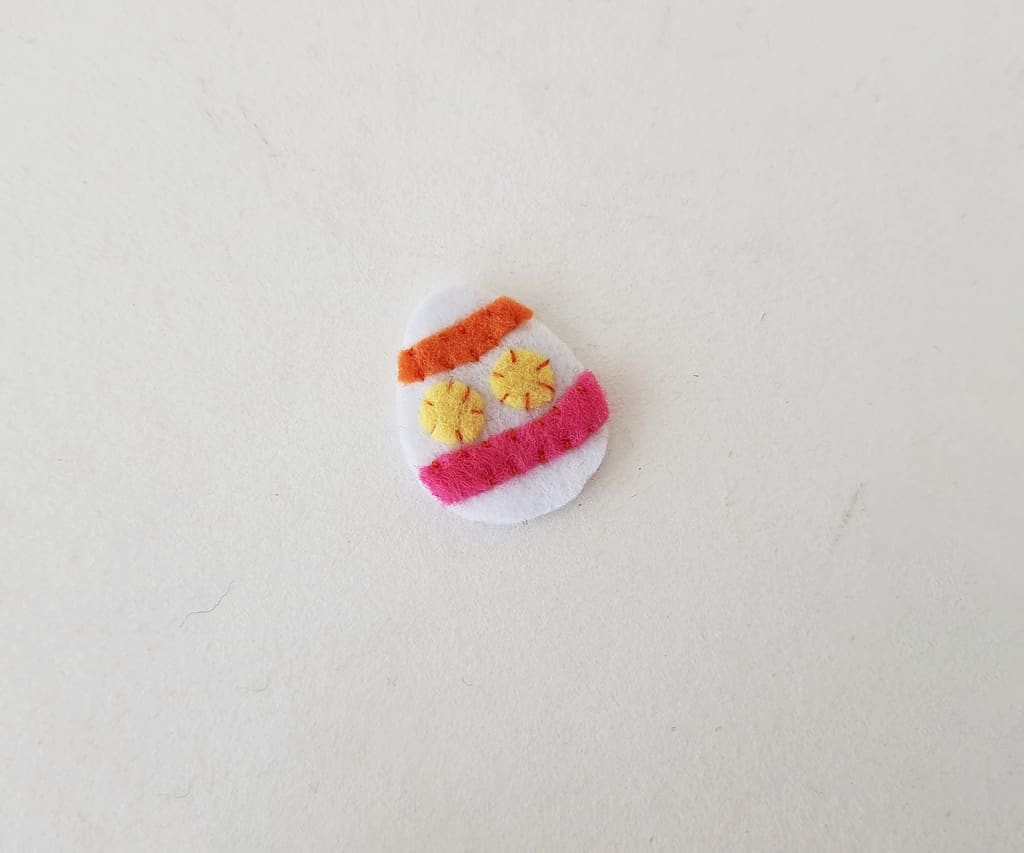
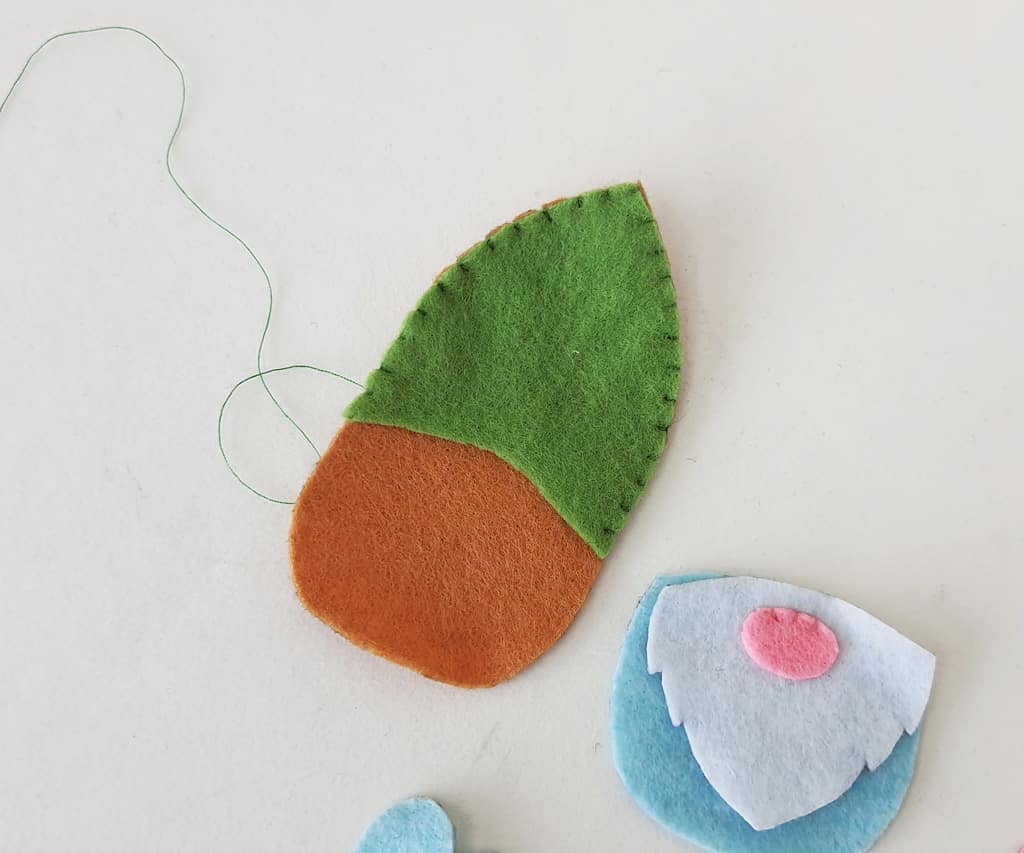
Cut out small pieces from your felt scraps, such as circles, triangles, stripes or zigzags to decorate the egg cutout. We used 2 circle cutouts and 2 small strips. Place the round cutouts on the egg and prepare needle with thread to stitch them.
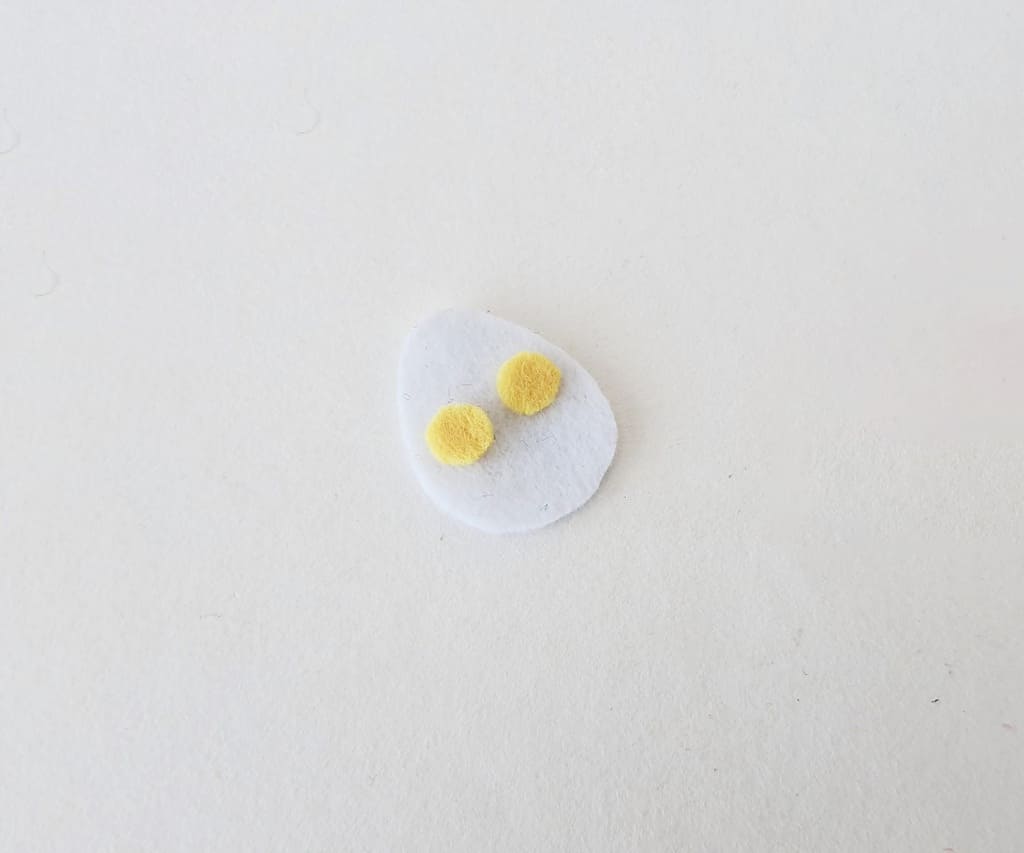
Pace the strips on the egg base and stitch them to the egg using matching threads.
If you cut out different egg decorations, sew them on to the egg as you like.
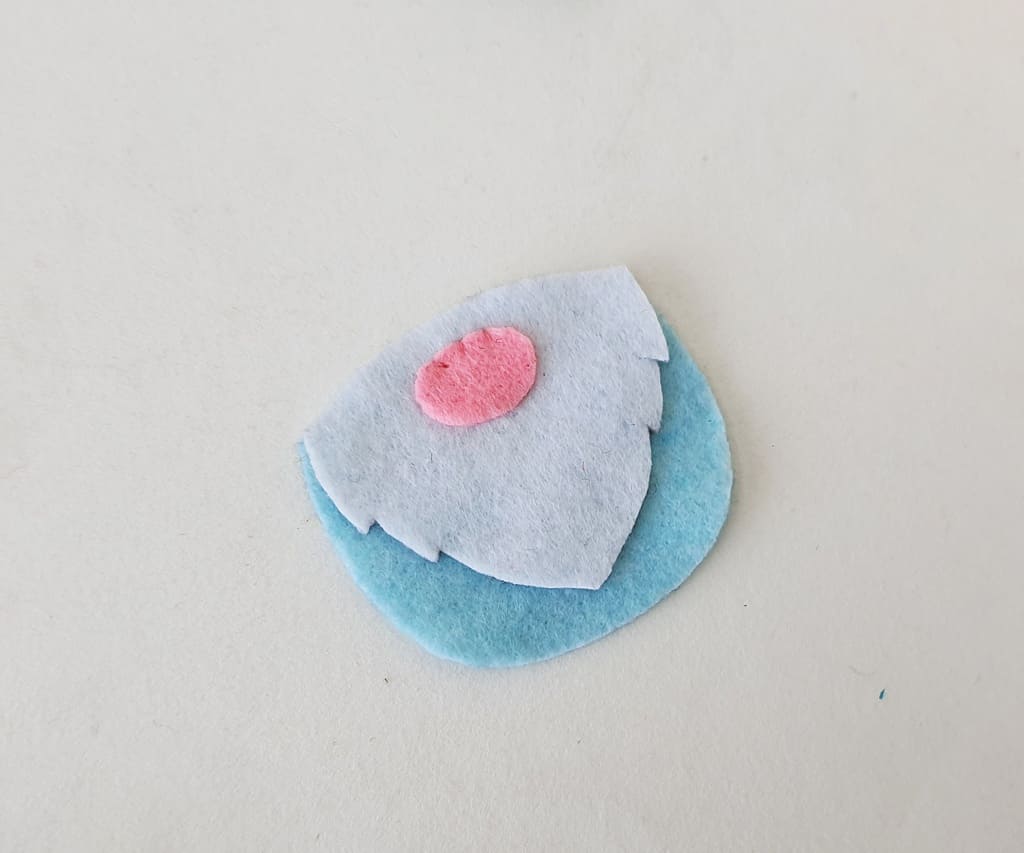
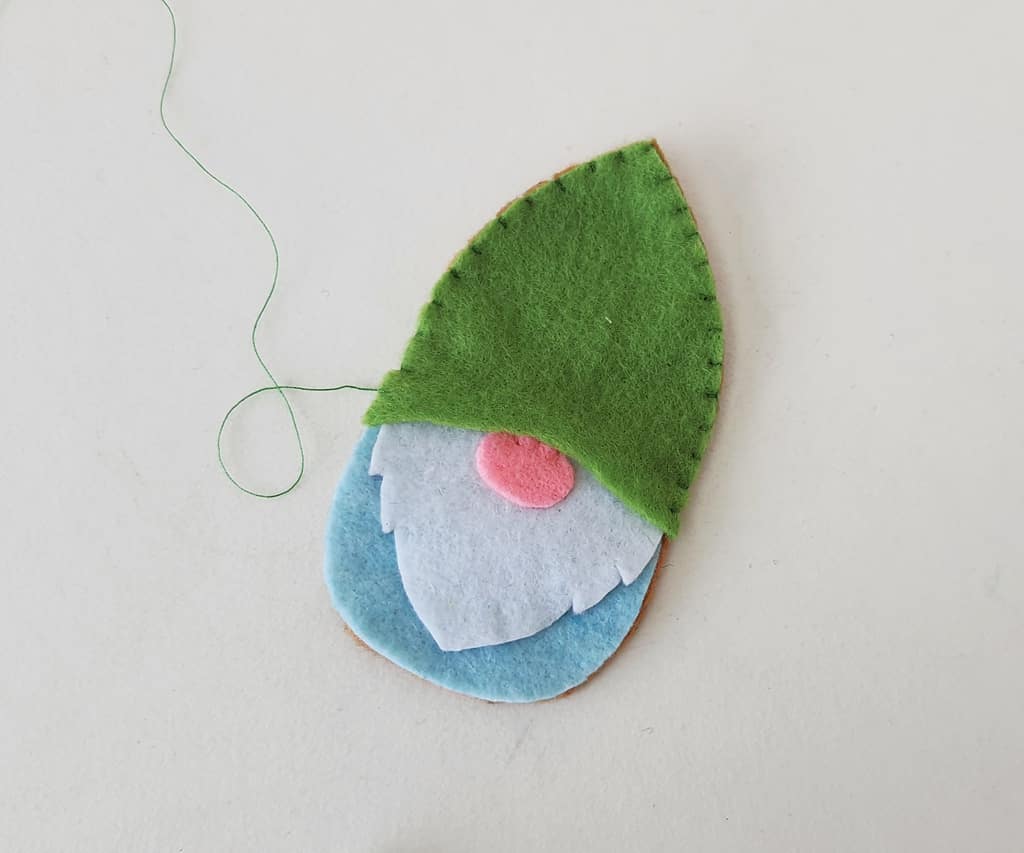
Take the shirt cutout, beard and nose cutouts.
Place the beard on top of the shirt, and then place the nose near the top of the beard.
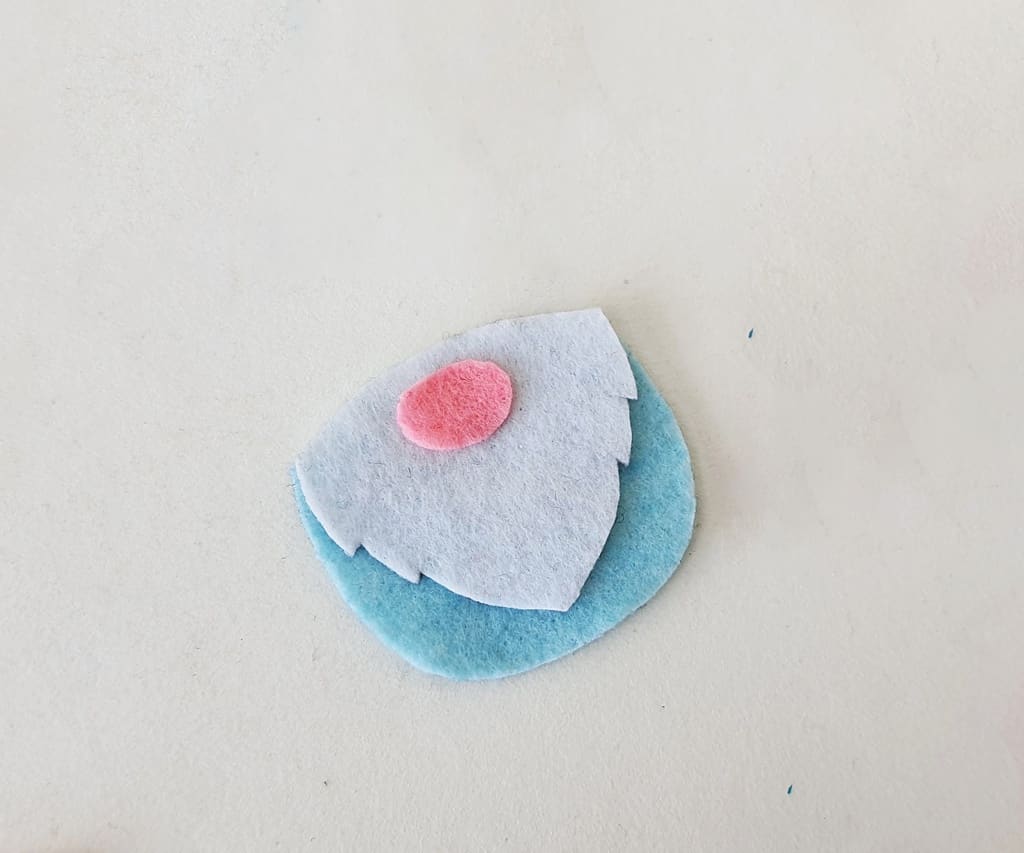
Stitch the nose, beard and shirt cutouts together by making 3 or 4 stitches on the top edge of the nose, connecting all three layers.
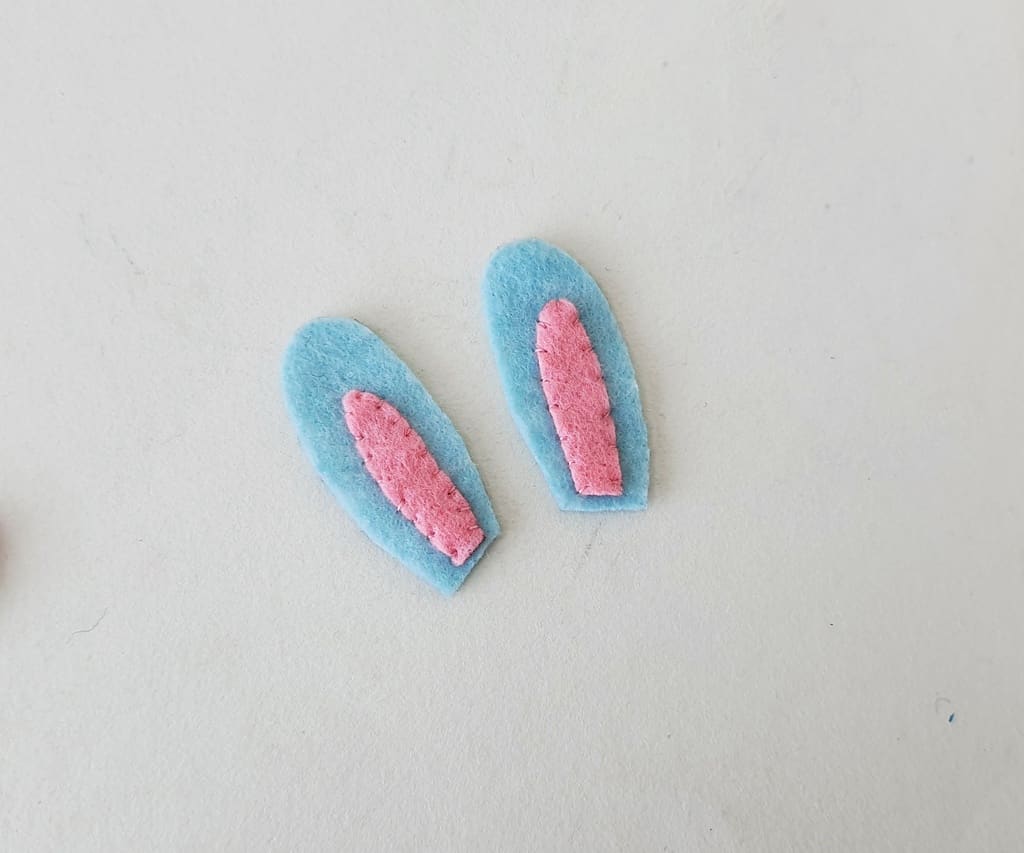
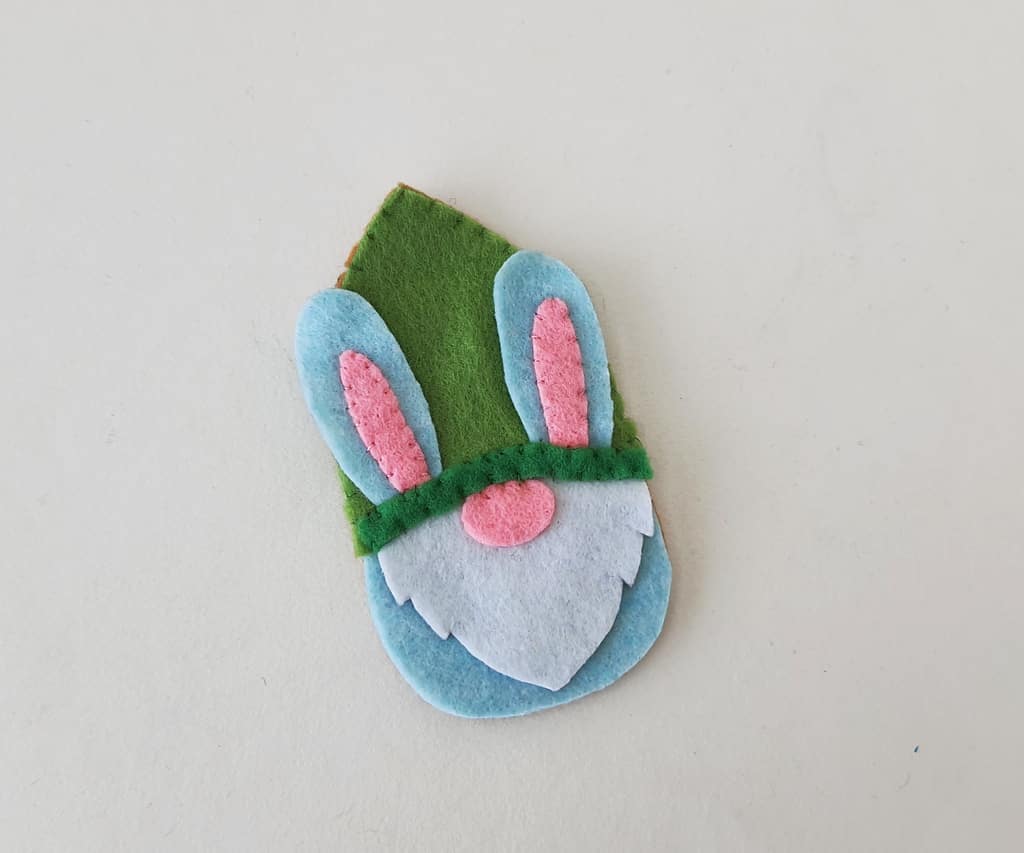
Place the inner ear cutouts on the outer ear cutouts.
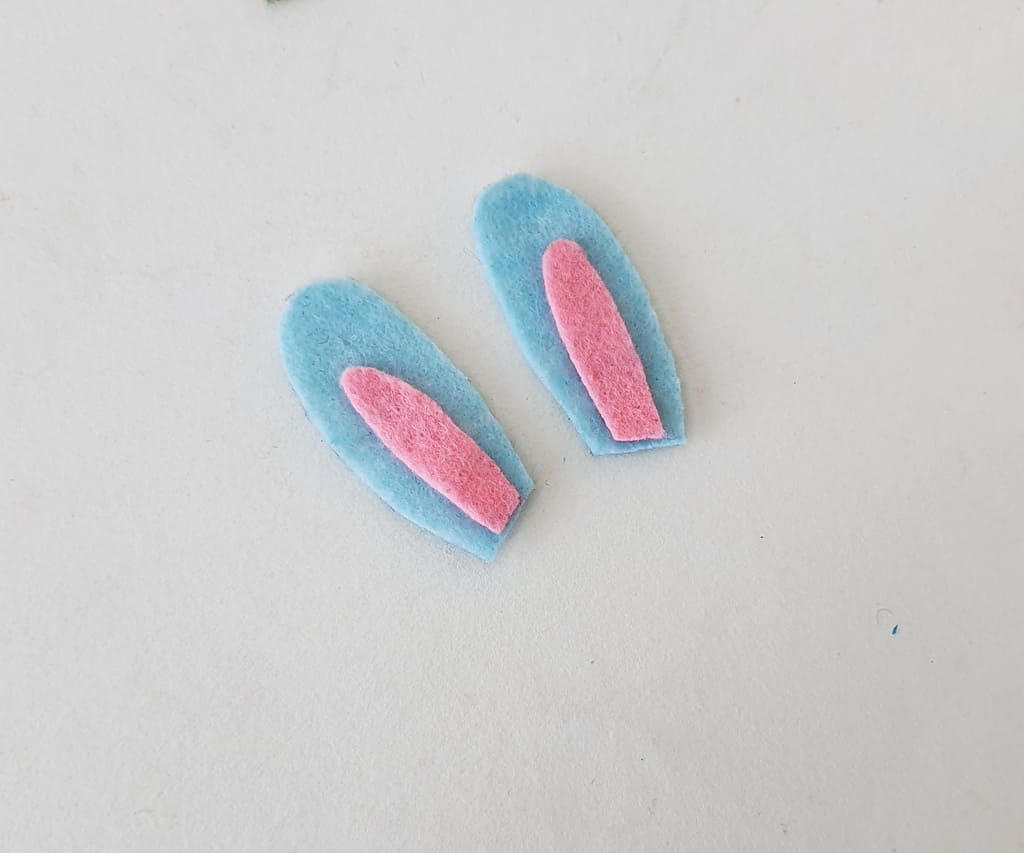
Stitch around the inner ear cutouts using matching threads to attach them to the outer ear cutouts.
Place the hat cutout on the hat part of the gnome’s base and stitch around the the outside edges of the hat. Leave the bottom of the hat open.
Place the lower body piece on the bottom part of the base and tuck the top edge of the lower body under the hat.
Place the ear pieces on the hat as shown below. Place the hat border along the bottom edge of the hat, covering the bottom edges of the ears.
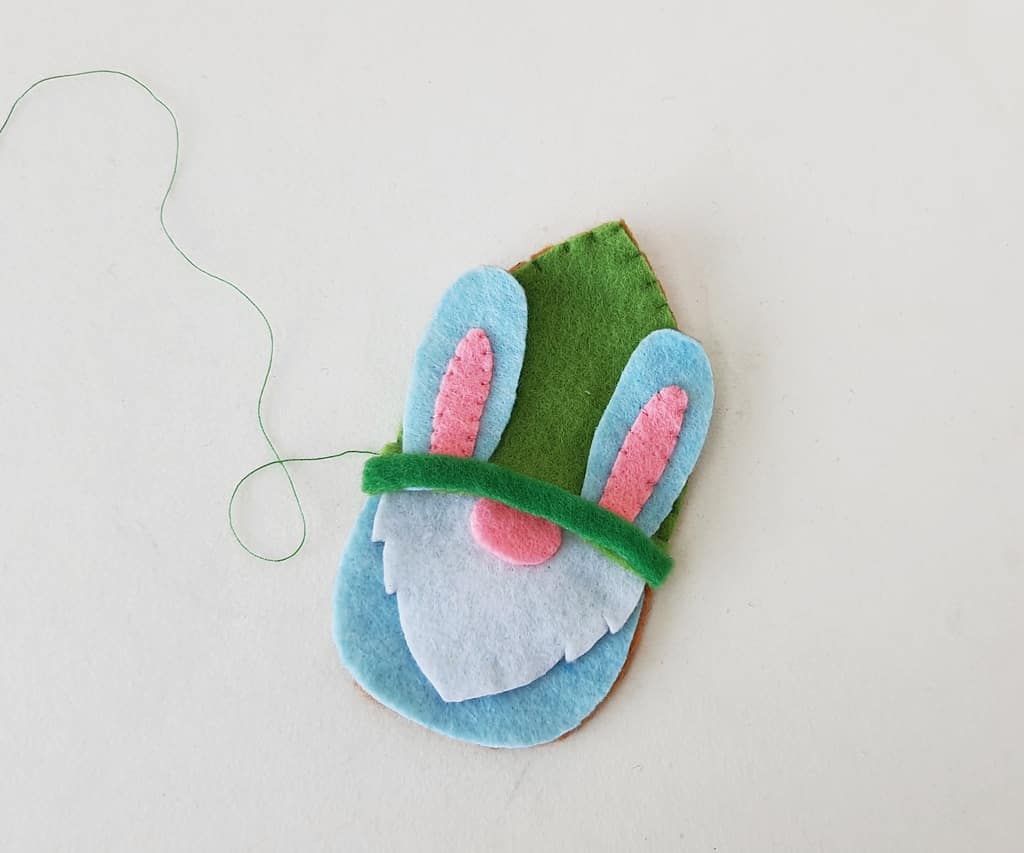
Stitch the top layers together by lifting the body and hat off the base, as you stitch through the hat border to connect the hat, ears, and lower body together.
Make sure not to stitch through the base of the gnome.
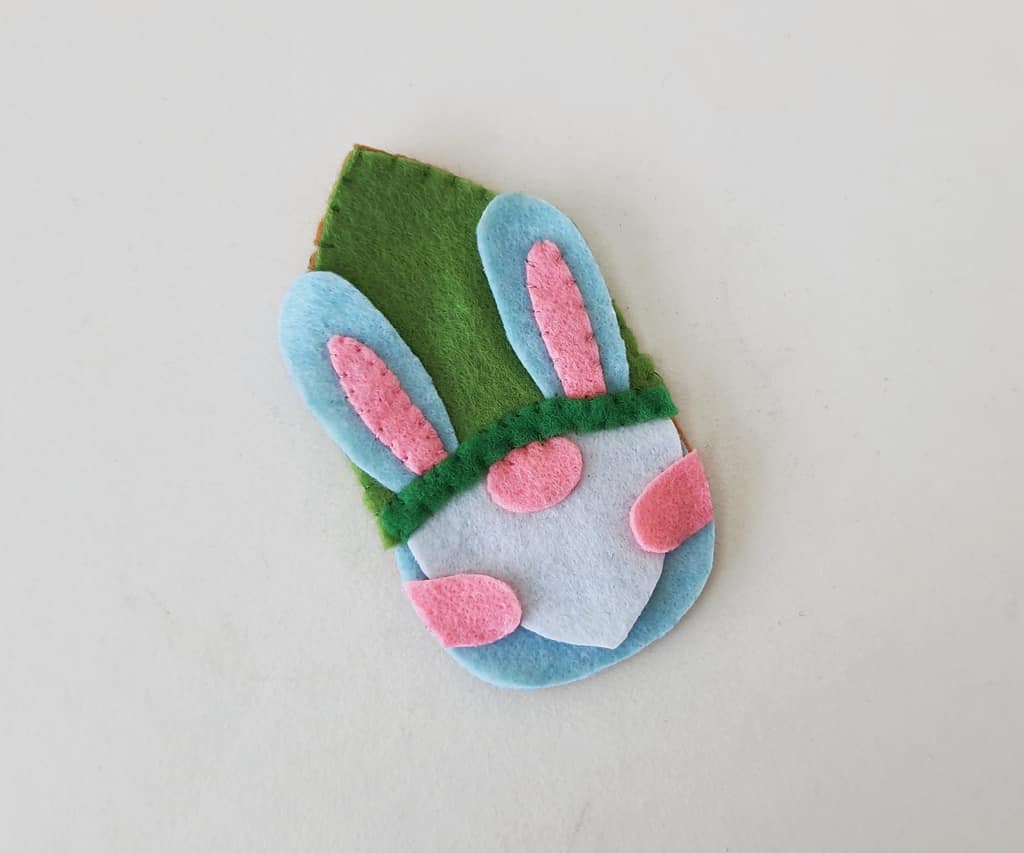
Place the 2 arm cutouts on either side of the lower body.
Beginning connecting the gnome’s body to his base.
Stitch from the edge of the hat, down through the arm, stopping about half an inch after the arm. Then, stitch the other side in the same fashion- beginning at the edge of the hat, then stitching down through the arm, stopping just after the arm.
Use scrap felt or cotton batting to stuff the Easter Bunny Gnome.
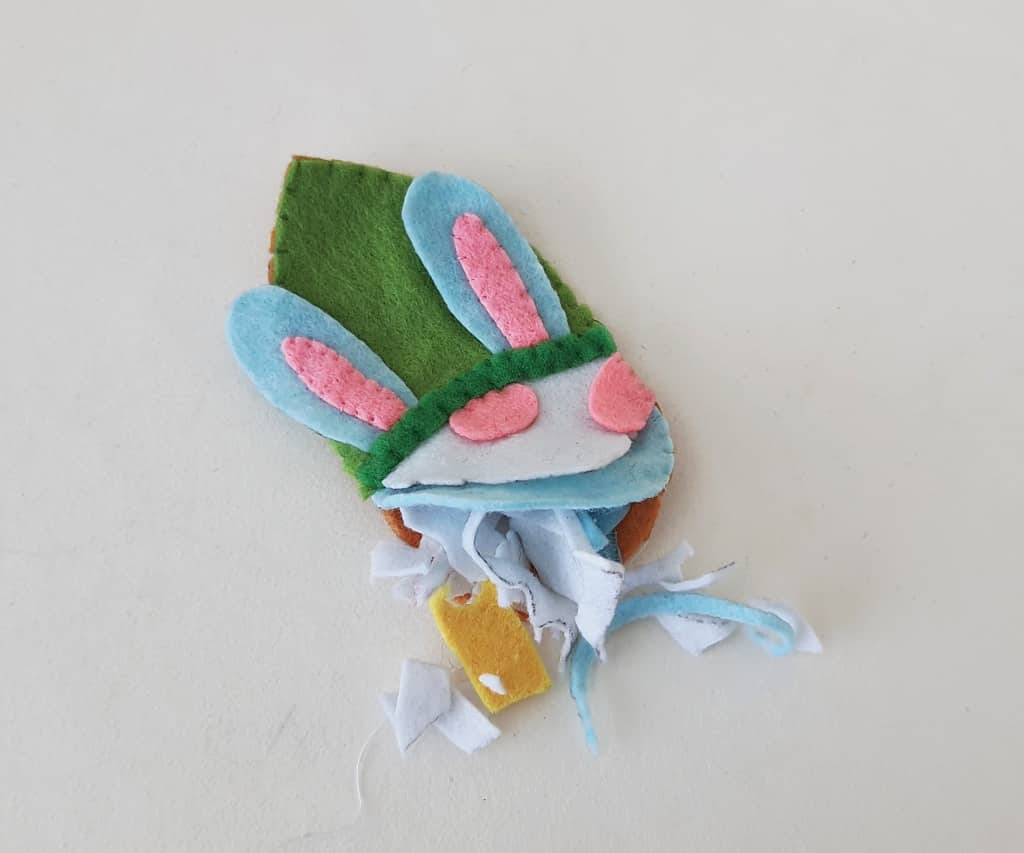
Place the shoe cutouts between the base and the body layers. Finish stitching around the bottom of the gnome to close the plush.
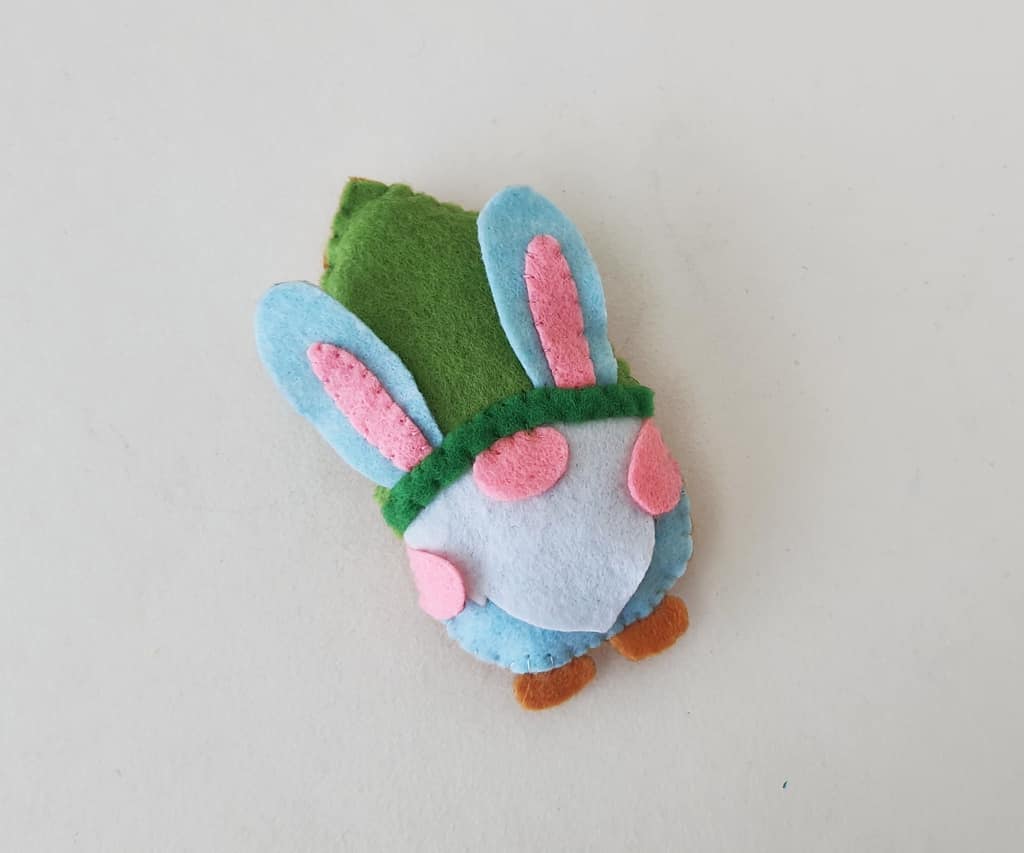
Tie a knot or two and cut off extra thread.
Stitch the felt egg on to the gnome to complete the Easter Bunny Gnome.