
Paper Nativity Garland for Christmas
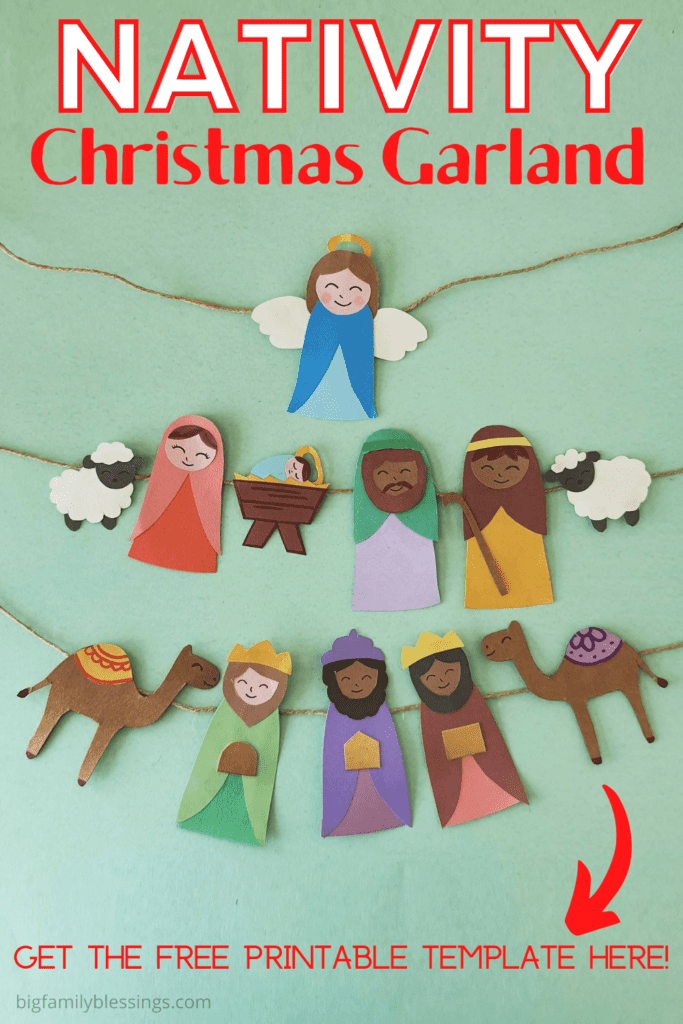
Make your own festive Nativity Garland to decorate your mantel or home this Christmas.
Help keep your Christmas Christ-centered by along adorable and festive Nativity themed Christmas crafts.

How to make a Nativity Paper Garland for Christmas
List of Supplies:
- Colored craft papers
- Pencil – to trace the template
- Craft glue
- Markers or gel pens
- String
- Template
Instructions:
Download and print out the Nativity Garland pattern. Cut out all of the nativity pattern pieces.
Select colored craft papers for the Nativity garland items and figures. The template includes patterns for baby Jesus, a manger, an angel, Mary, Joseph, 3 Wisemen, a shepherd, 2 sheep, and 2 camels.
Trace the template patterns on the colored craft papers you chose.
Then, but out all of the traced pieces.
Let’s begin the garland craft by making the 3 Wisemen.
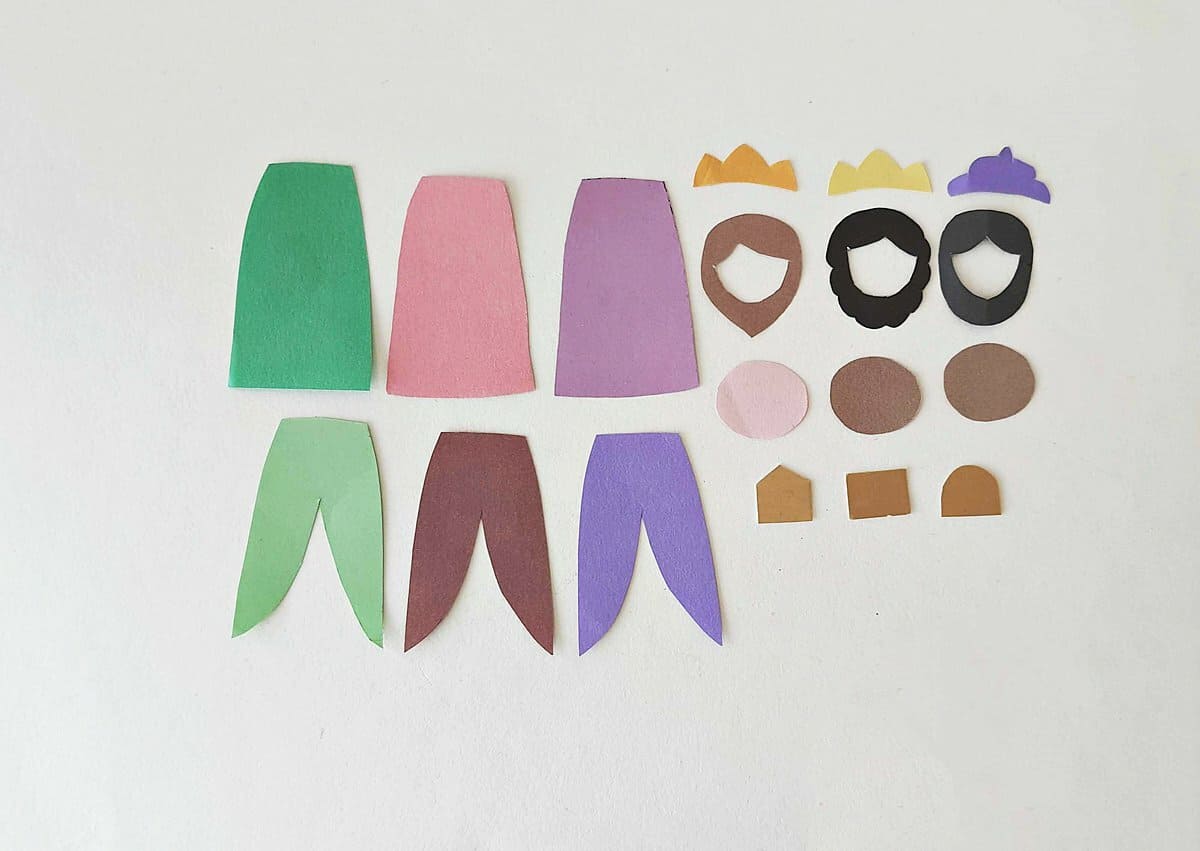
Attach the outer robe piece onto the under robe piece.
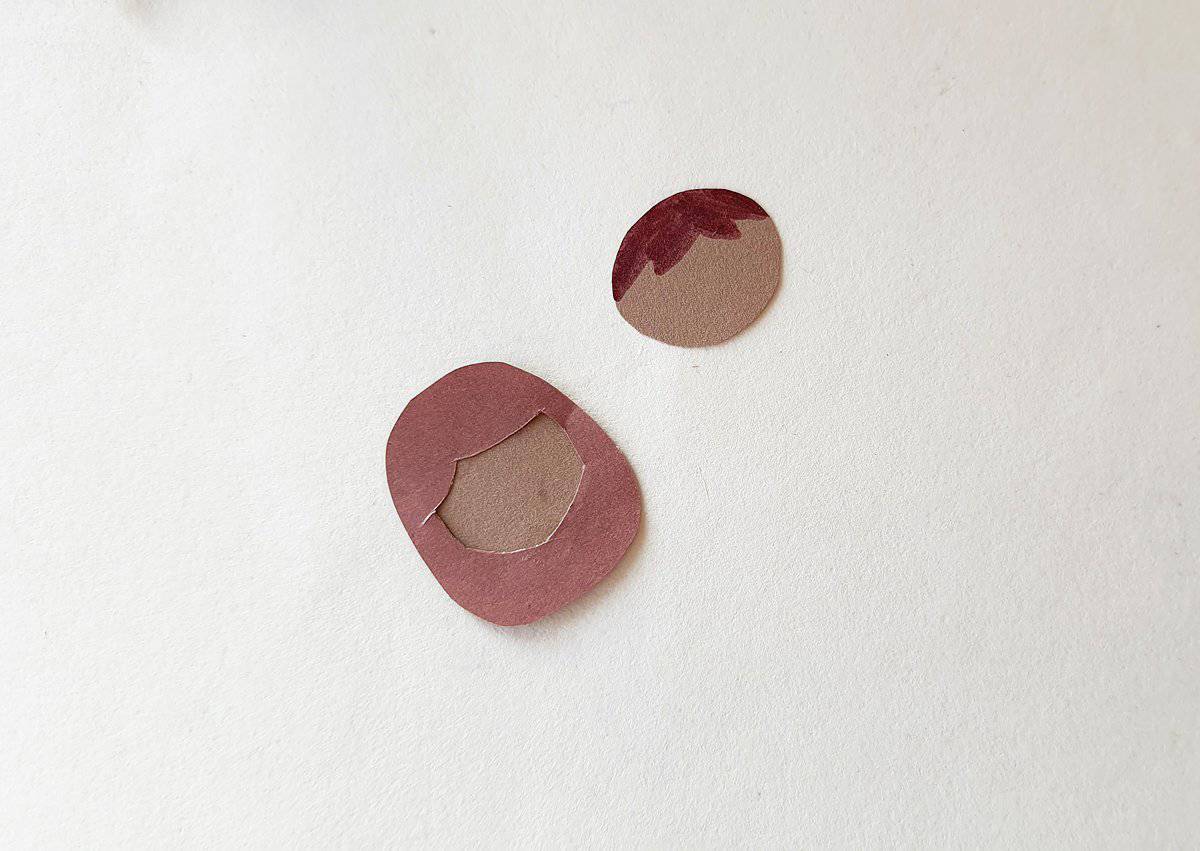
Attach the beard cutouts to the head cutouts.

Attach the wisemen’s heads onto the robes.

Glue the gifts onto each wise man and also glue the crown cutouts on their heads.
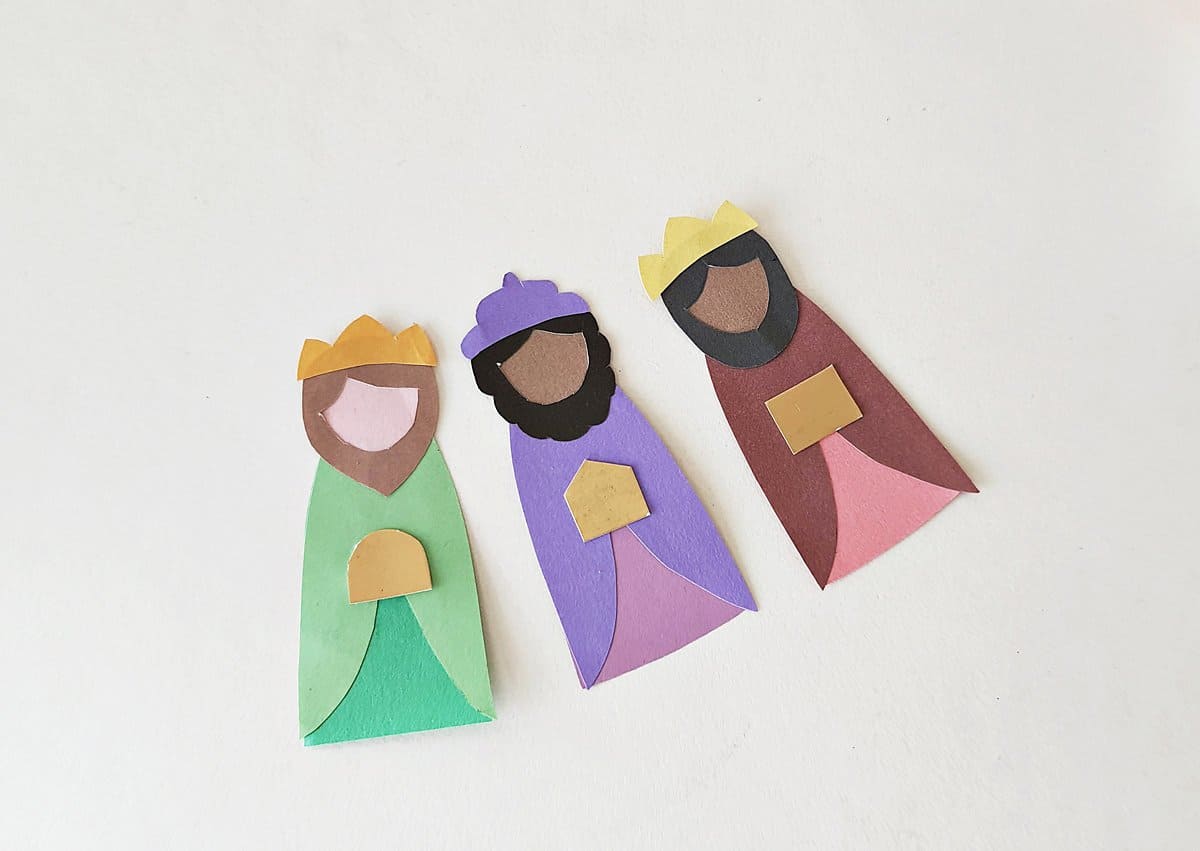
Use a marker or gel pen to draw the faces on the Wisemen.

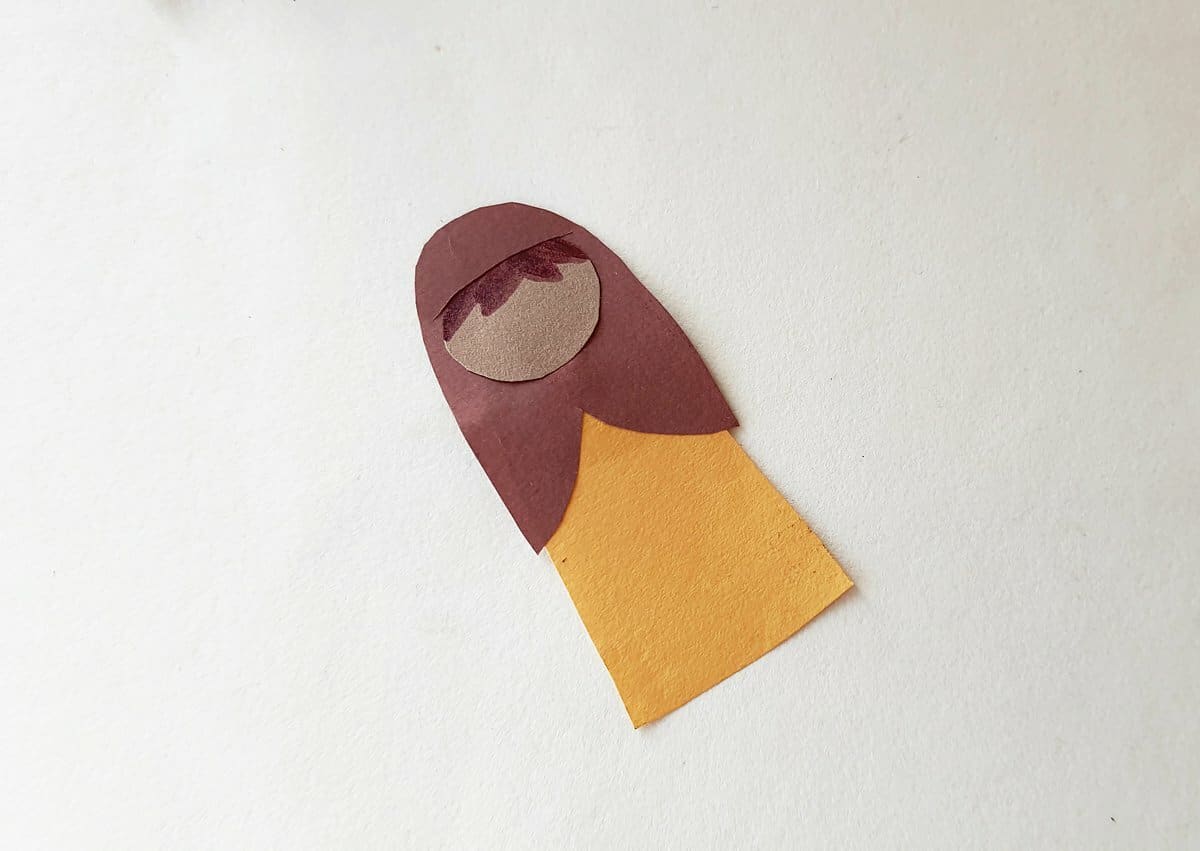
Prepare the baby Jesus and Mary figures.
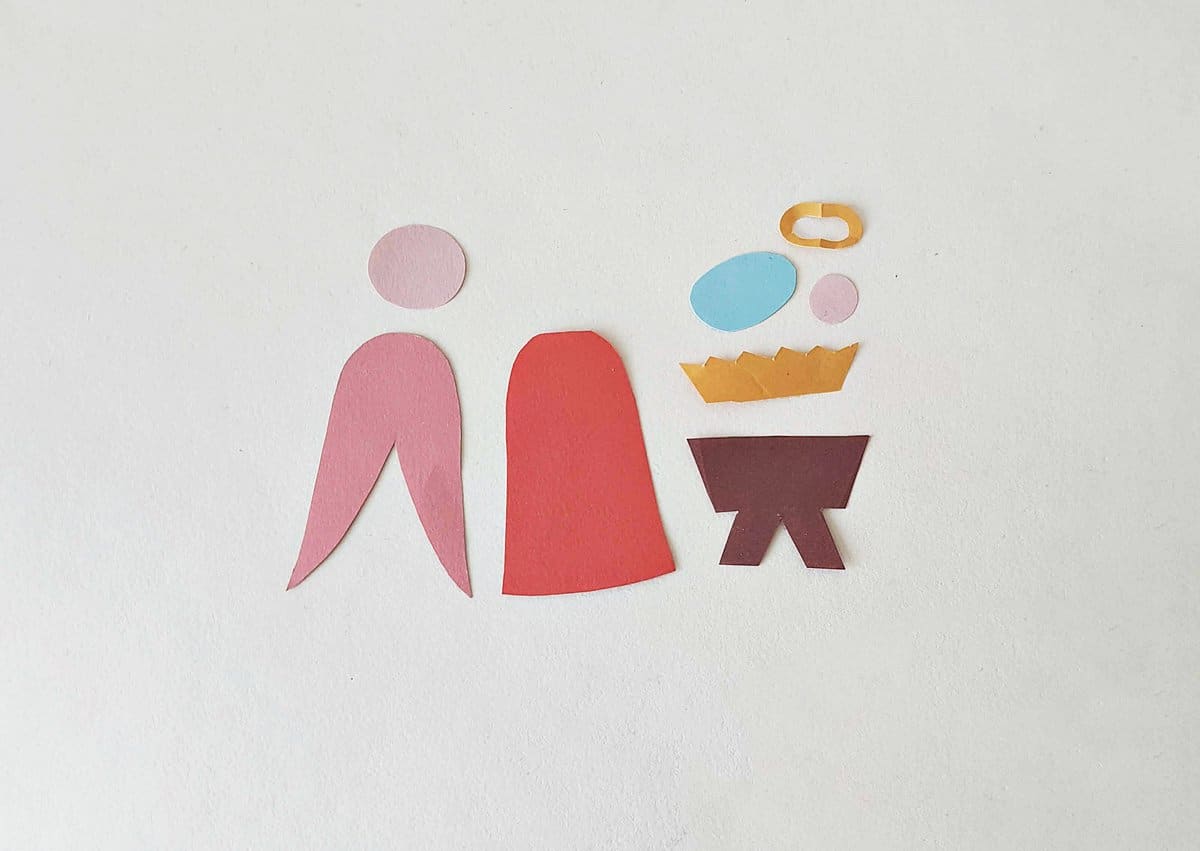
Use marker to draw the hair onto the head cutouts of both Mary and Jesus.

Attach the halo ring to the head of the baby Jesus.
Glue Mary’s inner and outer robe pieces together.
Glue the hay in the manger.
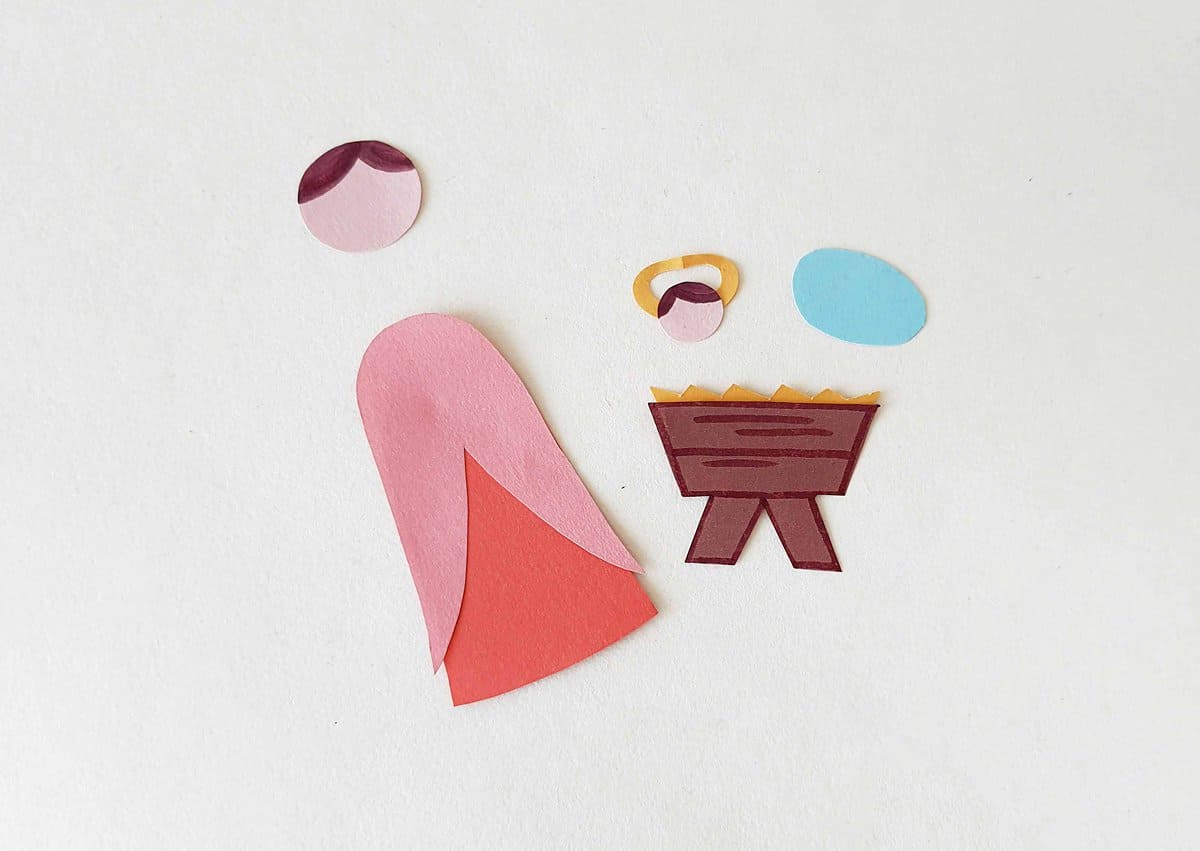
Attach the heads onto the bodies.

Glue baby Jesus on the manger and use a marker to draw faces on Mary and Jesus.

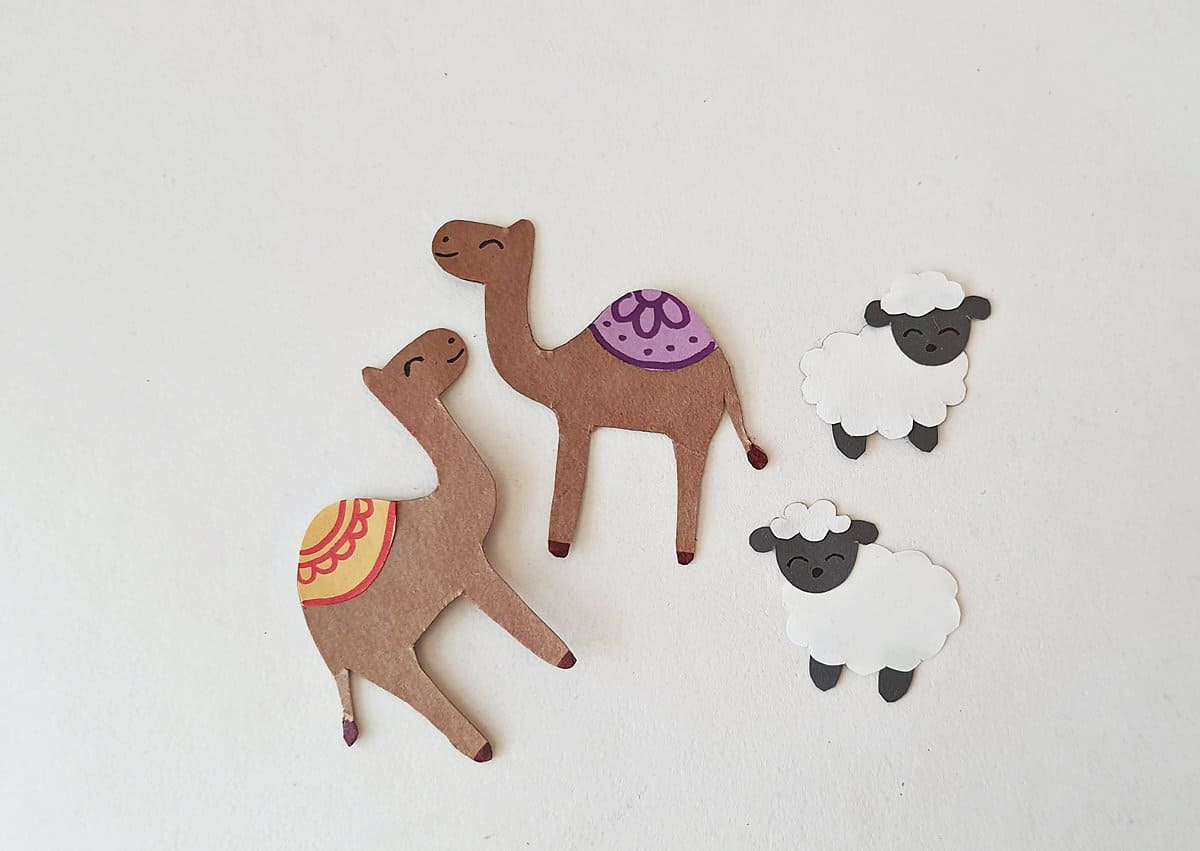
Prepare the camel and the sheep pieces.
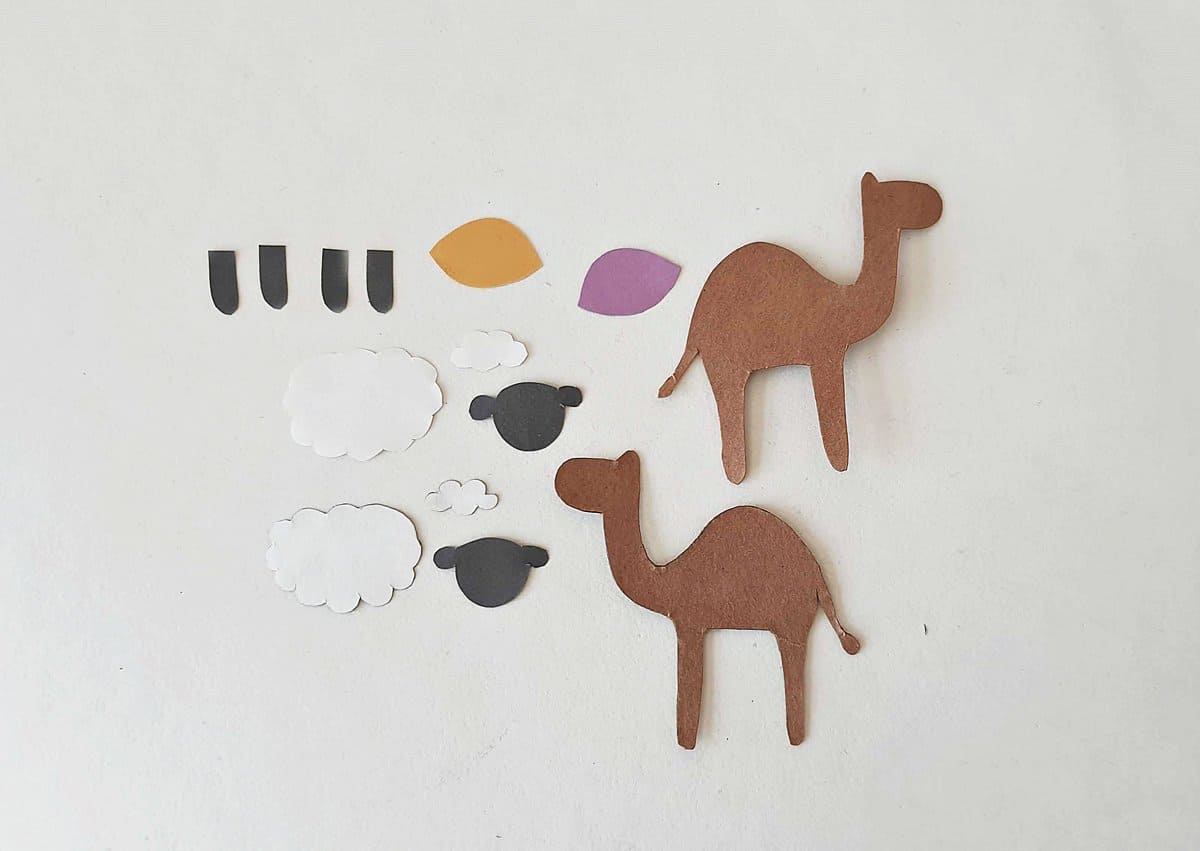
Attach the saddle cutouts on the top of the camels and attach the head cutouts to the body cutouts of the sheep.
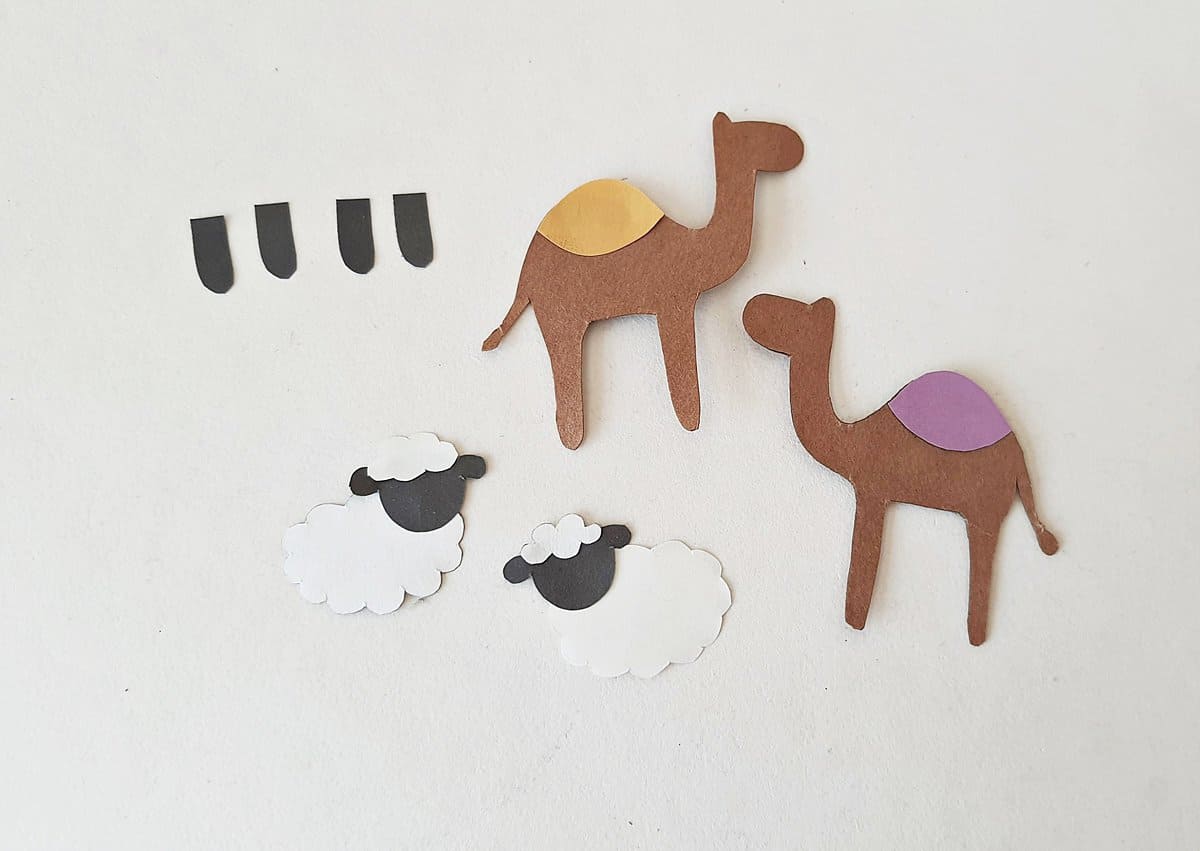
Use markers to draw details onto the saddles of the camels.
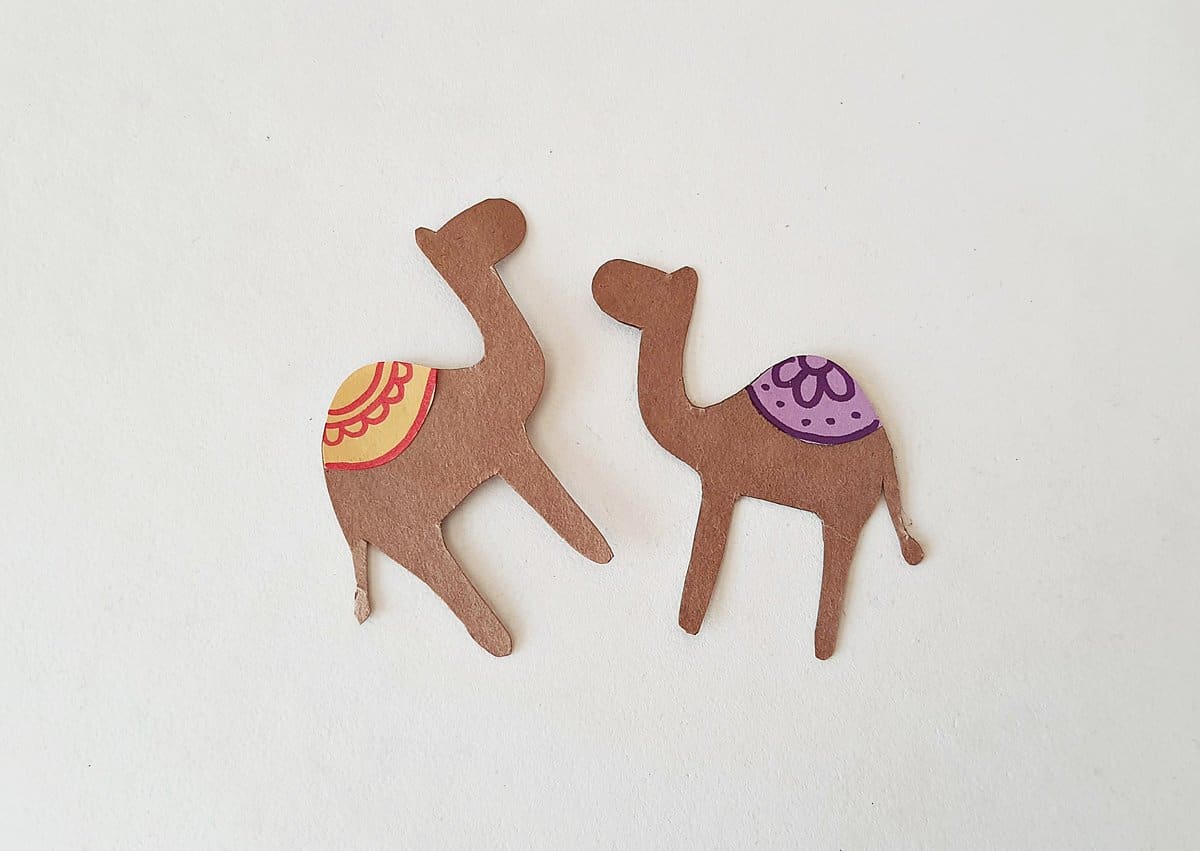
Use a black marker to draw the faces onto the animals.
Trace and cut out the angel patterns.
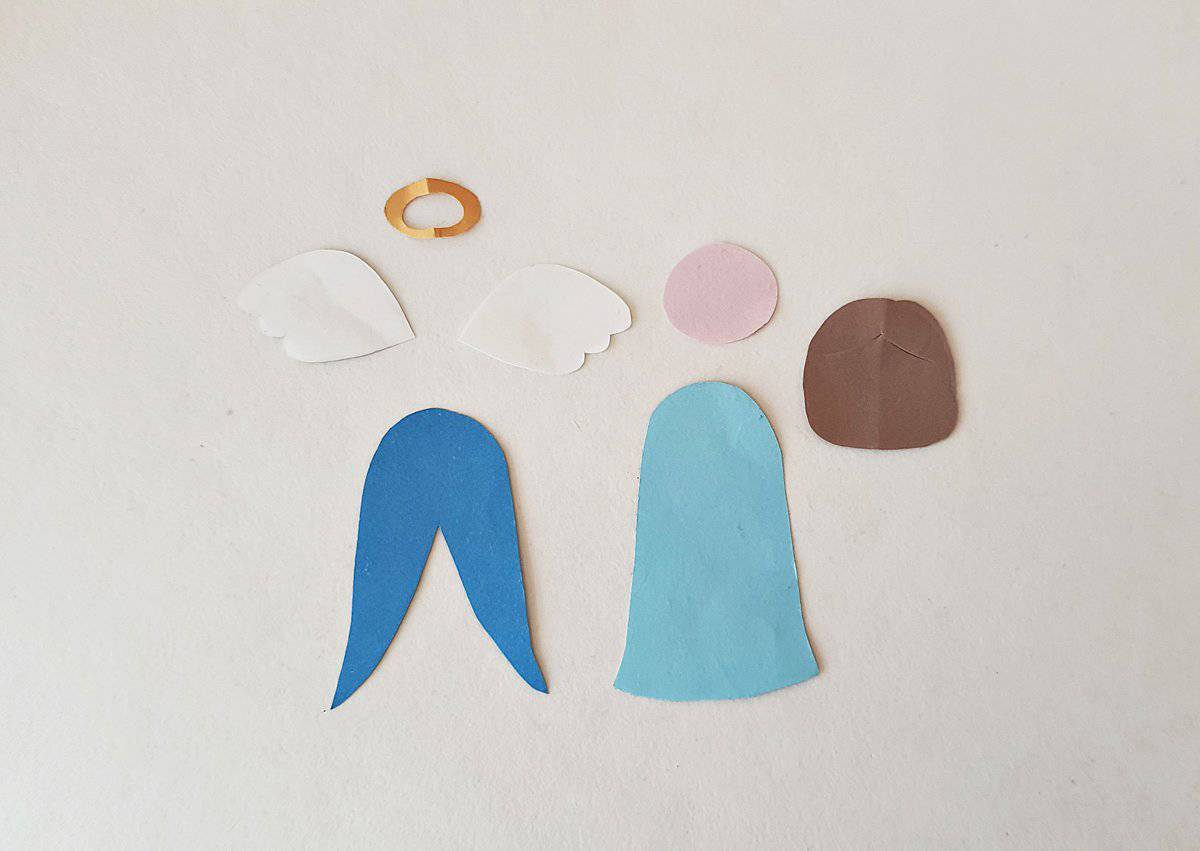
Attach the robe pieces together.
Cut a slit along the middle of the hair.
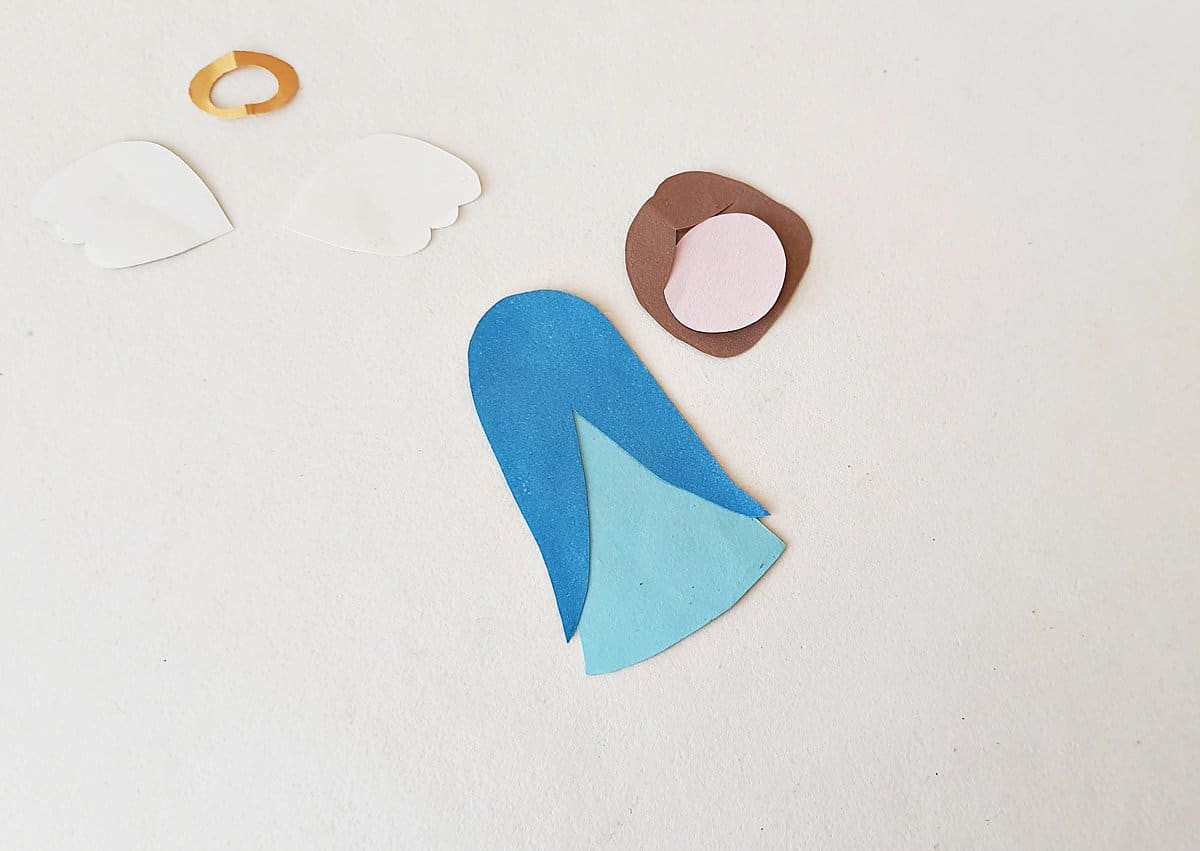
Insert the top end of the head through the hair slit, from below. Use glue to attach the head and the hair.

Attach the head to the body and attach the halo cutout on the top of the head.
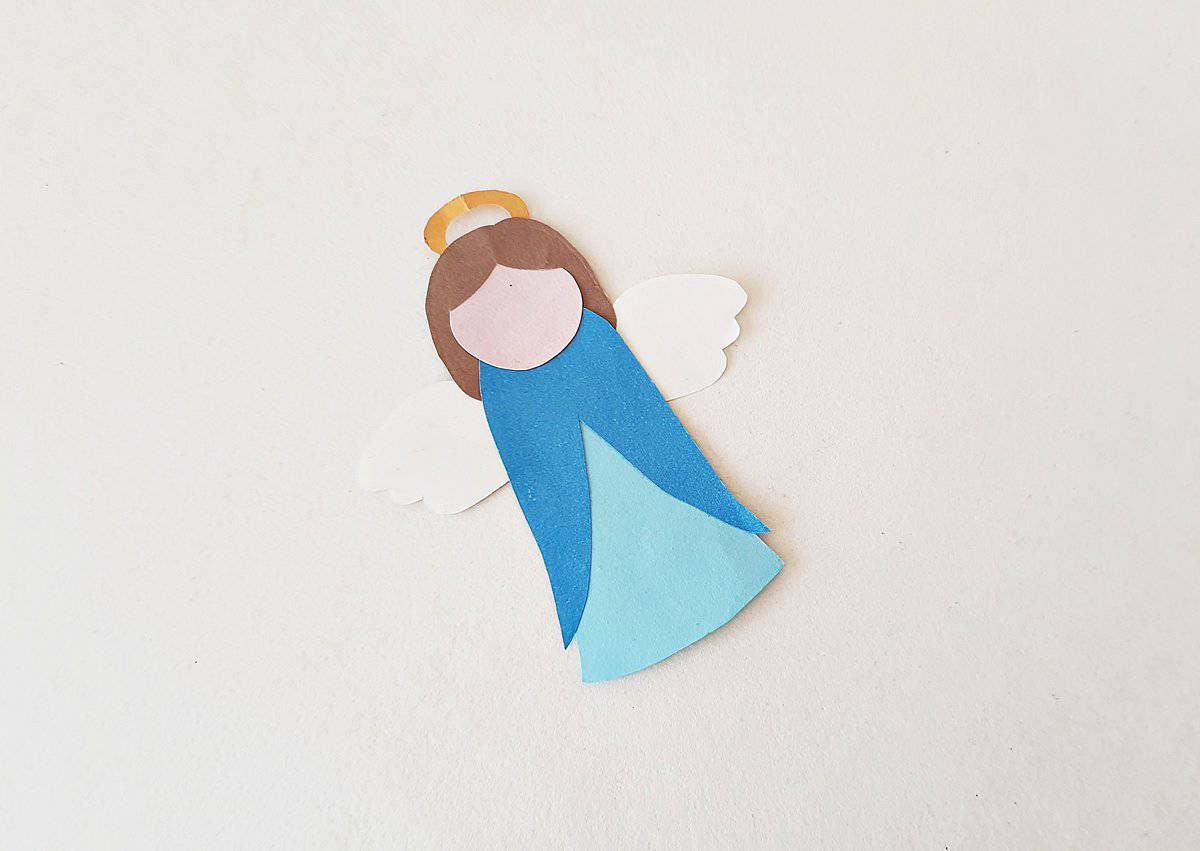
Use a black marker to draw the face onto the angel.

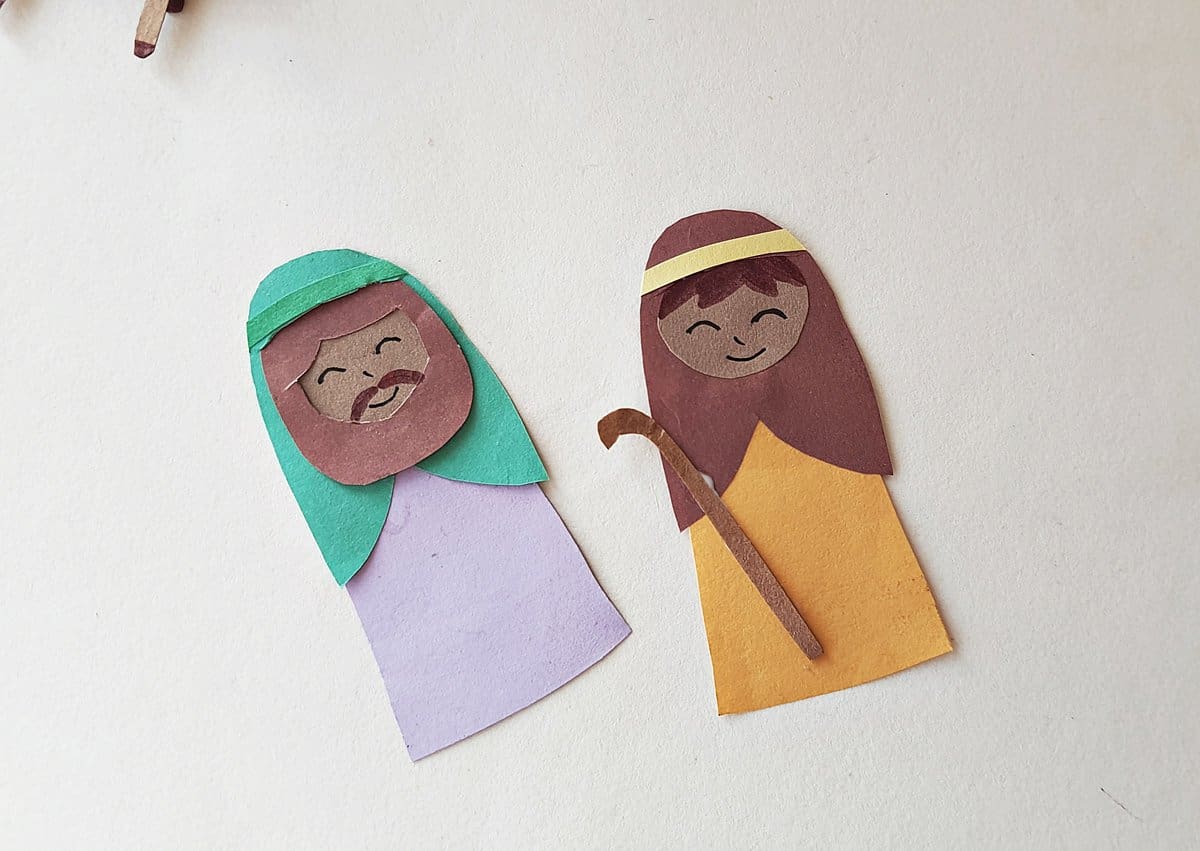
Cut out the patterns for Joseph and the shepherd figures.

Attach the hair and beard cutout to Joseph’s head.
Use a marker to draw hair on the shepherd.
Attach the shepherd’s head on the scarf cutout and then attach the scarf cutout on top of the robe cutout. Use a marker to draw the face.
Similarly, craft the Joseph figure. Attach the stick cutout to the shepherd’s figure.
Lay all the crafted figures out in the order you’d like to attach them to the garland.
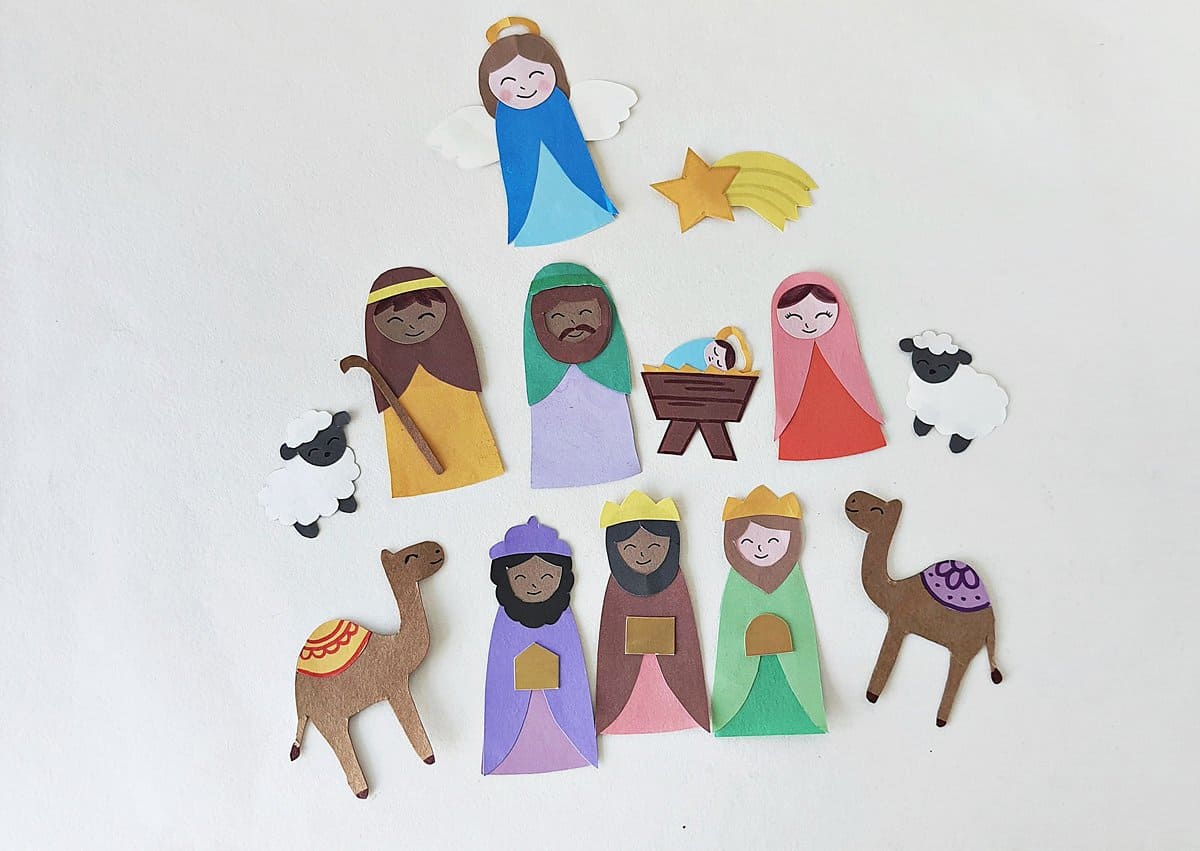
Attach the paper figures on a string using glue or tape to finish the garland.


Hello,
I submitted my information to receive the free template for the nativity garland, but still haven’t received the email link to it.
Hi Shelley, double check your spam folder for the email. If you still haven’t received it send an email to amanda@bigfamilyblessings.com telling me which printable you’d like and I’ll send the printable to you that way.
I’ve tried multiple times to get the pattern download but have no success . What should I do?
You should see “Download and print out the Nativity Garland pattern. Cut out all of the nativity pattern pieces.” in the instruction list. Just below that is a form to put in your email and receive the download.
What a beautiful craft for the kids!
I would like a copy of your template.
Hi Marianne, you’ll see a link to the free pdf template in the supply list. The word “template” in the list is in blue text- simply click that blue linked word for the template.
I would like a copy of the nativity garland for my Sunday School class. Thank you.
Hi Connie, simply click the word “template” in the supply list to get the free printable pattern.
Could I please have the nativity scene cut out
Simply fill out the subscriber form above.
I would like the nativity template. Thank you!!
hi i would like a template of the banner
I would love to make this Nativity garland with my 4.5 year old twin boys! Thank you!
Enjoy!
It would have been really nice to have the directions with the template. Otherwise the kiddos need my phone for them. My son is looking forward to doing them.
Great point. Thanks for letting me know. I’ll work on adding printable directions in the future.
How do I get a copy of the nativity template?
Click the blue hyper-link that says “template” or “nativity garland pattern”
Nativity Garland template please!
You should see the email sign up for the printable in the instructions list.