Cutest Ever Craft Stick Bunny Craft
Make this adorable craft stick bunny craft with your kids this Spring! Or, if you are looking for a fun Easter craft for kids, call it a craft stick Easter bunny!
You probably have many of the supplies you need to make this craft stick bunny at home already. But, if you’re shopping for supplies, you’ll find all the things you need to make this simple bunny craft at your local big box store, at the Dollar Store, or at Amazon.
Big Family Blessings is reader supported. When you purchase through links on our site, we may earn affiliate commission at no additional cost to you. Learn more.
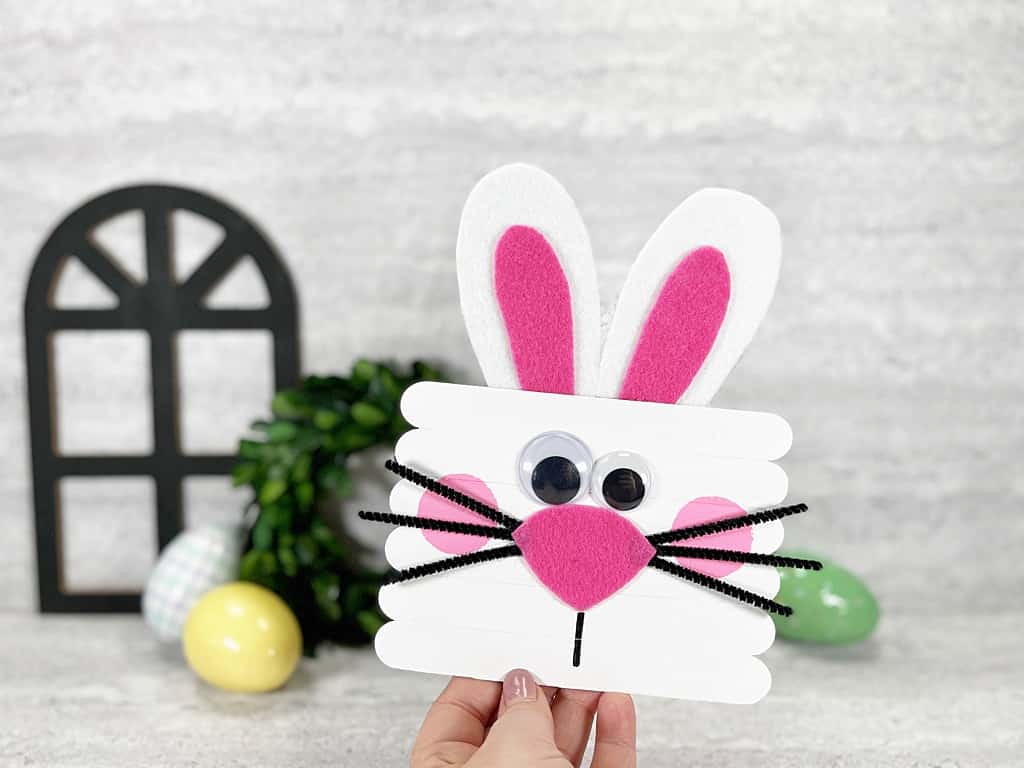
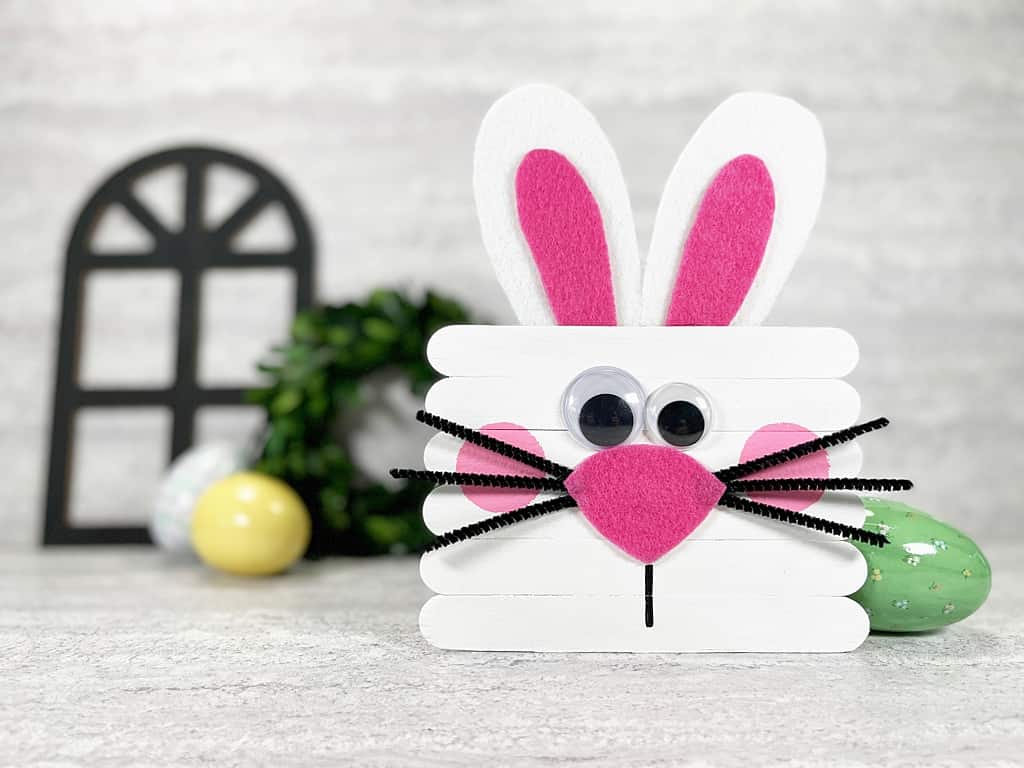
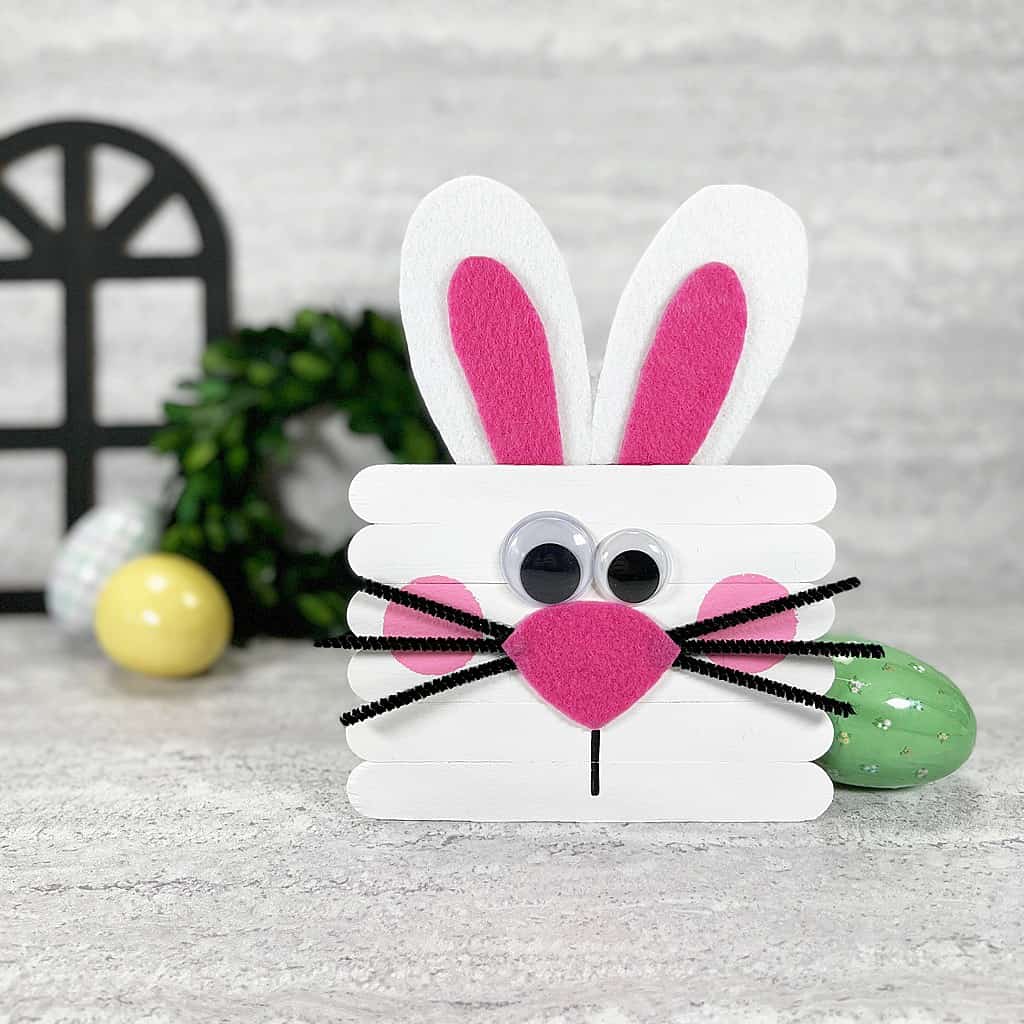
You can make your Easter bunnies any color you’d like! We chose a white and pink bunny, but you can leave the craft sticks natural and use tan for the ears if you’d like a brown bunny. Or simply change up the pink to a different Easter pastel for a fun crafty change!
Whether you are looking for a bunny craft, a farm animal craft, a spring craft, or even an Easter craft, this adorable craft stick bunny is sure to be just the thing!
If you are making Easter, Spring or Farm crafts you’ll want to make the matching Lamb and Chick craft stick animals too! You simply can’t go wrong with craft stick crafts!
Once you’ve finished crafting these cute Bunnies, you can decide how to display them. Add a magnet to the back for an adorable spring/Easter refridgerator magnet. Glue a loop of ribbon or twine to the back to hang them on an Easter tree or from your window. They’d be super cute in an Easter table center piece too!
How to make a Bunny with Craft Sticks
Materials:
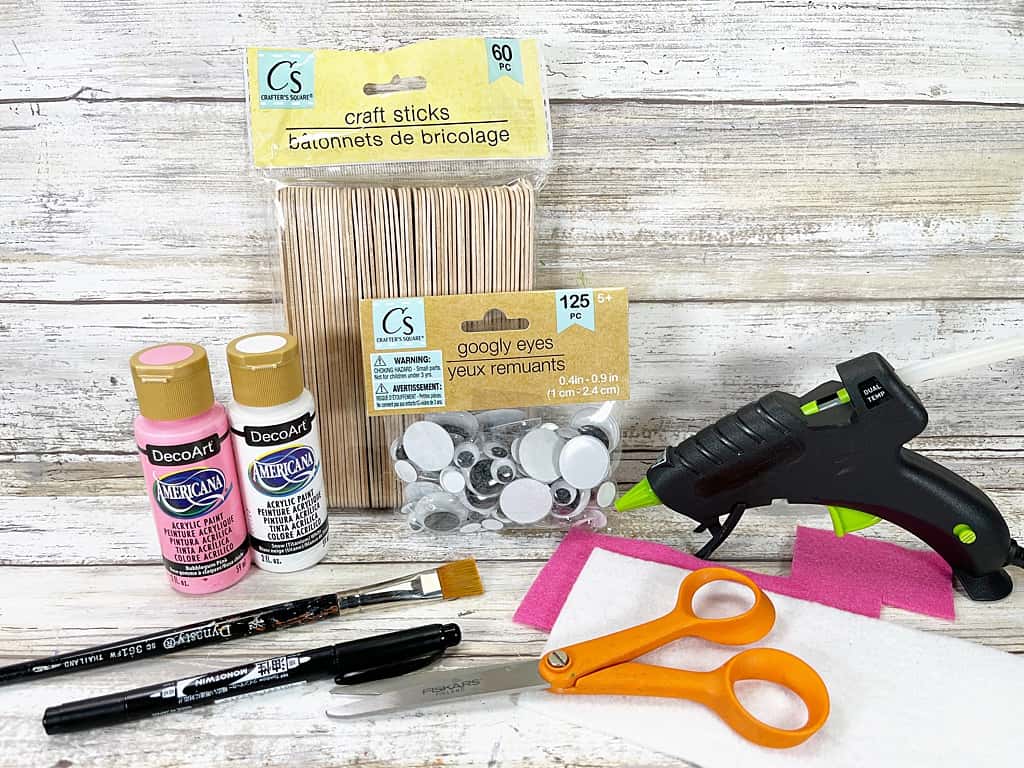
- Jumbo Wooden Craft Sticks
- Wiggle Eyes
- Black Chenille Stems
- Craft Paint – we used white and pink
- Craft Felt – we used white and pink
- Glue Gun and Glue Sticks
- Sponge Dabber
- Paintbrush
- Scissors
- Permanent Marker
- Craft Stick Bunny Pattern
Instructions:
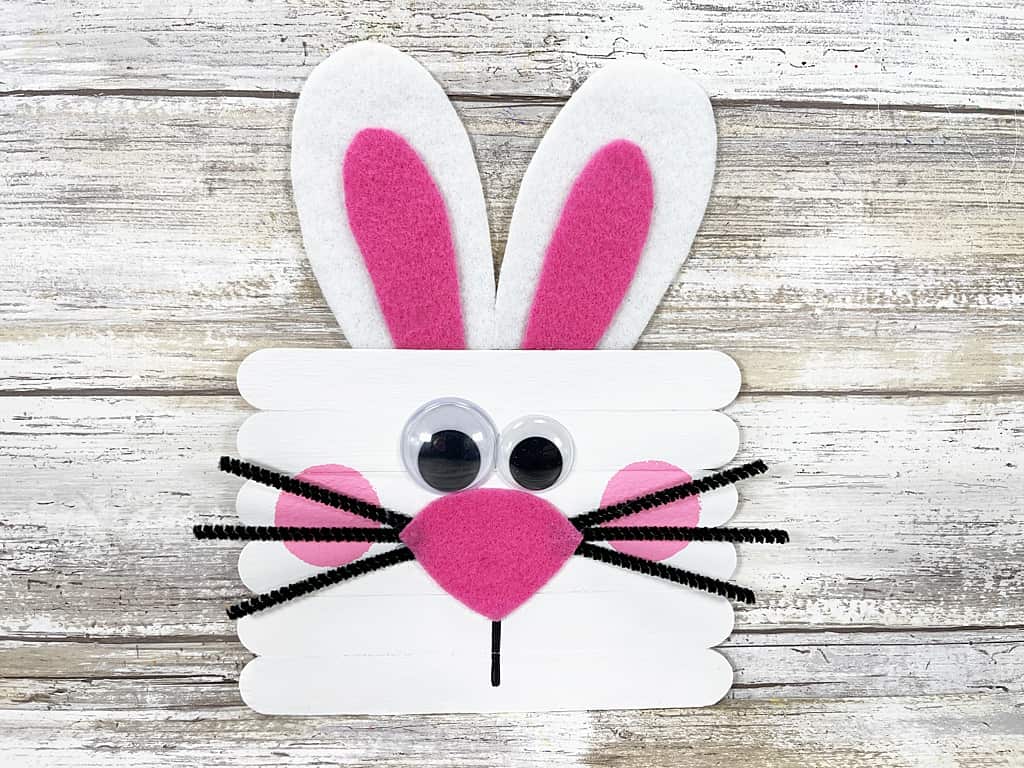
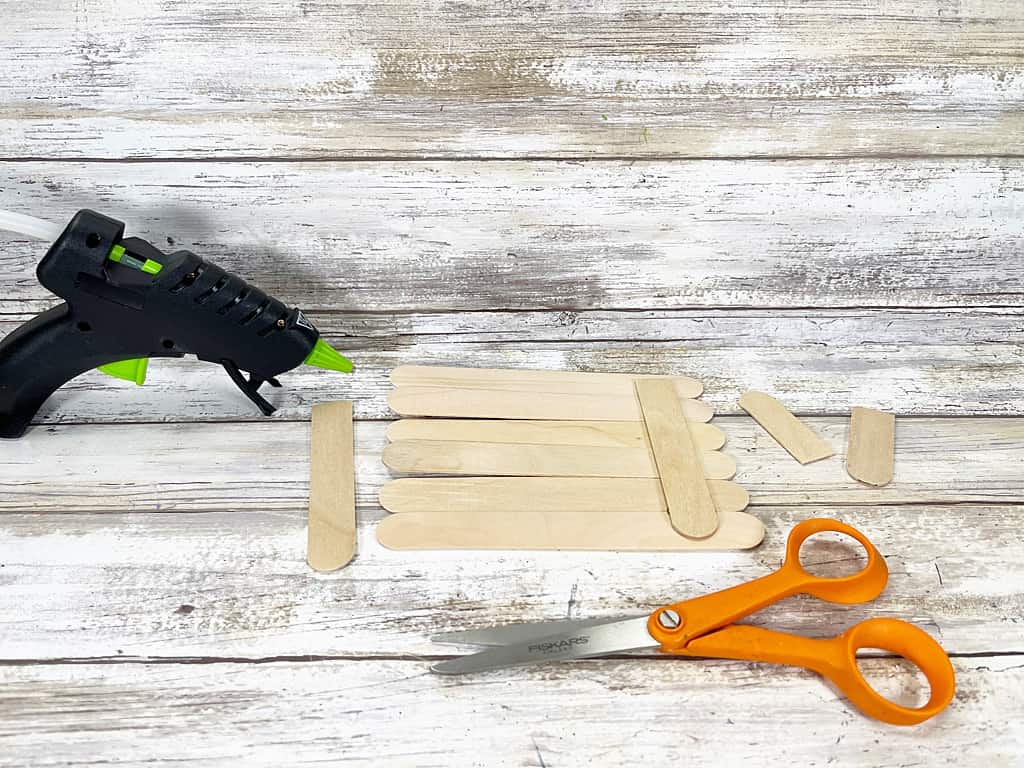
Gather all supplies. To create the Bunny, line up six jumbo craft sticks on your work surface.
Using scissors, trim additional jumbo craft sticks to the width of the Bunny and attach with a glue gun and glue sticks.
(You can use liquid craft glue for this project, but you will have to wait for it to dry.)
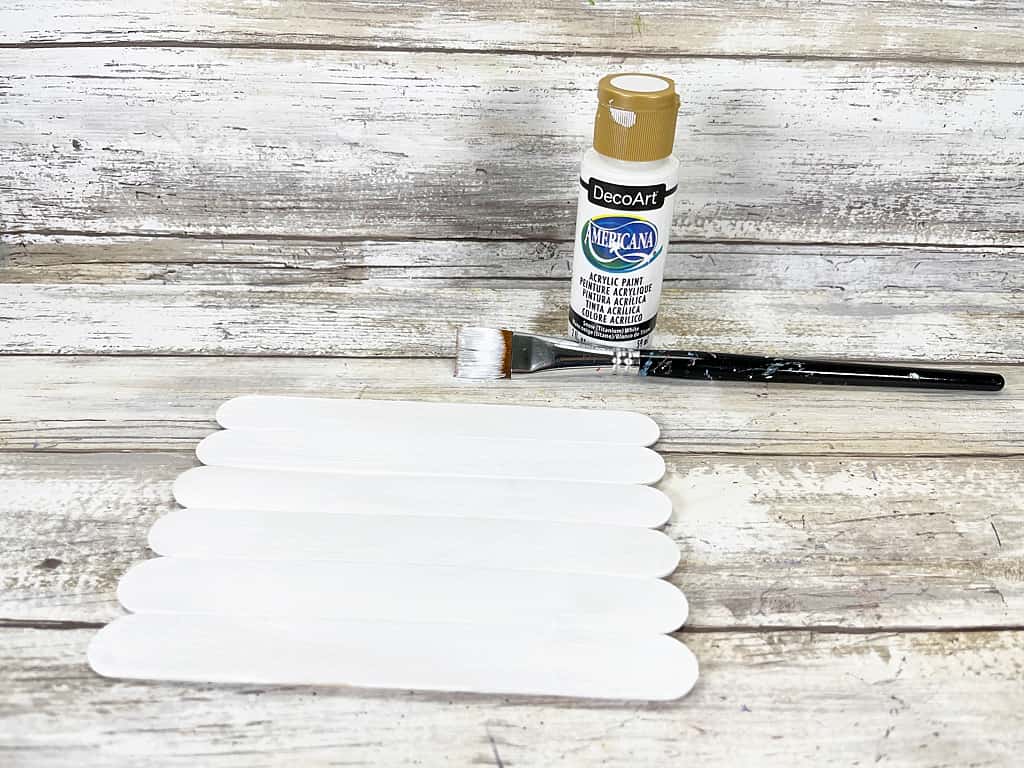
Base coat the front and sides of the Bunny with white acrylic craft paint. Set aside to dry and apply a second coat, if necessary.
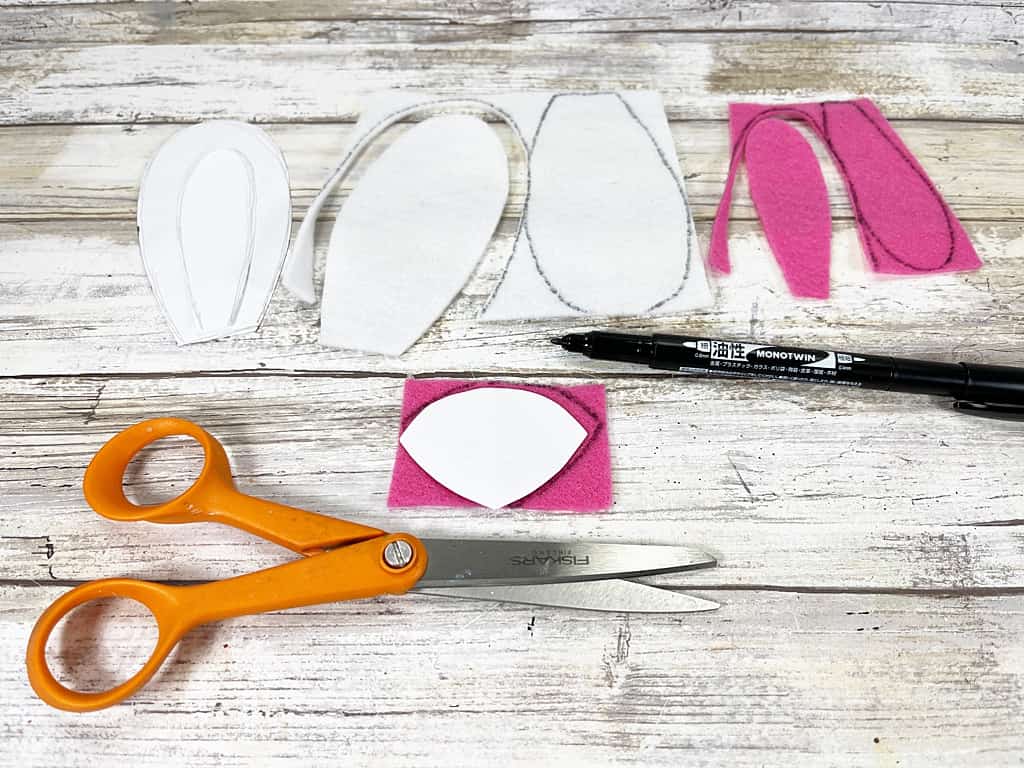
Download and print the Craft Stick Bunny Pattern, then cut out with scissors.
Trace the outer ear twice onto white craft felt. Trace the nose once and the inner ear twice onto pink craft felt.
Cut out all patterns with scissors making sure to cut inside the traced lines for a clean, finished project.
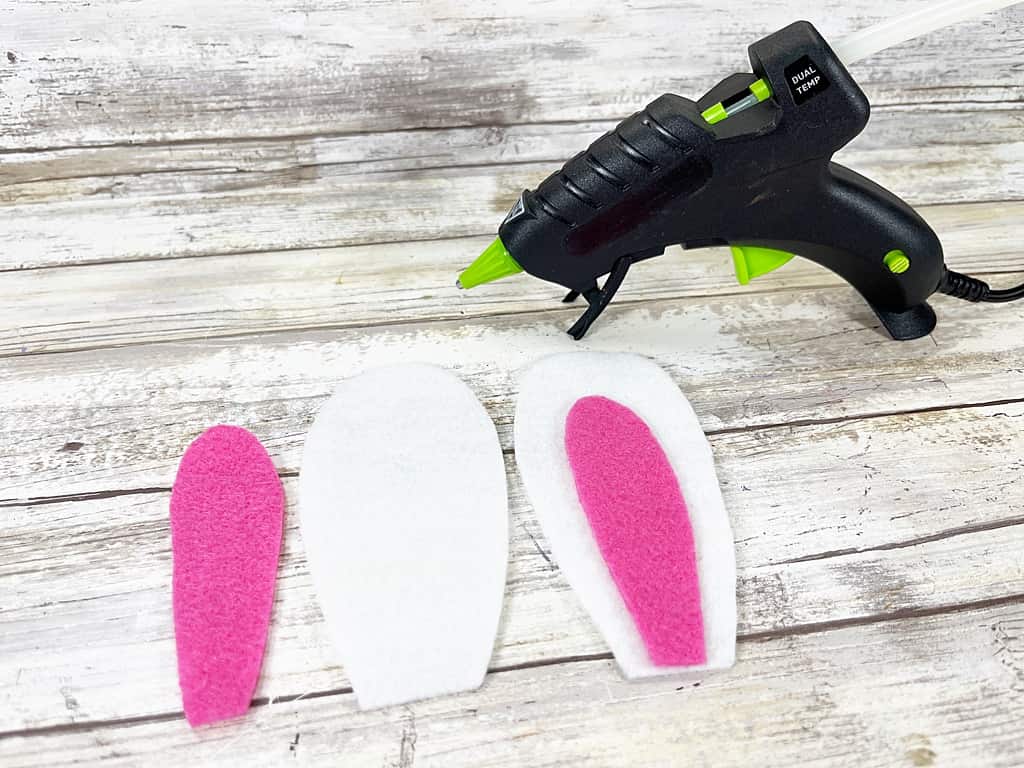
Attach the pink inner ear pieces to the center of the white outer ear pieces with a glue gun and glue sticks.
You could also use colored cardstock or craft foam instead of felt for this project.
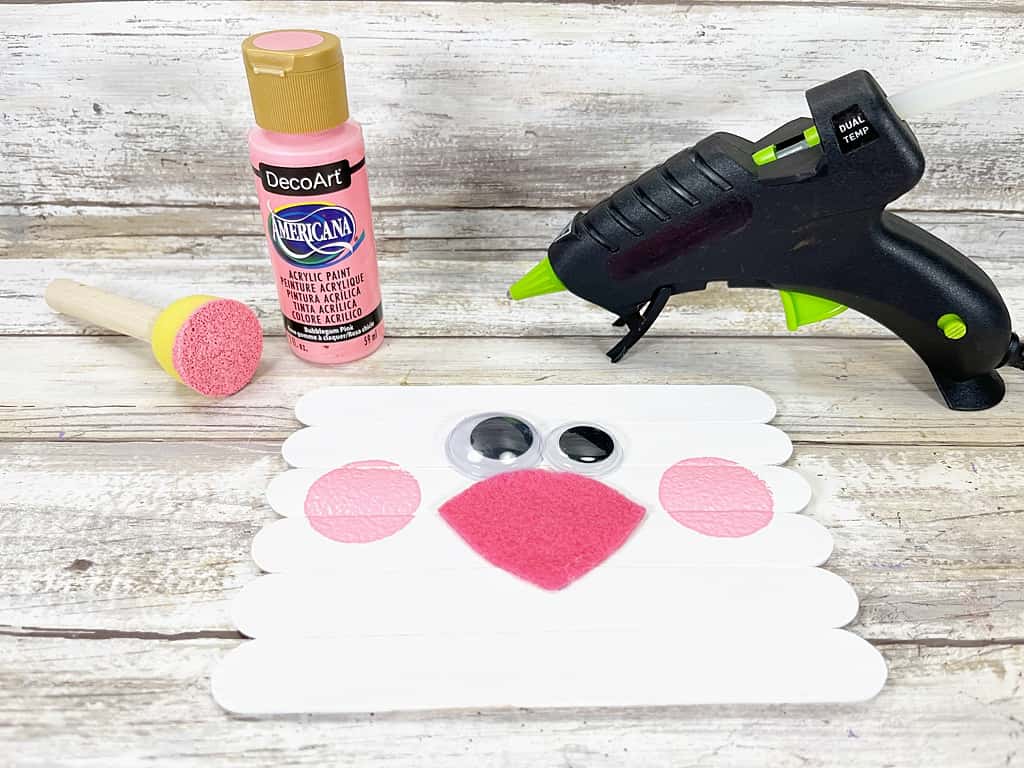
Attach two wiggle eyes to the Bunny’s face with a glue gun and glue sticks.
Create cheeks by dipping a sponge dabber into pink acrylic craft paint and stamping on either side of the face.
Glue the Bunny’s nose just under the eyes.
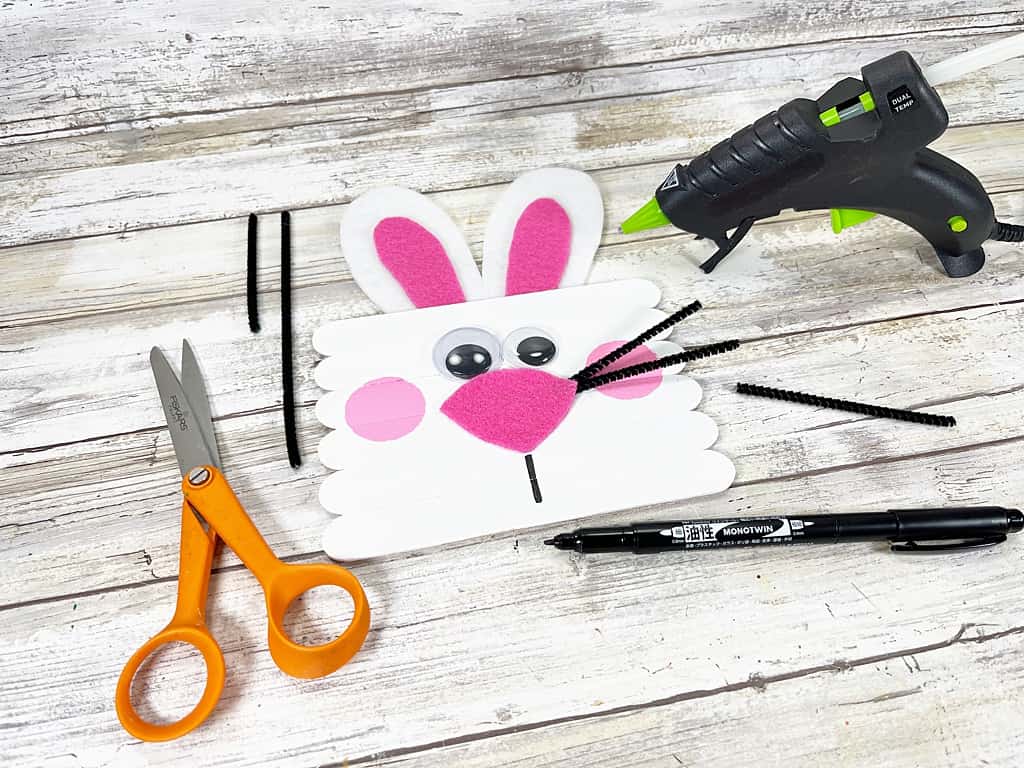
Attach the ears to the top center of the back of the Bunny’s head with a glue gun and glue sticks.

Cut black chenille stems in half and attach three to either side of the Bunny’s nose with a glue gun and glue sticks.
To finish, draw a straight line from the base of the nose to create the Bunny’s mouth.
Enjoy your super cute Craft Stick Bunny! And be sure to make his matching chick and lamb friends!