Felt Winter Gnome Craft
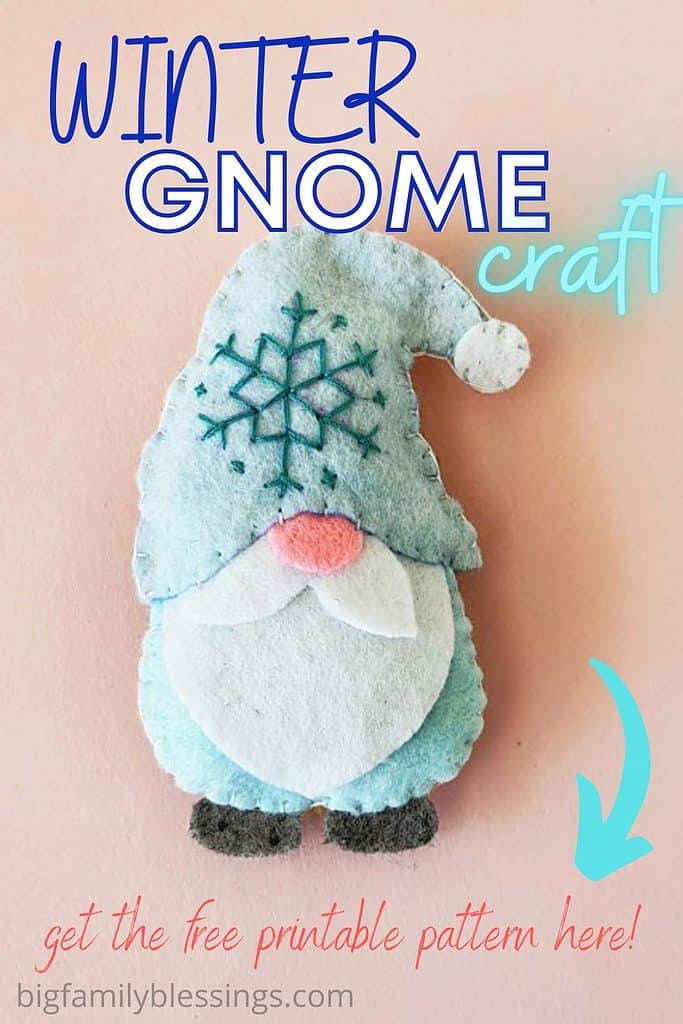
Gnomes and winter go hand in hand don’t they? Make the cutest ever DIY Winter Gnome to decorate with all season long. If you love crafting adorable gnomes, this one is for you!
This adorable Winter gnome is the perfect craft for older kids, teens, and adults this winter. With just a few craft supplies and about half an hour to work, you’ll have the cutest winter gnome to display this year.
Simply add a ribbon and this gnome becomes a winter gnome ornament! Or, add a magnet to the back of your gnome for a seasonal refrigerator magnet. Another great way to use this felt gnome craft is as a backpack charm. Add a carabiner or keyring to display the gnome on your backpack.
How to make a Felt Winter Gnome Craft
List of Supplies:
- Felt fabrics
- Matching thread
- Pencil
- Cotton batting or scrap felt
- A pair of scissors
- Template
Instructions:
Download and print out the winter gnome template. Cut out all of the pattern pieces.
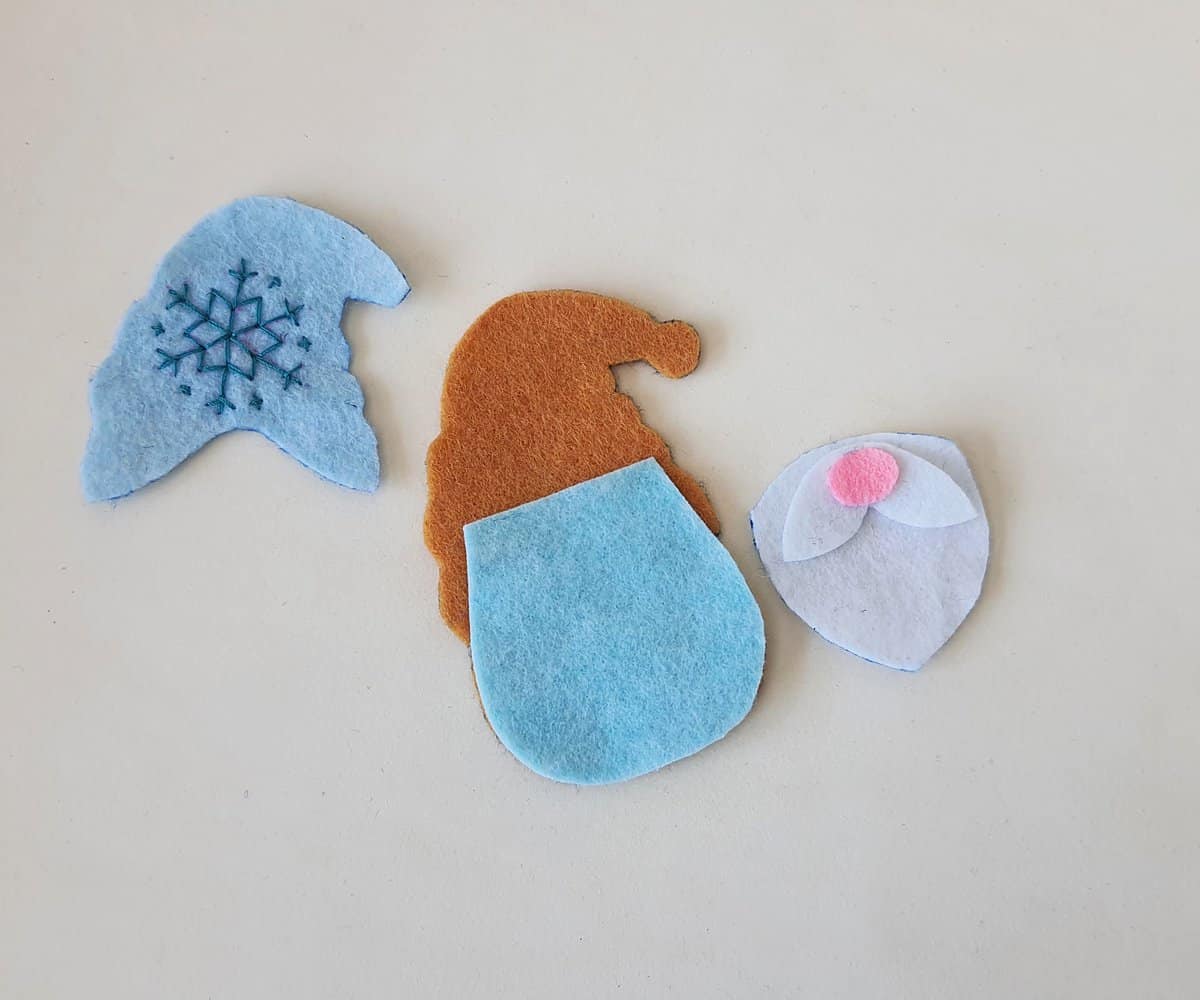
Select felt fabrics for the winter gnome craft. We’re using pink, blue and white.
Trace the gnome patterns on the selected craft papers and cut out the traced pieces.
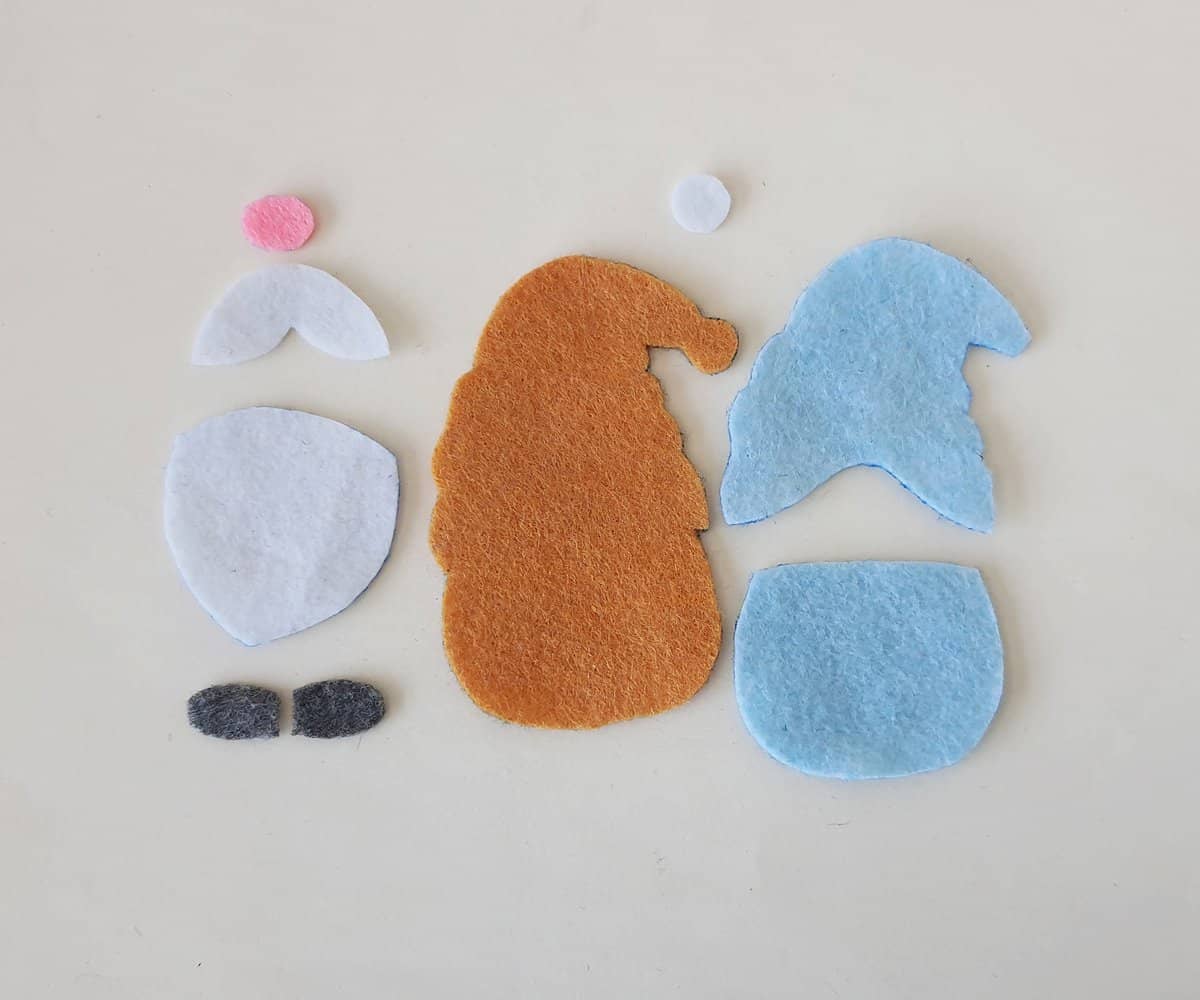
Take the hat cutout and draw a snowflake pattern on it to embroider. We’re using a darker shade of blue thread to stitch the snowflake pattern on the hat.
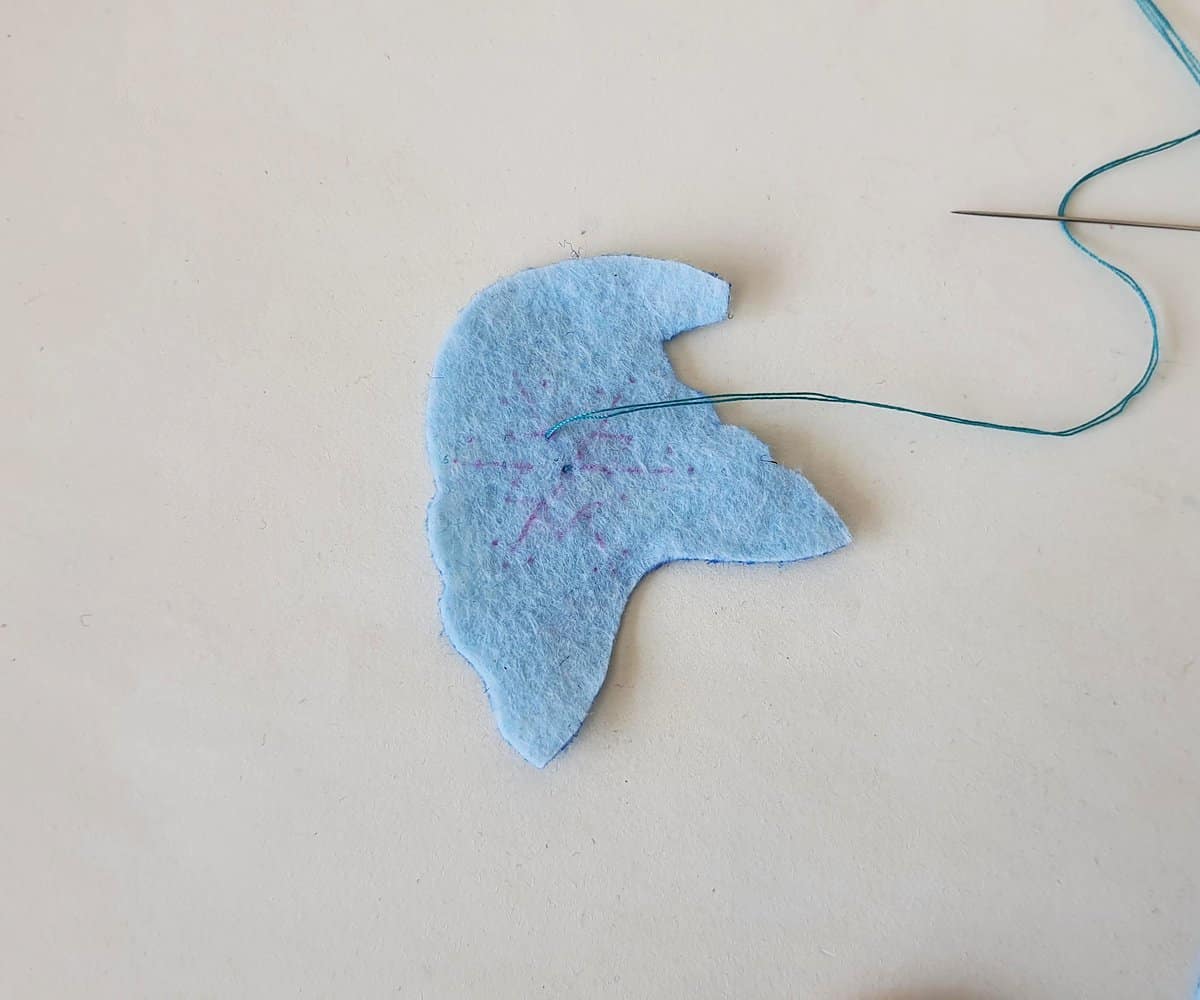
Stitch the center part of the snowflake first.

Stitch the outer sections of the snowflake after completing the center.
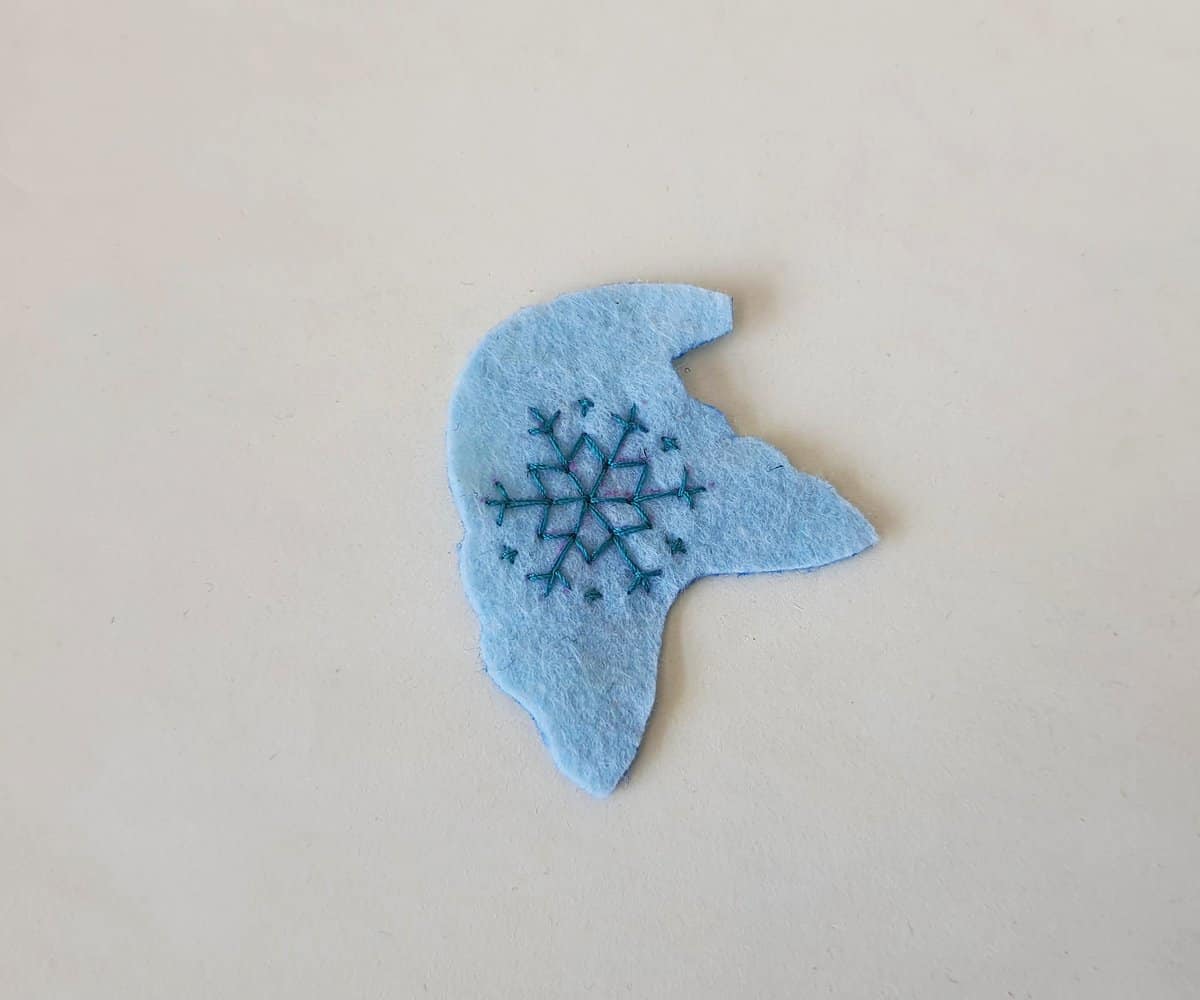
Add more details to the snowflake pattern if you want to.
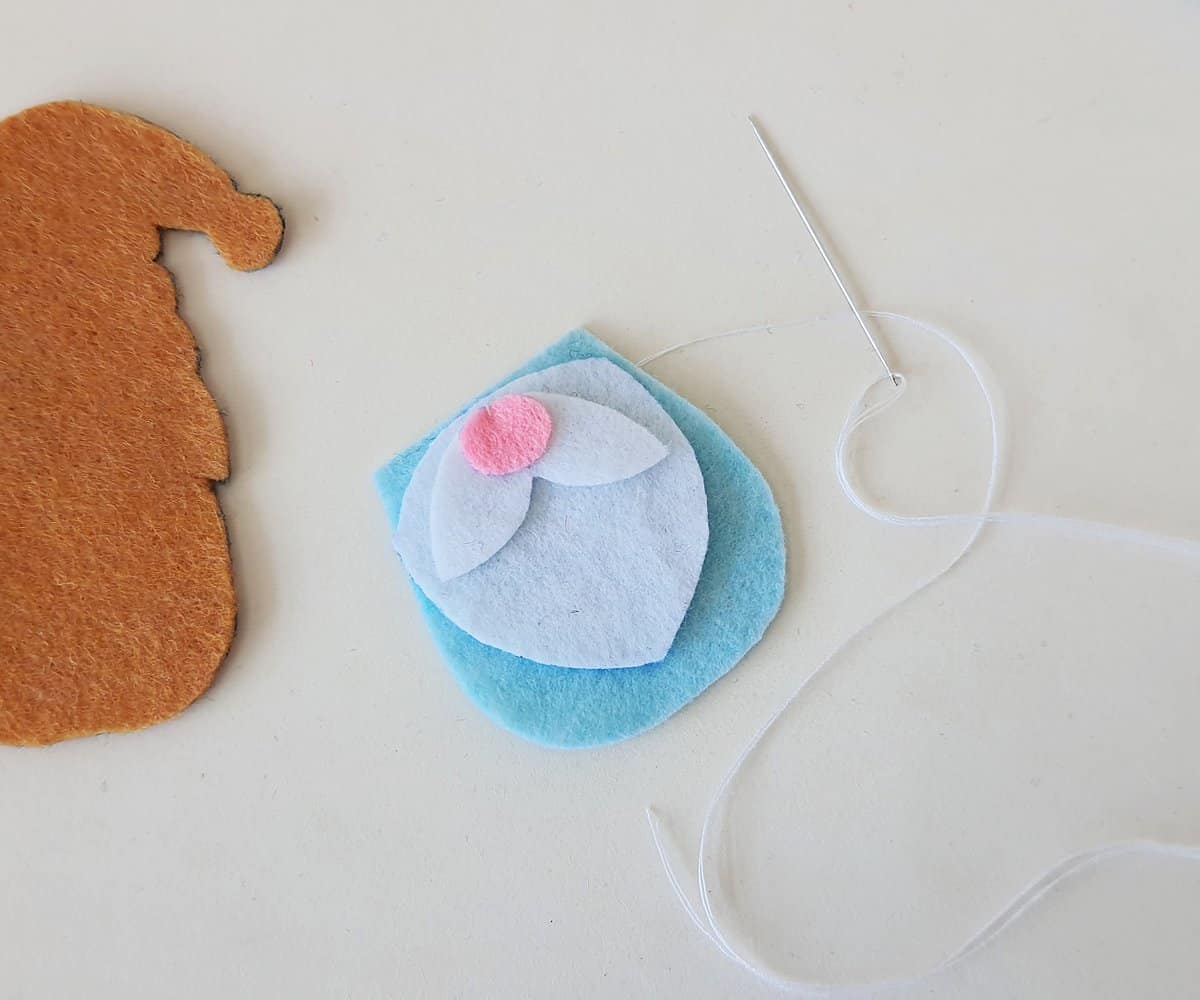
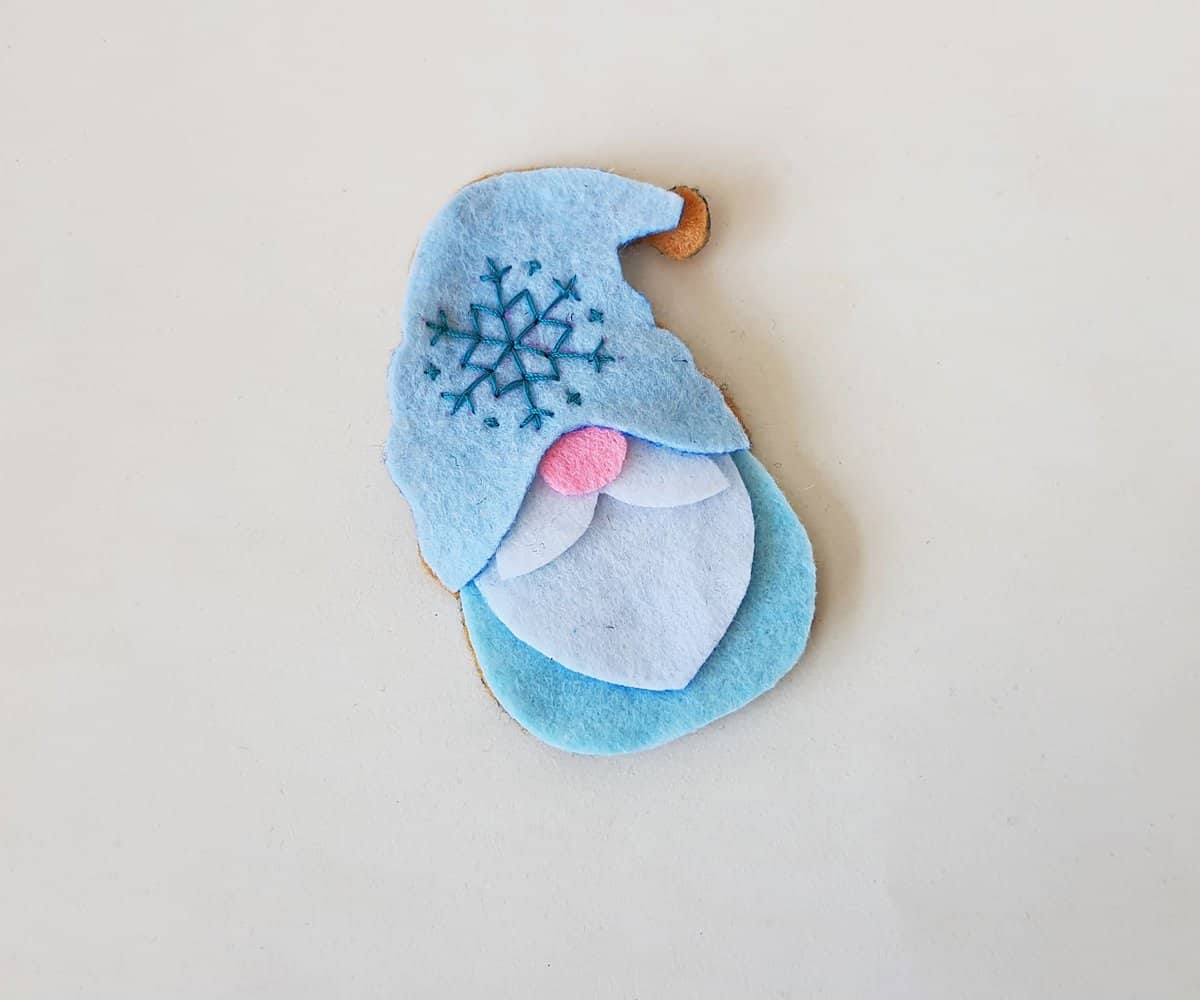
Place the mustache cutout near the top of the beard cutout and then place the nose cutout on top of the mustache.
Lay the gnome’s shirt down, then place the beard stack near the top edge of the gnome’s shirt.
Make a few stitches through the nose, securing all four pieces of felt together.
Place the stack you just stitched (the shirt, beard, mustache, and nose) on top of the gnome’s base. Then place the hat on the base.
The hat should overlap the shirt and beard pieces.
Stitch around the outside edges of the hat, leaving the bottom edge unstitched to secure the hat to the gnome’s base.
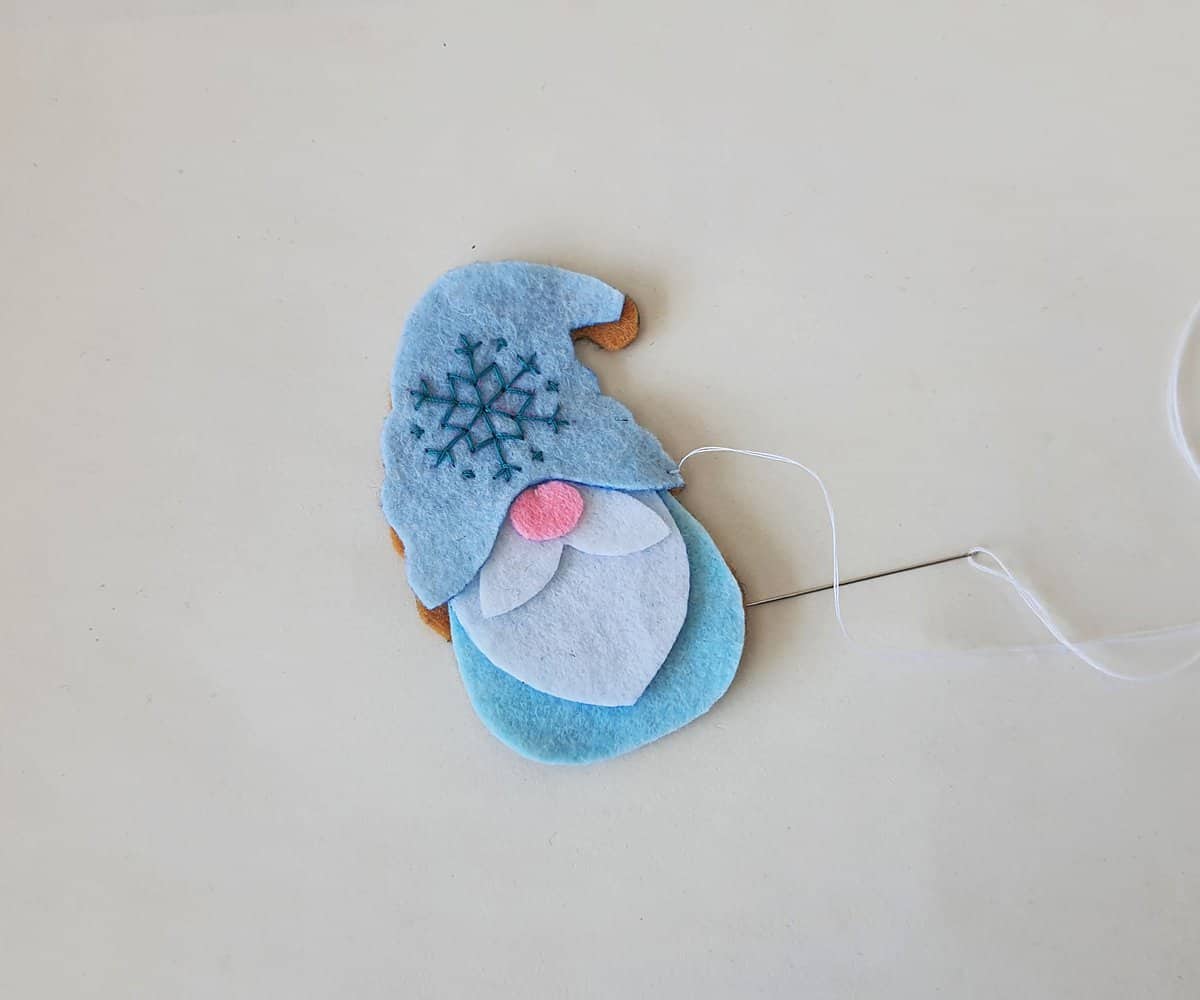
Stitch the pompom on to the tip of the hat.
Lifting the shirt off of the base, stitch the bottom edge of the hat to secure the hat to the shirt and face of the gnome. Do not stitch through the base layer.

Stuff the gnome using cotton batting or scrap felt.

After stuffing the gnome, begin sewing around the edge of the shirt to secure the front of the gnome to the base. Stop after sewing one side.
Place the shoe cutouts between the base and shirt layers of the gnome.

Continue stitching around the sides of the gnome, until the gnome is stitched all the way around.
Tie 2 tight knots and cut off extra thread.
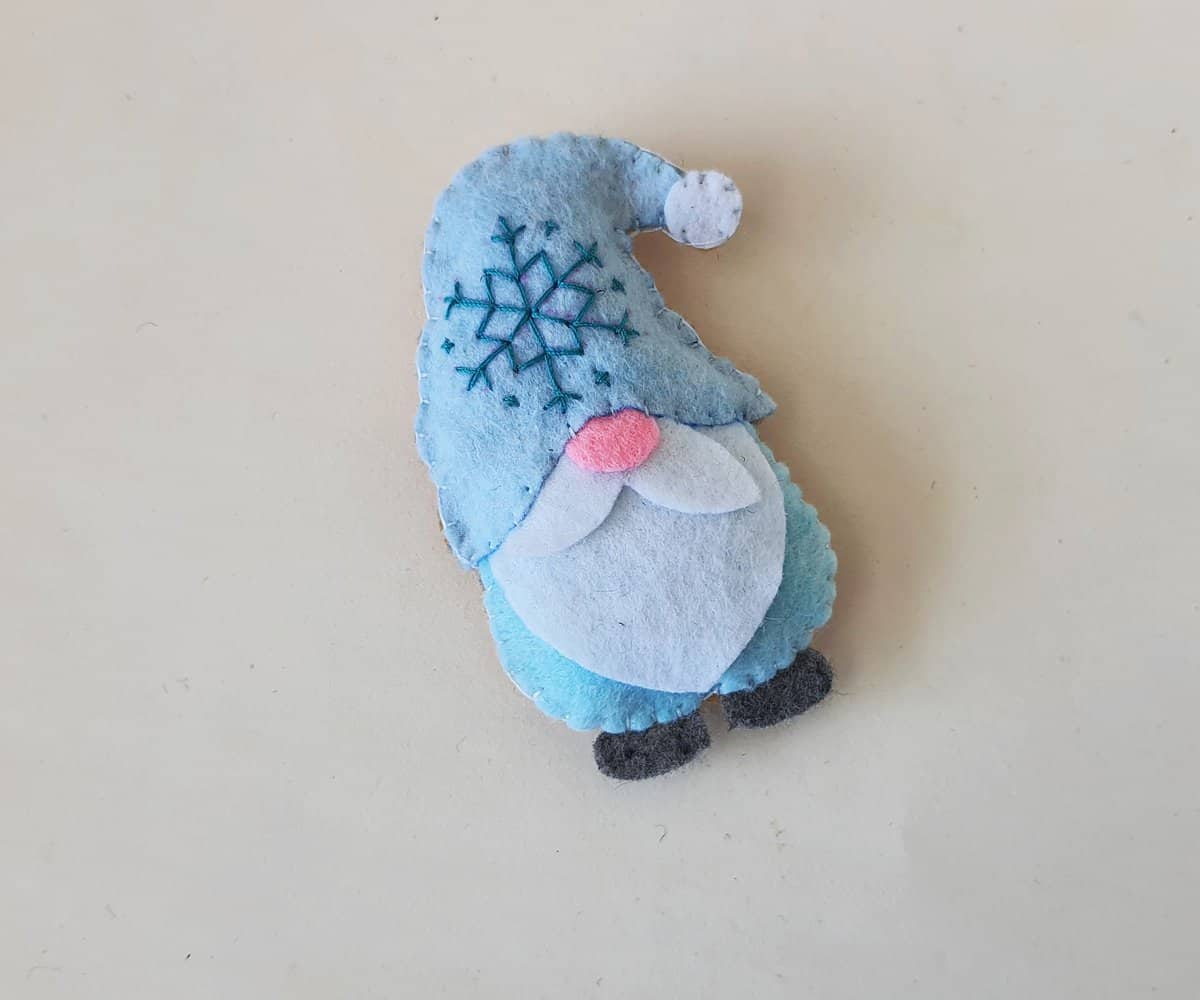
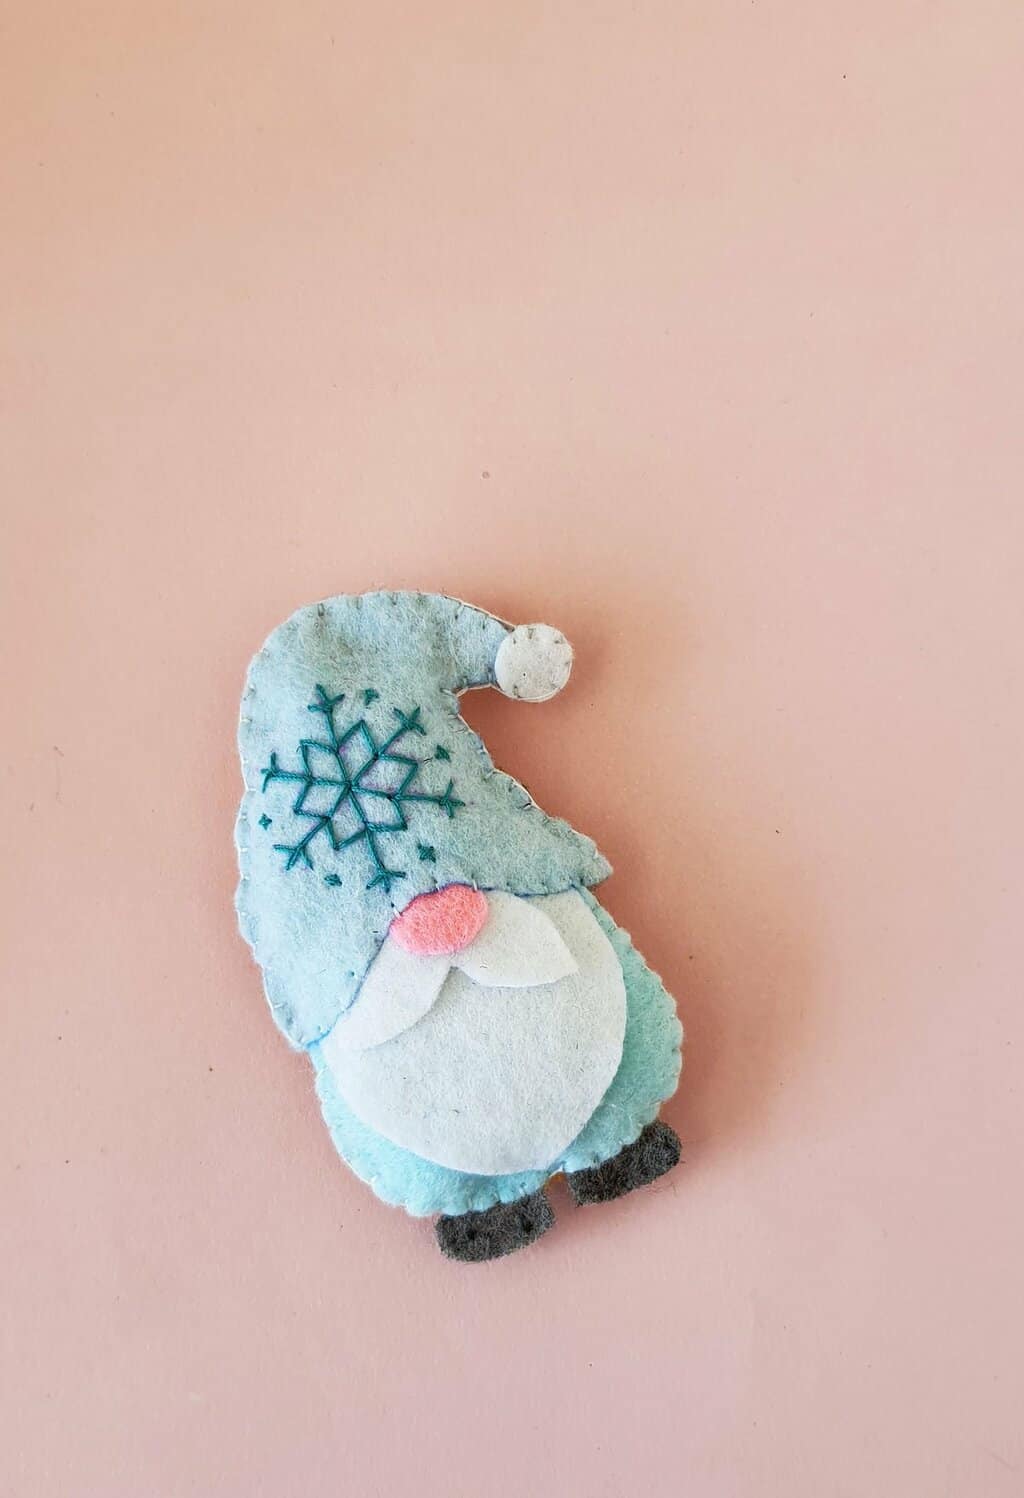
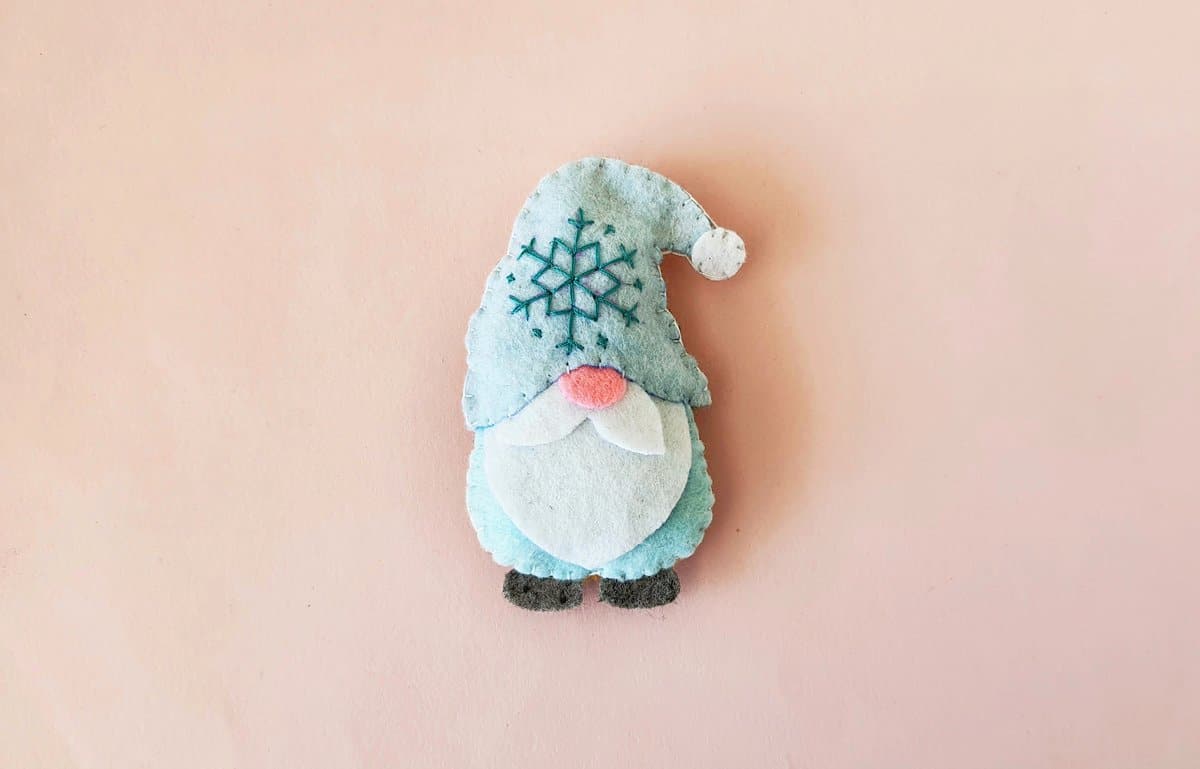
Now, your winter gnome is finished!
If you loved making this winter gnome, you’ve got to try this adorable Gnome snowman too!