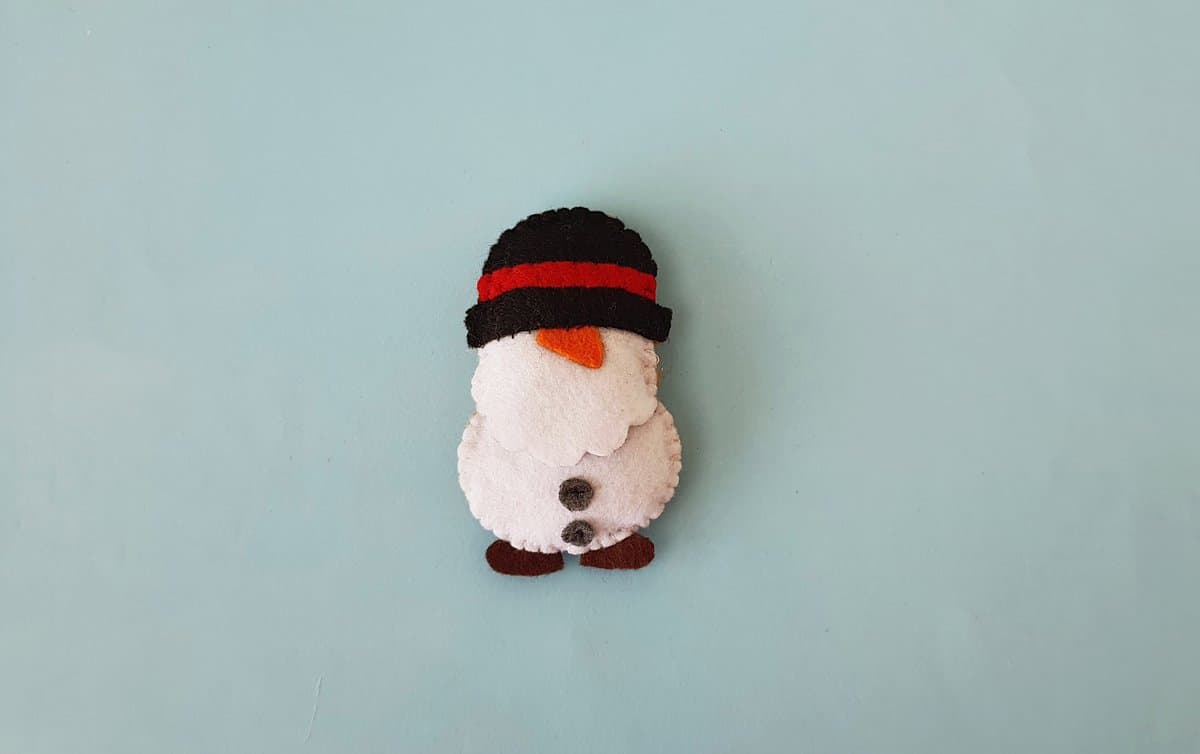
Snowman Gnome Craft

This adorable felt Snowman Gnome craft is perfect for winter! Make a DIY snowman gnome to decorate your house for the winter season- or even use him as a super cute gnome Christmas ornament.
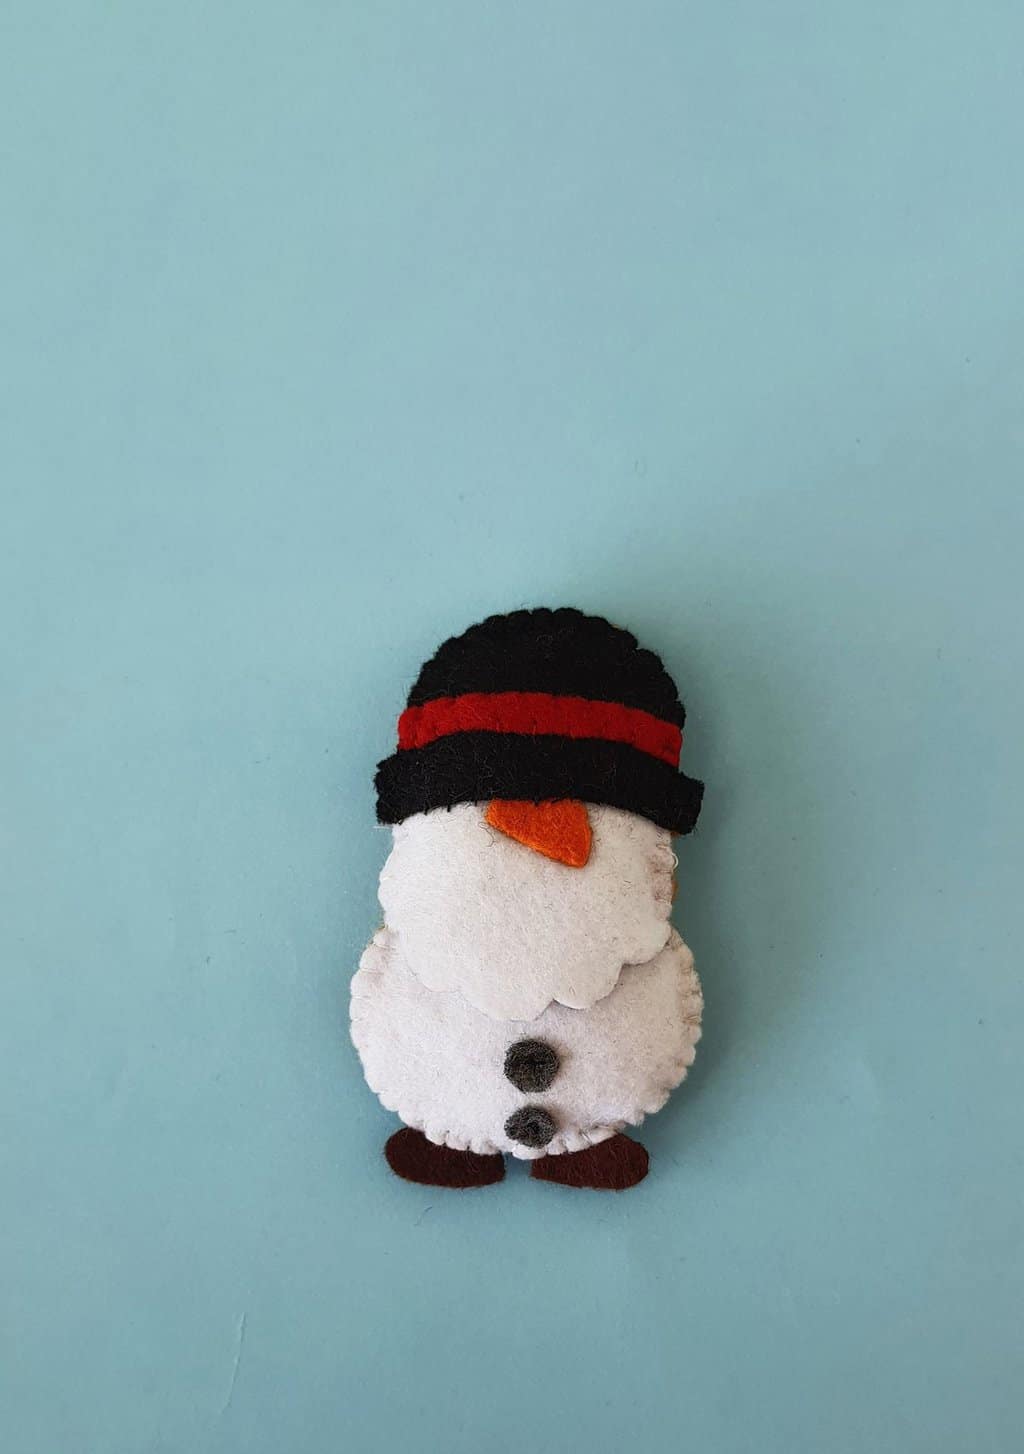
Snowman gnomes are the perfect winter decor! You can decorate with this fun gnome snowman all the way from December to March!
This super cute snowman gnome craft is sure to brighten up your home this winter. You can simply sit the gnome up in a window sill, or make into a magnet, plant stake, keychain, or ornament.
Ways to decorate with a Snowman Gnome
- Glue a magnet to the back for a winter gnome refrigerator magnet.
- Sew a slender dowl rod or popsicle stick to the back for a plant stake.
- Create an ornament by making a loop of thread or ribbon and sewing it between the layers of the hat as you stitch the gnome together.
- Make a keychain by sewing a carabiner or key ring to the back.
Make a snowman gnome using the free template and easy instructions found below.
How to make a Snowman Gnome
List of Supplies:
- Felt Fabrics
- Needle
- Matching threads
- Pencil or fabric maker – to trace the template
- Cotton or scrap felt
- A pair of scissors
- Template
Instructions:
Download the snowman gnome template. Cut out all of the pattern pieces.
Select felt fabrics of your choice for the gnome. Trace the patterns onto the chosen felt pieces and cut out the pieces.
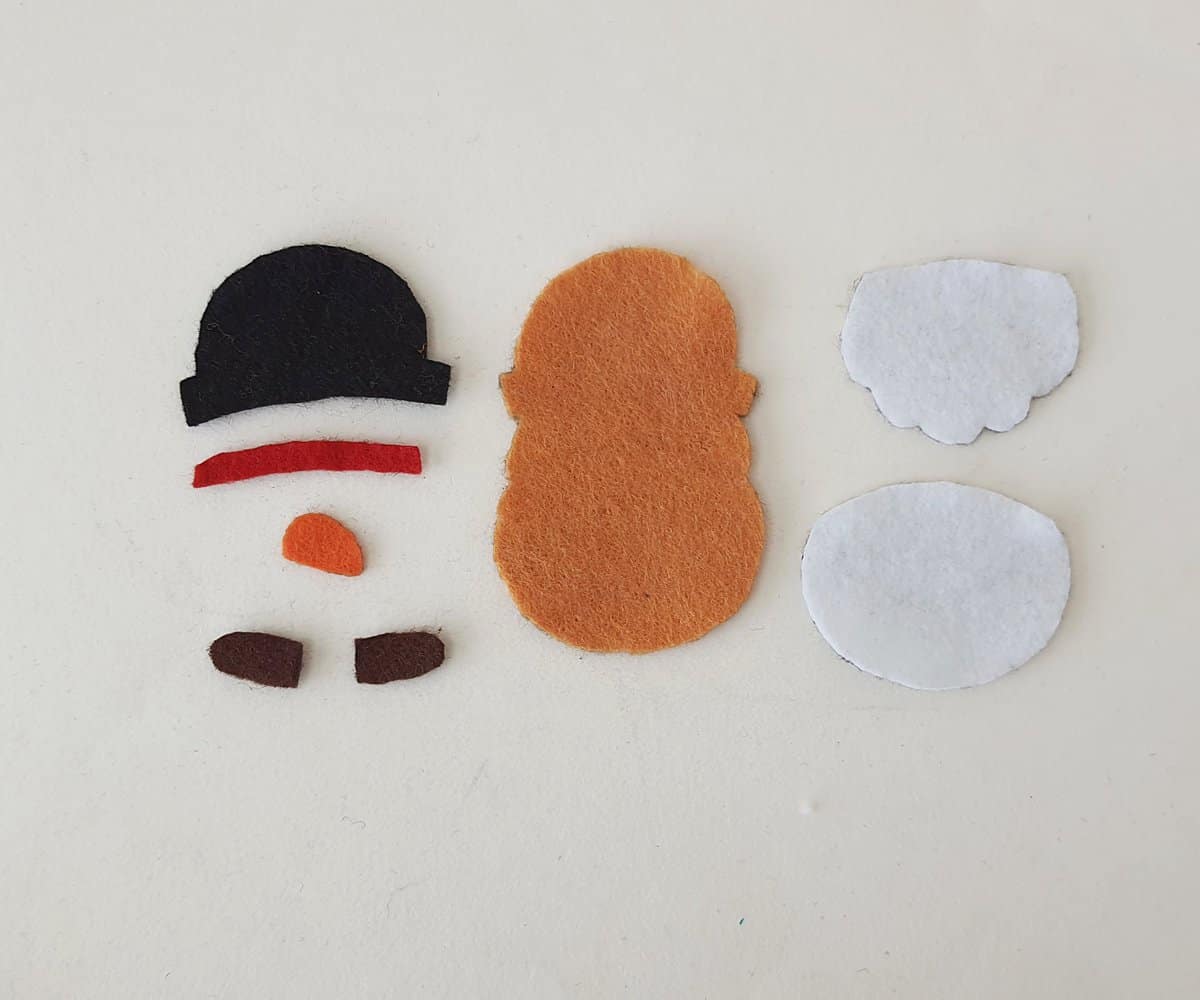
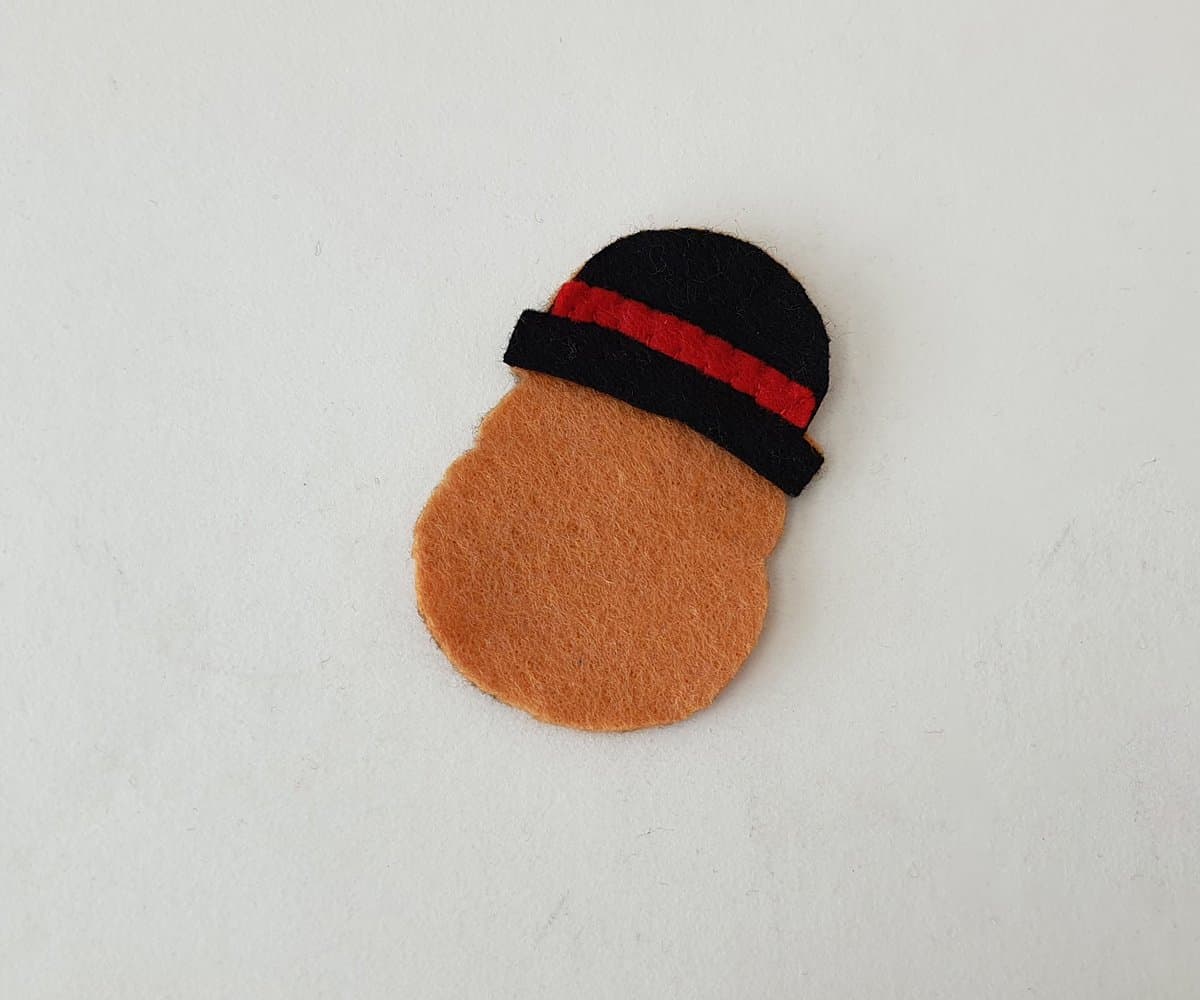
Place the hat strip on the hat base cutout and place the nose cutout on the head cutout.

Prepare a needle with matching thread to stitch the strip to the hat base and the nose to the head.

Place the hat cutout on the hat part of the base cutout.
Place the beard on the head part of the base and tuck the top side of the beard under the bottom edge of the hat. The head and hat should slightly overlap each other.
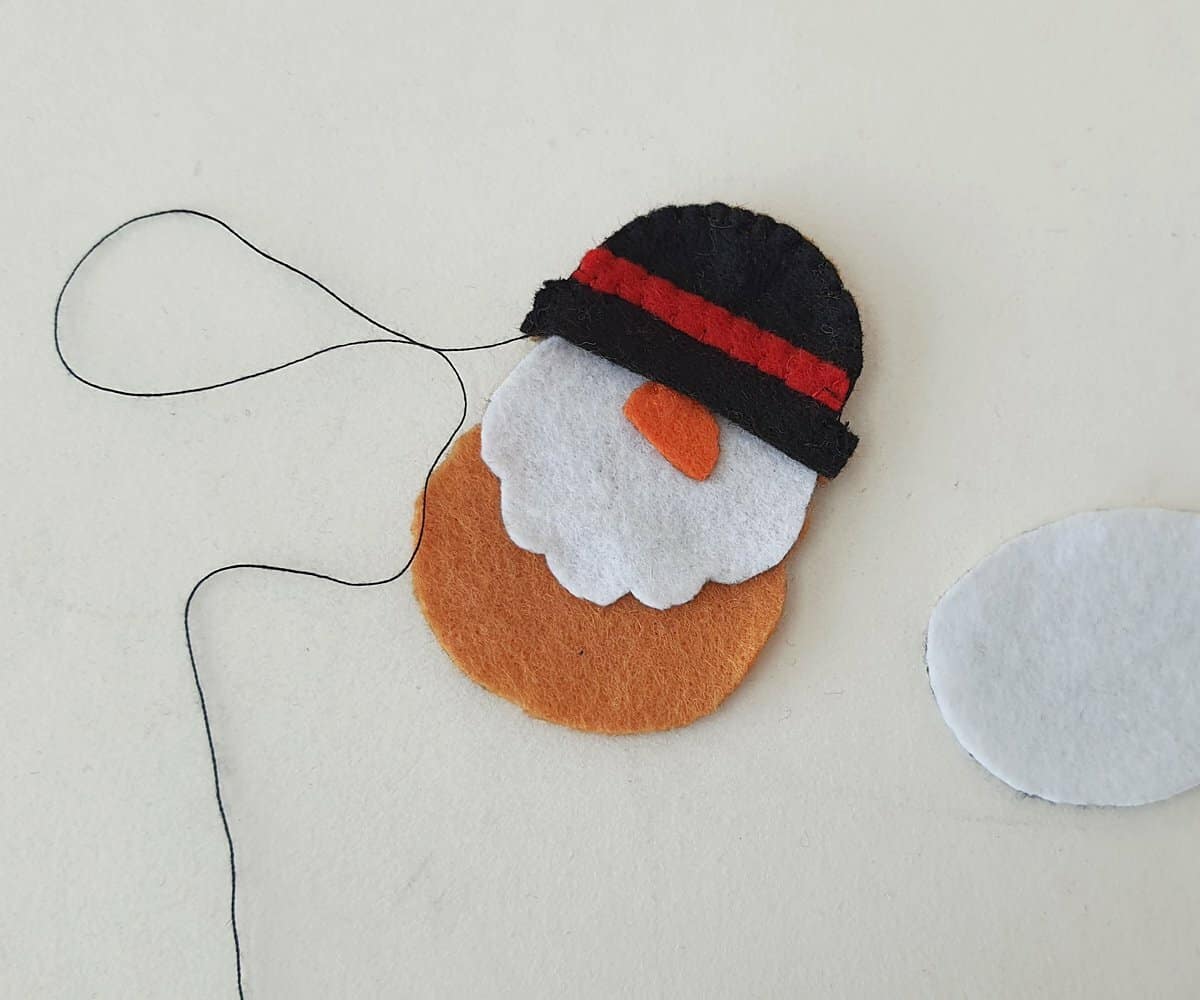
Remove the beard and hat from the base, keeping them overlapped. Stitch the overlapped parts of the hat and head together. Do not stitch them with the base.
Place the stitched head back on the base cutout.
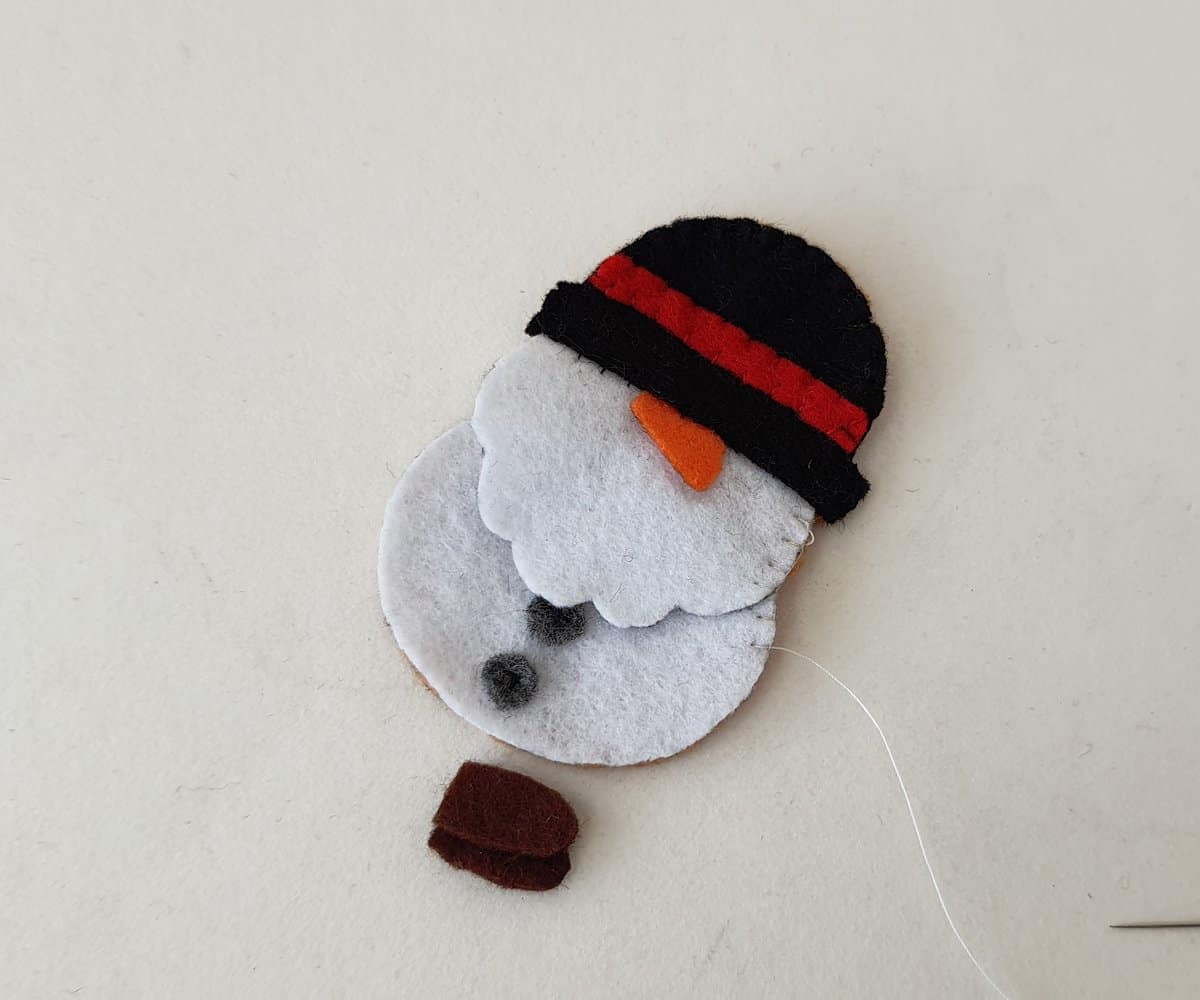
Stitch two small circle cutouts with the body cutout.

Place the body on the bottom part of the base, tucking the top part of the body under the bottom edge of the beard.

Remove the overlapped pieces from the base.
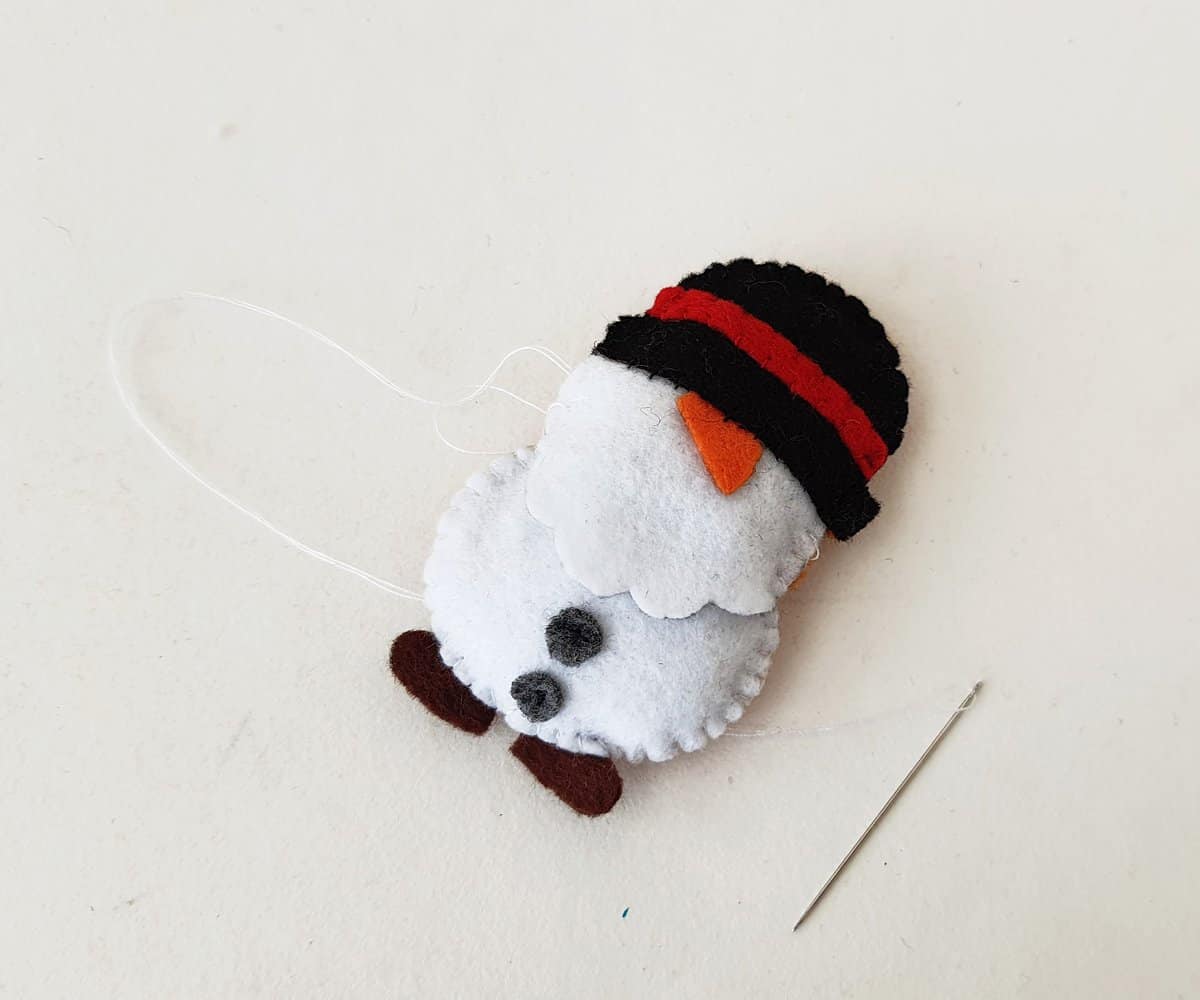
Use white thread to stitch the head and body piece’s overlapped parts.
Now, place the finished gnome back onto the base piece. Begin stitching around the side, stopping just before the bottom of the gnome.
Place the shoe cutouts between the base and body layers. Stitch the bottom of the gnome together, securing the shoes in-between the two layers.
Continue stitching around the sides to secure the gnome. Leave a small opening and stuff the gnome through the opening.

Finish the gnome by stitching the opening closed.
All done!